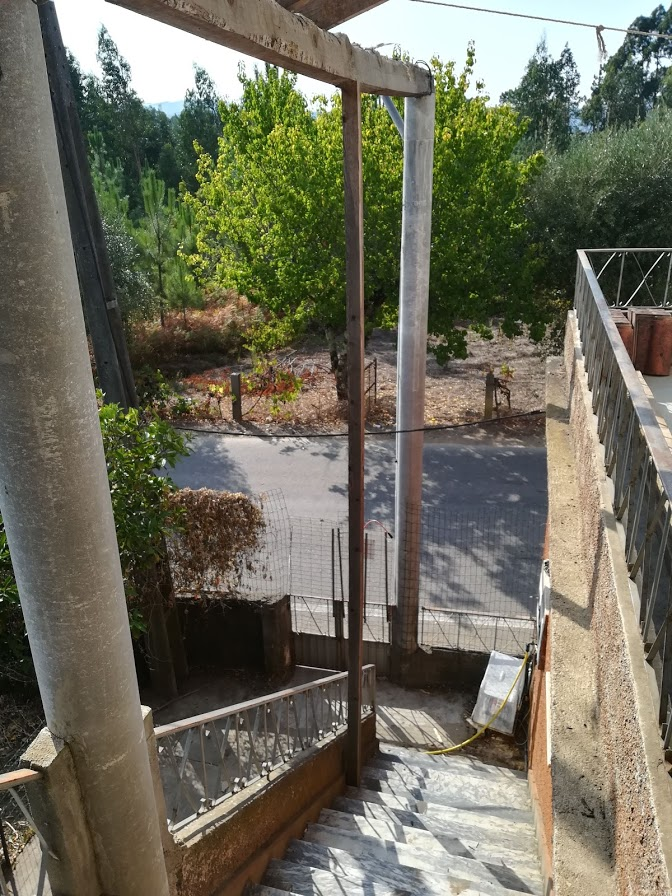
I filmed this with the lock down measures in place, I could not go to our other house and continue work on that so I started on something at our house that will take some time.
Behind or house I want to add a space to park two cars, with an inspection pit in the one parking area. I do not work on cars often since moving to Portugal but hope to at some point. At the very least I want to be able to service / inspect my own car.
An inspection pit will make that job easier and will not add that much to the costs, the biggest thing is digging the hole for the pit. That’s how it works out in my mind anyway.
The soil I am digging out is healthy, rich and dark soil filled with earthworms, so I want to keep it to one side for when we get started on planting vegetables. For that purpose I put down a tarp and have been putting the soil I dig out onto that.
For days 2 and 3 I was working on replacing a portion of a window frame that has pretty bad rot in it.
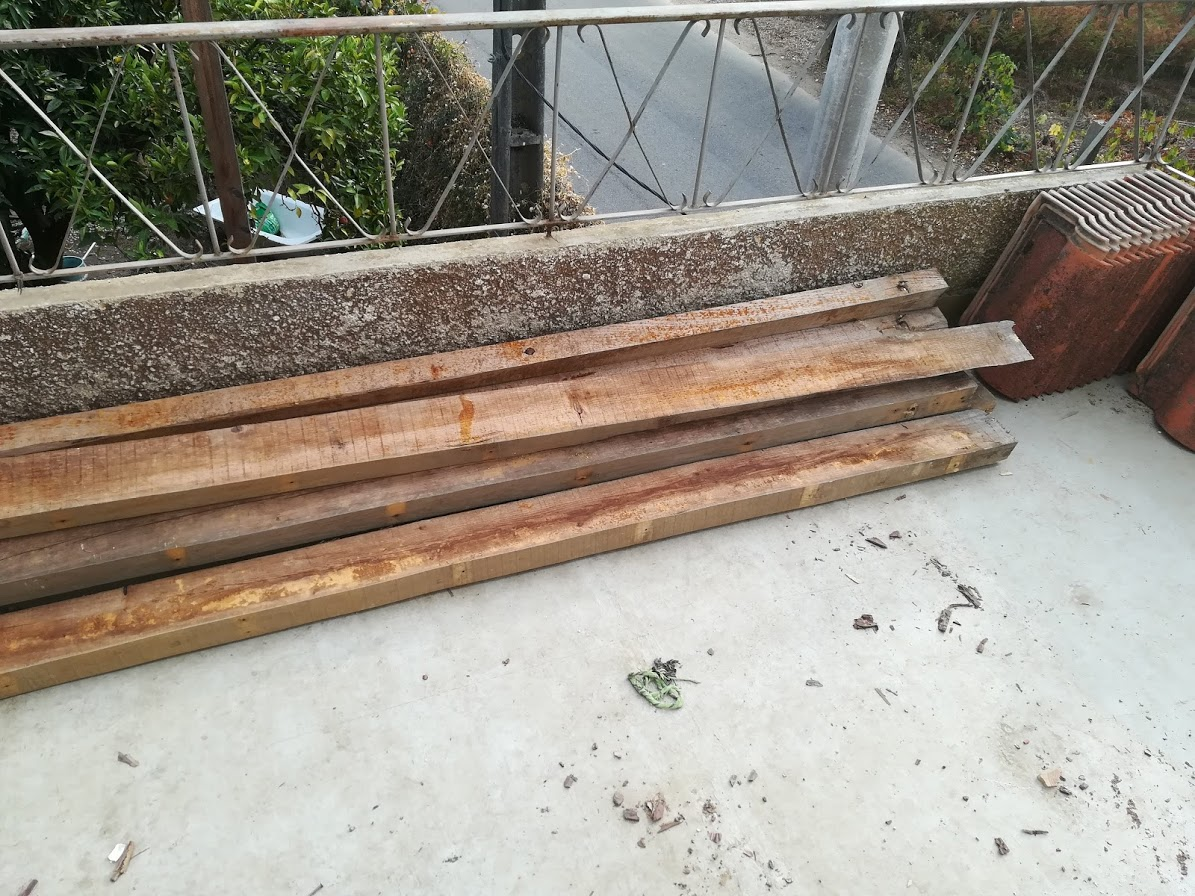
I recycled some scrap wood that I had salvaged from and old bed frame and an old sofa, with most of day 2 spent removing nails and staples from the wood.
On day 3 I was able to cut out a piece from the window frame and get started on the bits to replace it. This took a lot of back and forth to get the sizes right especially seeing as the piece I will be putting in is made up of a number of smaller pieces that I have started gluing together.
I stalled at this point as the government announced tighter restrictions on movement and I do not want to risk fines etc.
Instead of working on this house I have kept busy doing courses on Coursera whilst I look for work.
In this video I get started on fixing our house, working on an old shower, removing a wood fired water heater, then disassembling a window that has been attacked by termites.
I have not created a video in a while and this is the first where I am working in front of the camera. The house is in another village a few kilometers away from where I am currently living and has stood empty for a few months. Before we lived in it, it had been empty for years and it is showing signs of not having been maintained.
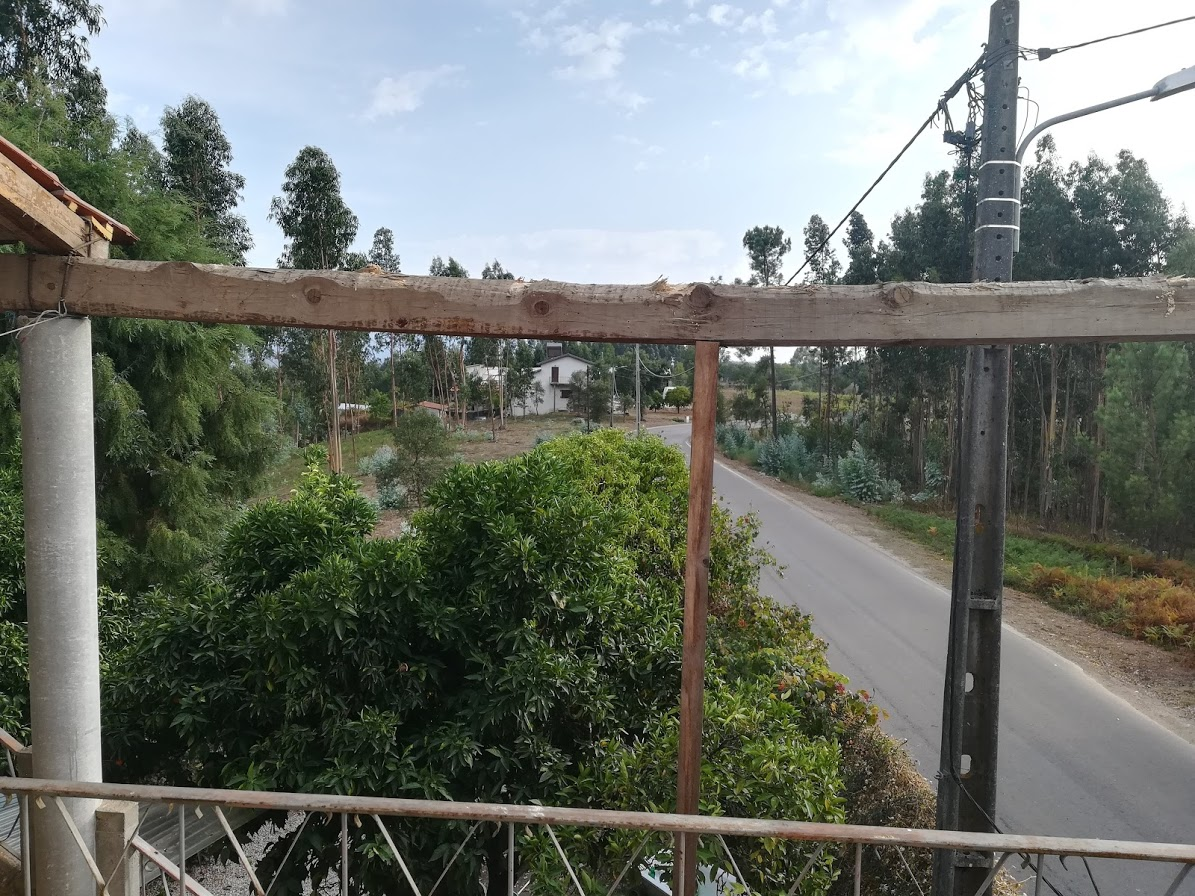
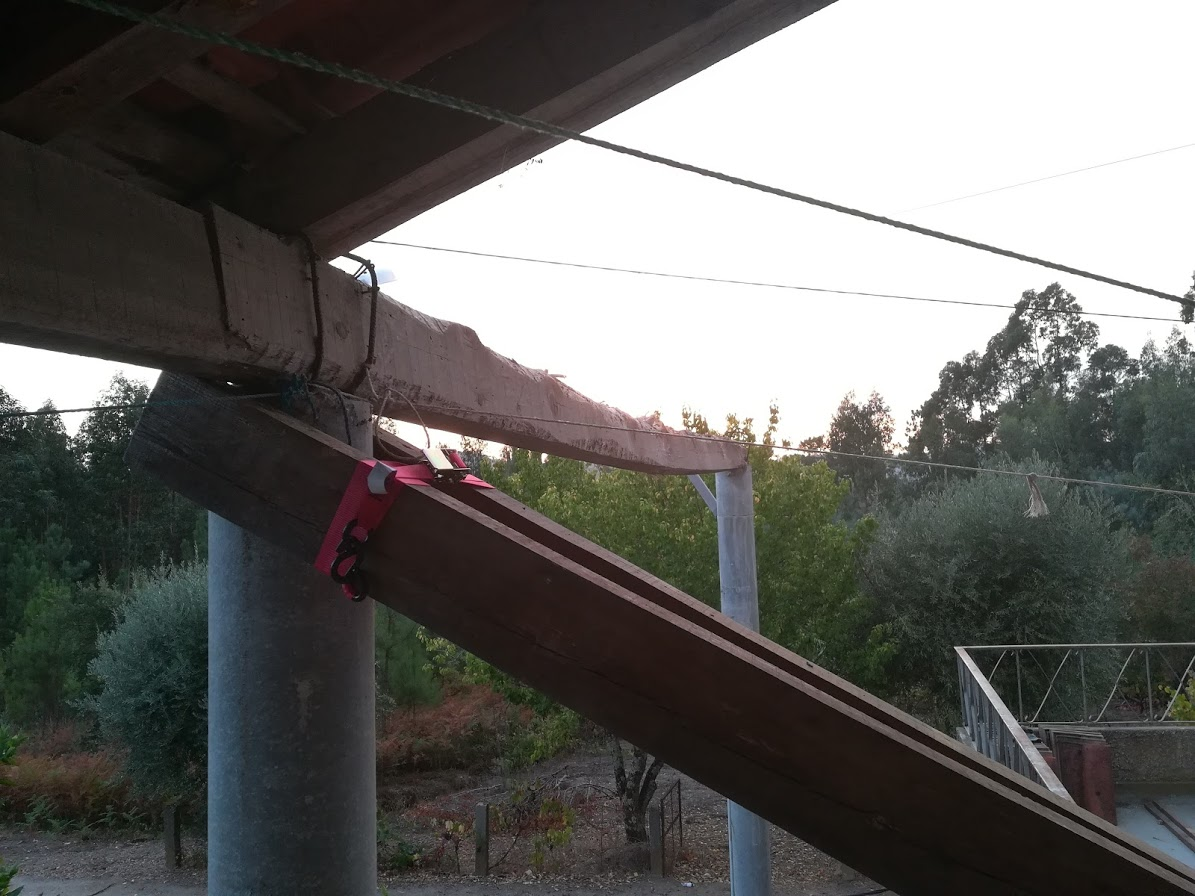
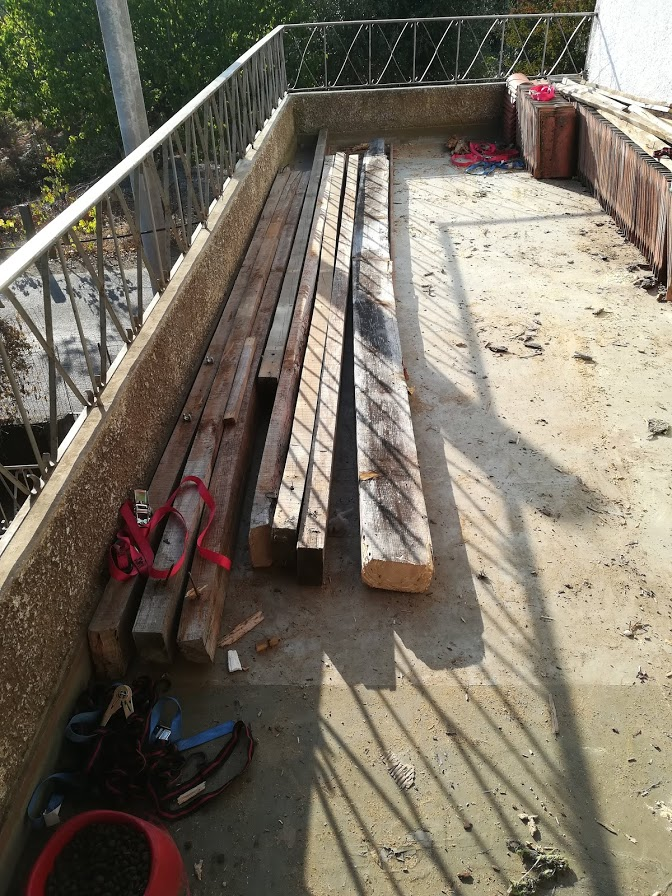
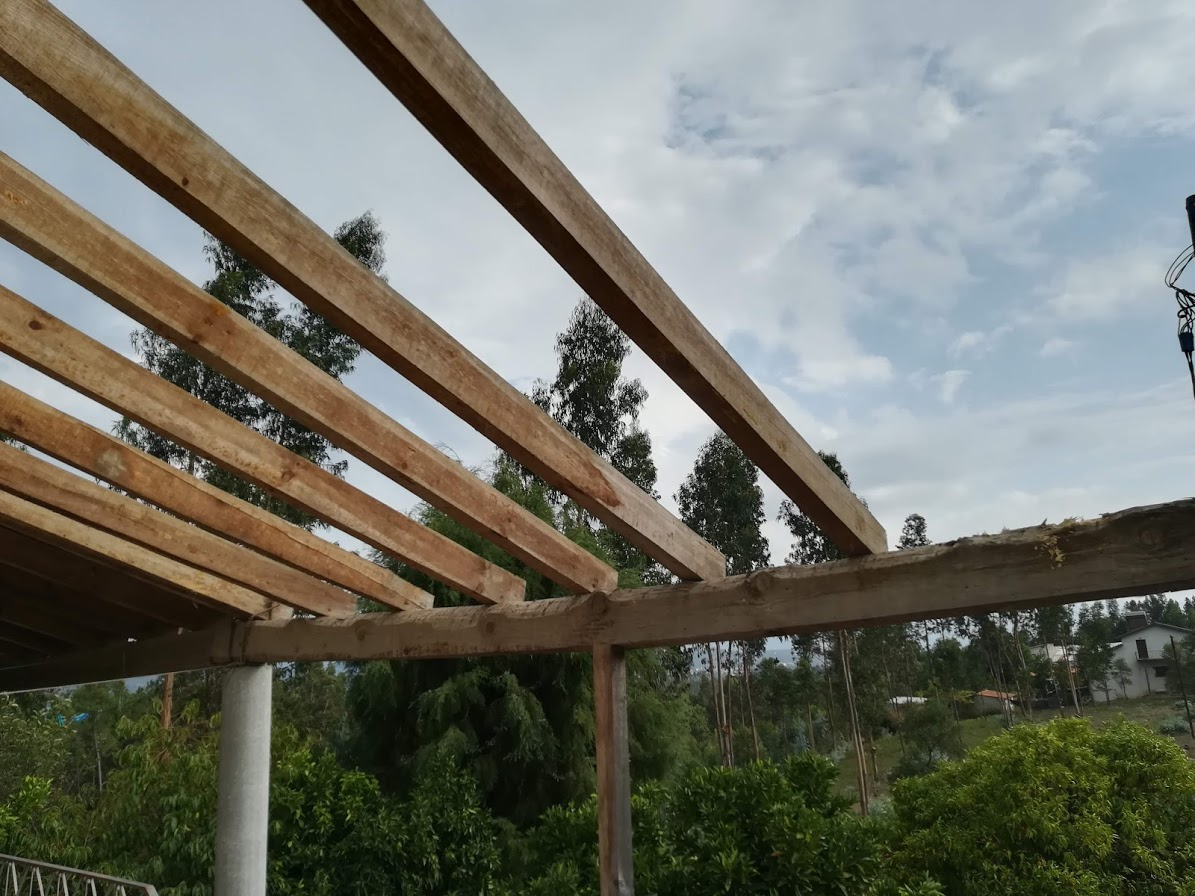
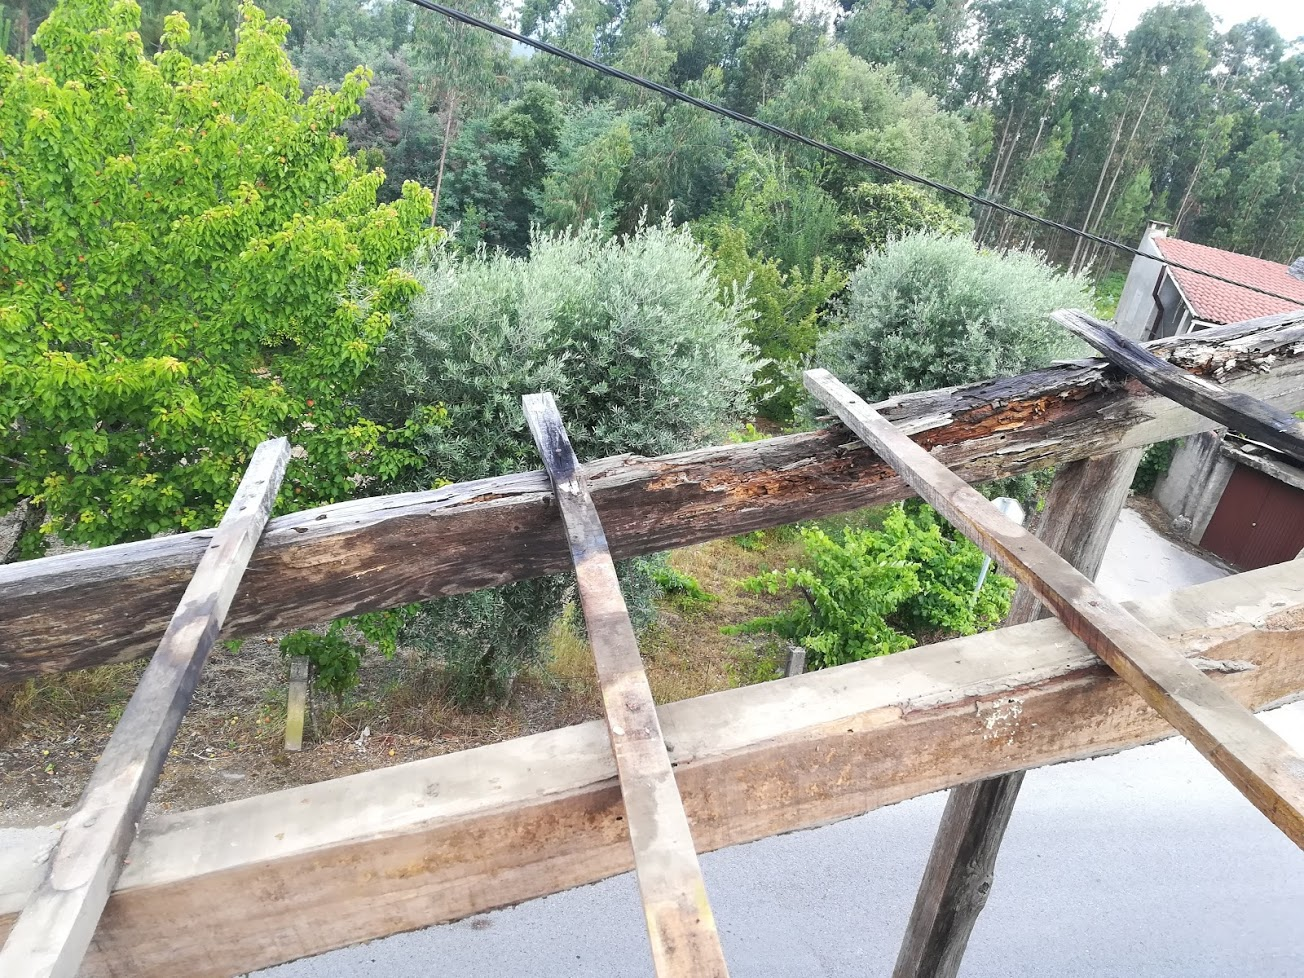
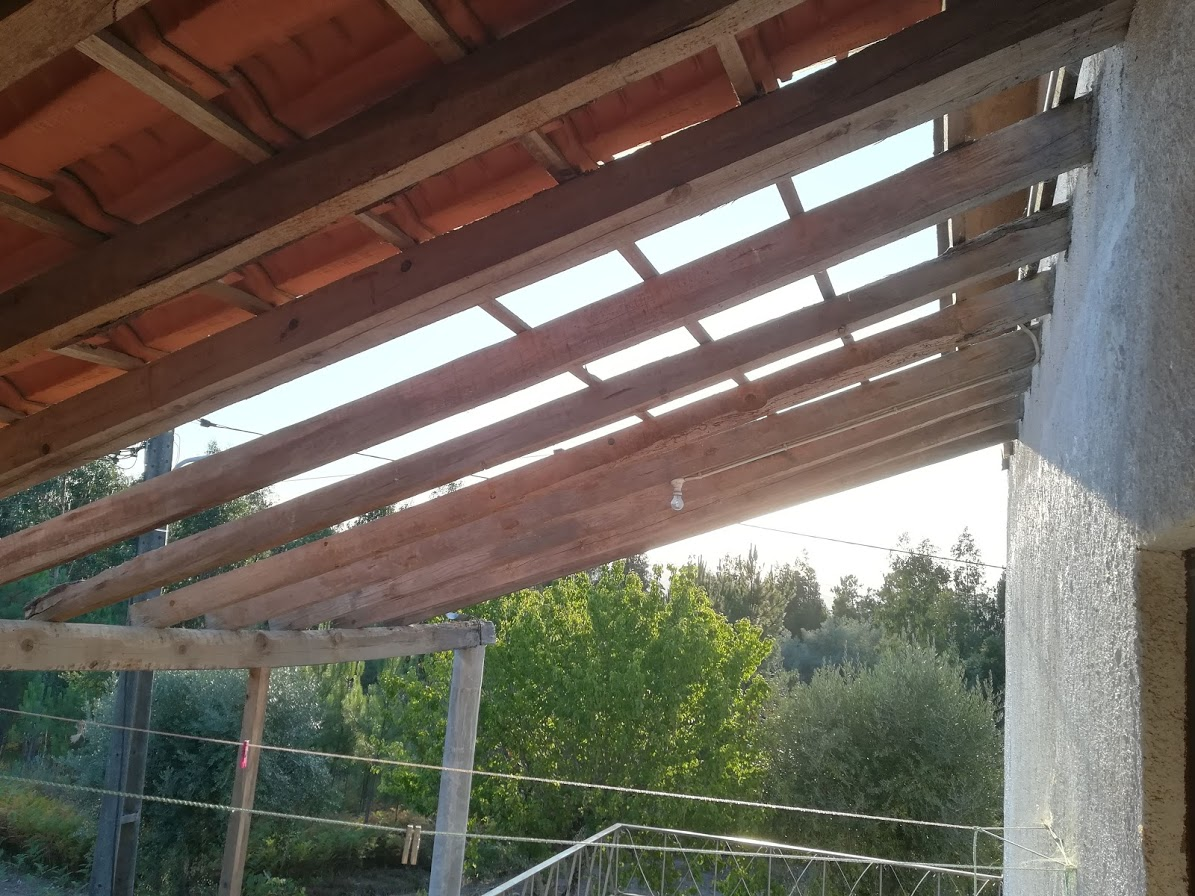
I had been hatching a plan for a number of days, weeks maybe, for how to get this last piece of the puzzle, this really long beam, down.
Its complicated by the fact that it hangs out so far away from the terrace on two stilts. I do not have scaffolding and research showed me it was incredibly expensive if I wanted to buy.
Where I was…
At the end of the day, after having cut all the other beams, I started testing out a theory. Even though the beams have been infested by pests, they still seemed sturdy enough to carry the weight of the beam I had to take down. Here you can see how it hung out off the edge of the terrace.
A shot from the side does not do much to highlight just how far that feels when you are trying to move something as long and heavy as that wooden beam!
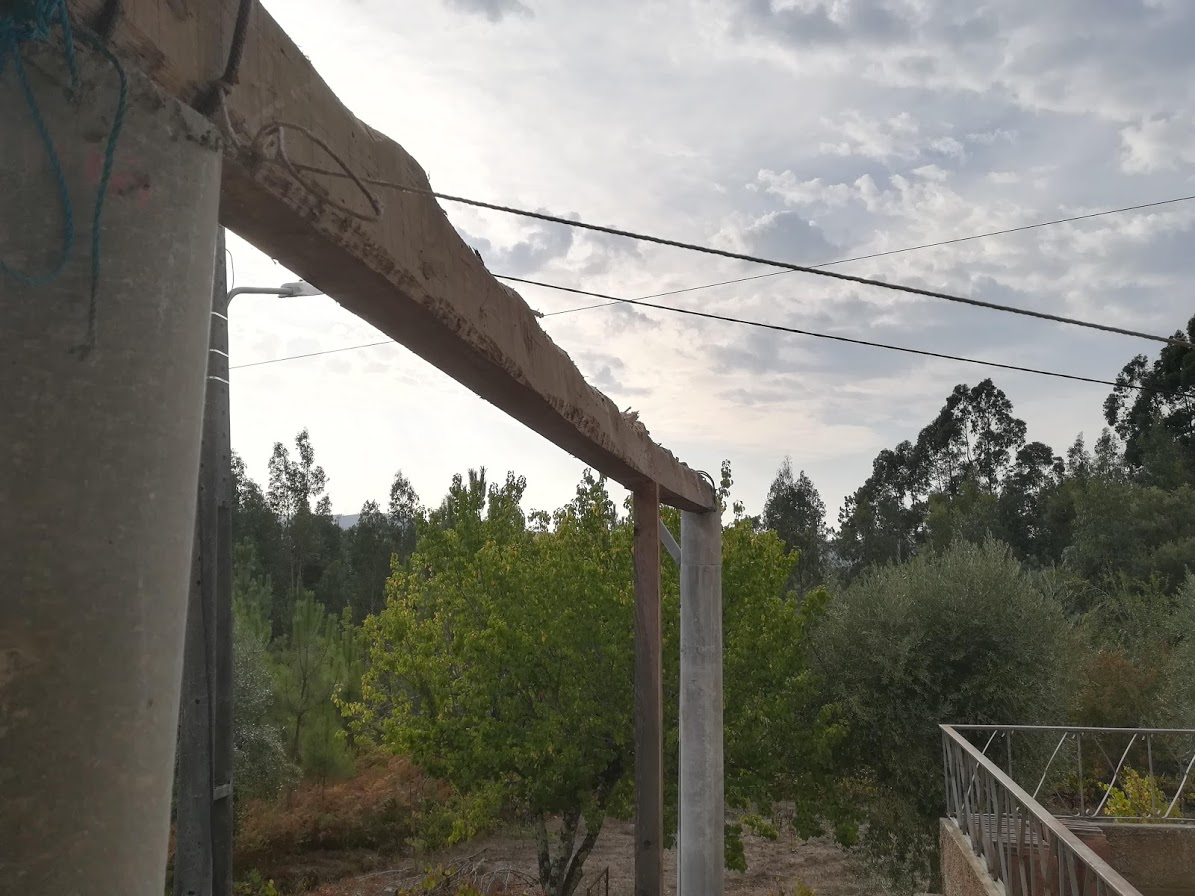
If you look closely at the wood resting on the concrete stilt, you will see it has started collapsing. The wood at that point had been eaten away so much that it was sagging around the concrete stilt.
Tie me down
I had an idea that if I took two lengths of wood, one either side of the concrete support, then used a tie down to pull them together, then the friction would keep them up there, maybe even be strong enough to carry the weight of the wooden beam.
I tried it on one side that evening. It seemed to work well enough to carry my weight!
Motivated by this success I packed it up for the night, eager to get this perceived danger down and out of the way.
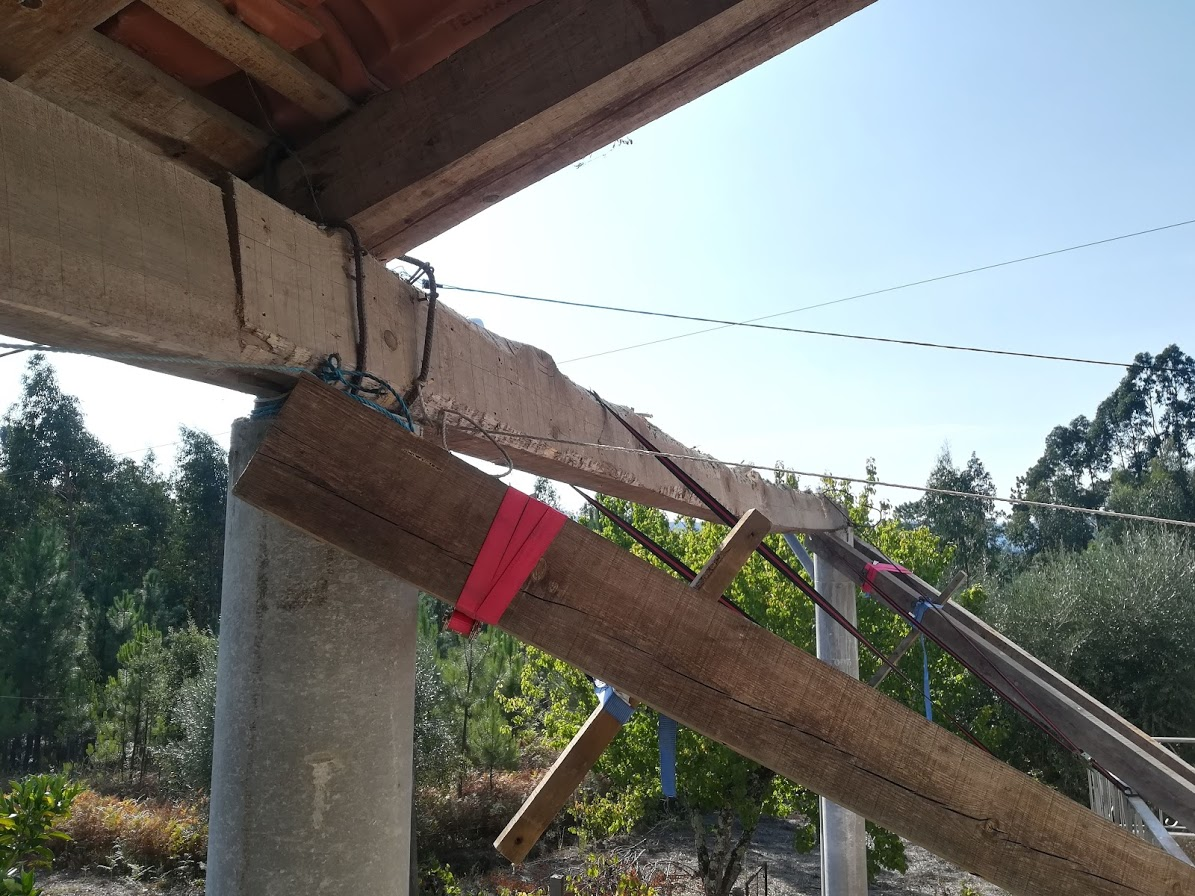
A nerve racking finish
I had planned this out and worked through as many scenarios I could think of, where things could go wrong, so felt prepared, however when it comes do doing sometimes you cannot escape anxiety.
I did the same with wooden beams on the other support, then tied their ends together too, that way they both supported one another and were less likely to start slipping down.
Fortunately because of the way I arranged it, and time it slipped down it would try and spread the wood further apart. I added short lengths of wood on each side. The idea was to cut the long wooden beam on on side, then let it rest on the supports I had added. If it did start to slide, then it would be caught by these short lengths. They ended up not being needed but I was glad they were there.
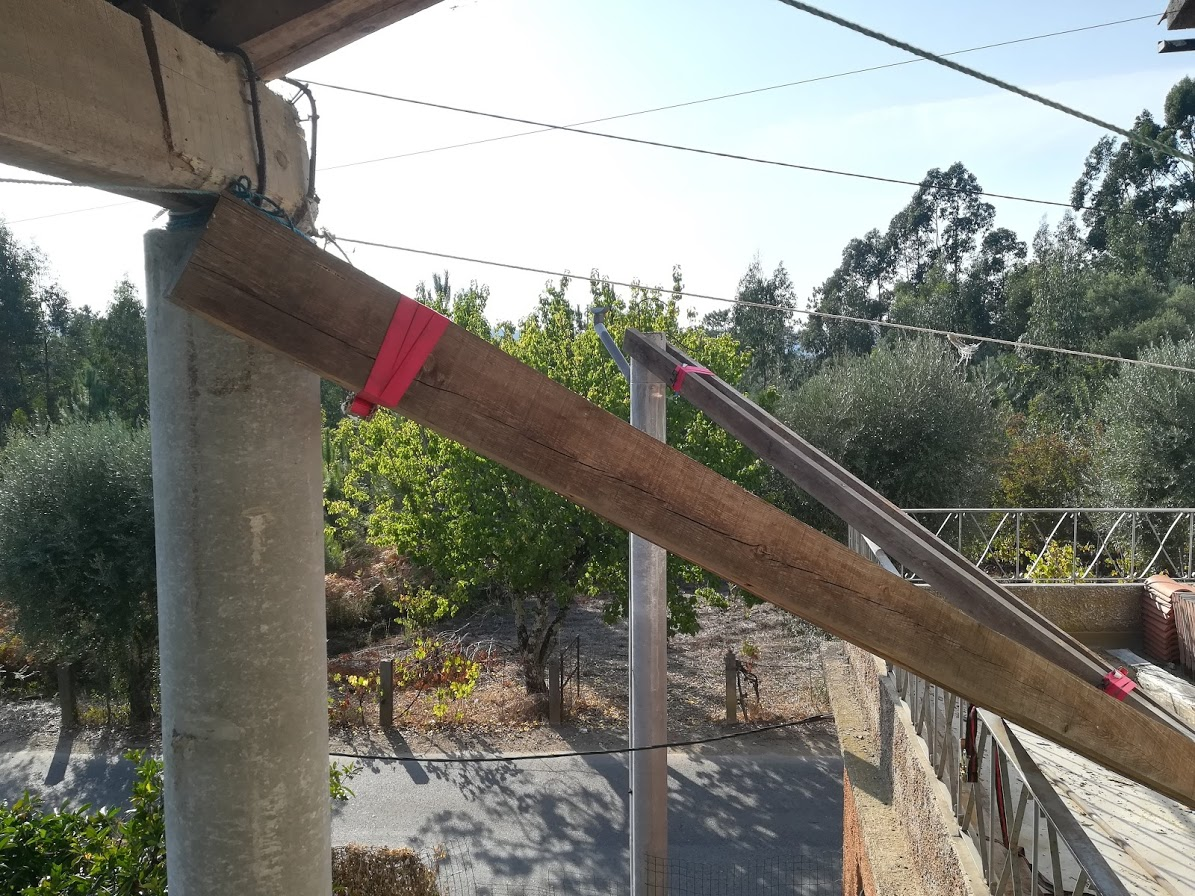
After much sawing, whilst leaning out over the stairs, I had cat the beam loose. I did not stop to take photos as I wanted it down ASAP. I had to use a length of steel pipe to lever the far side over the rebar that had been wrapped around it. Then bit by bit lift and move an end close to me, the move to the other side and repeat.
Because the gap between my supports narrowed the close they were to the terrace it got easier and easier to move the beam.
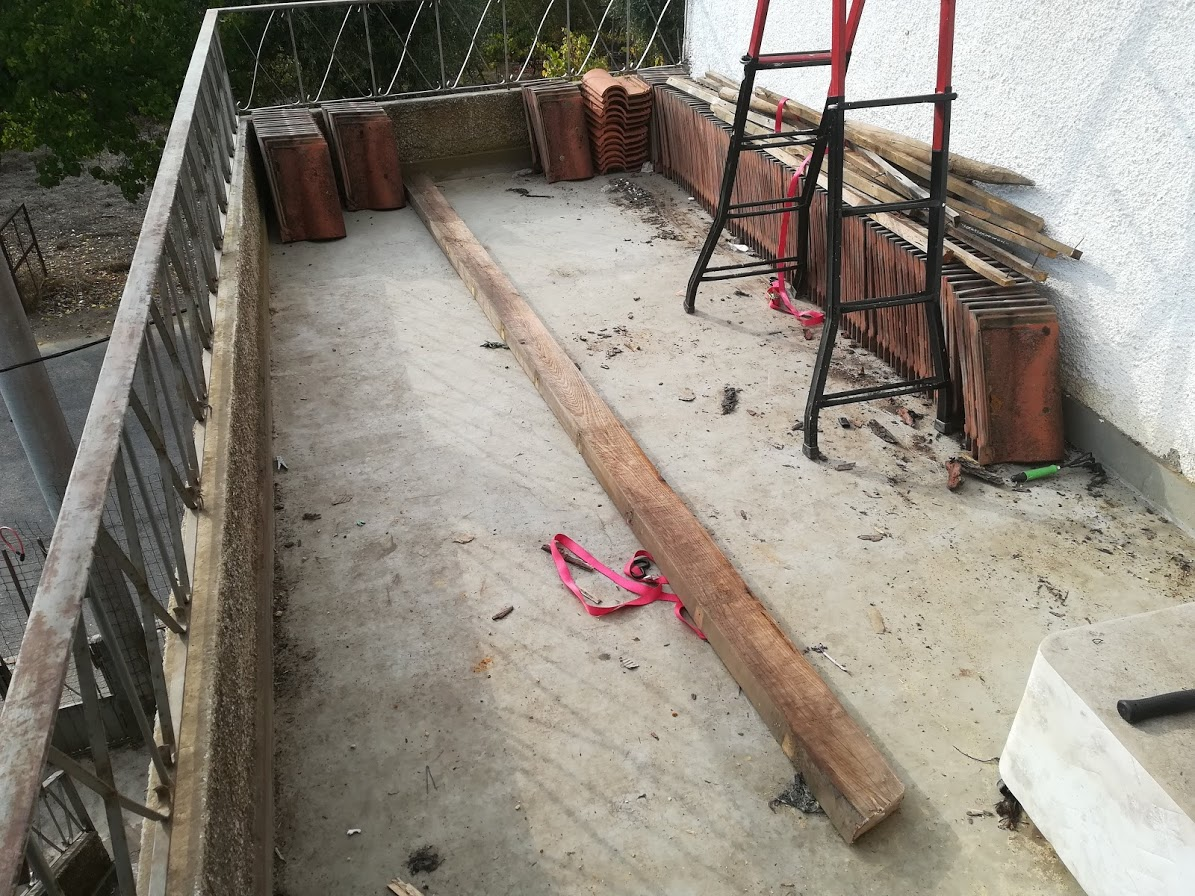
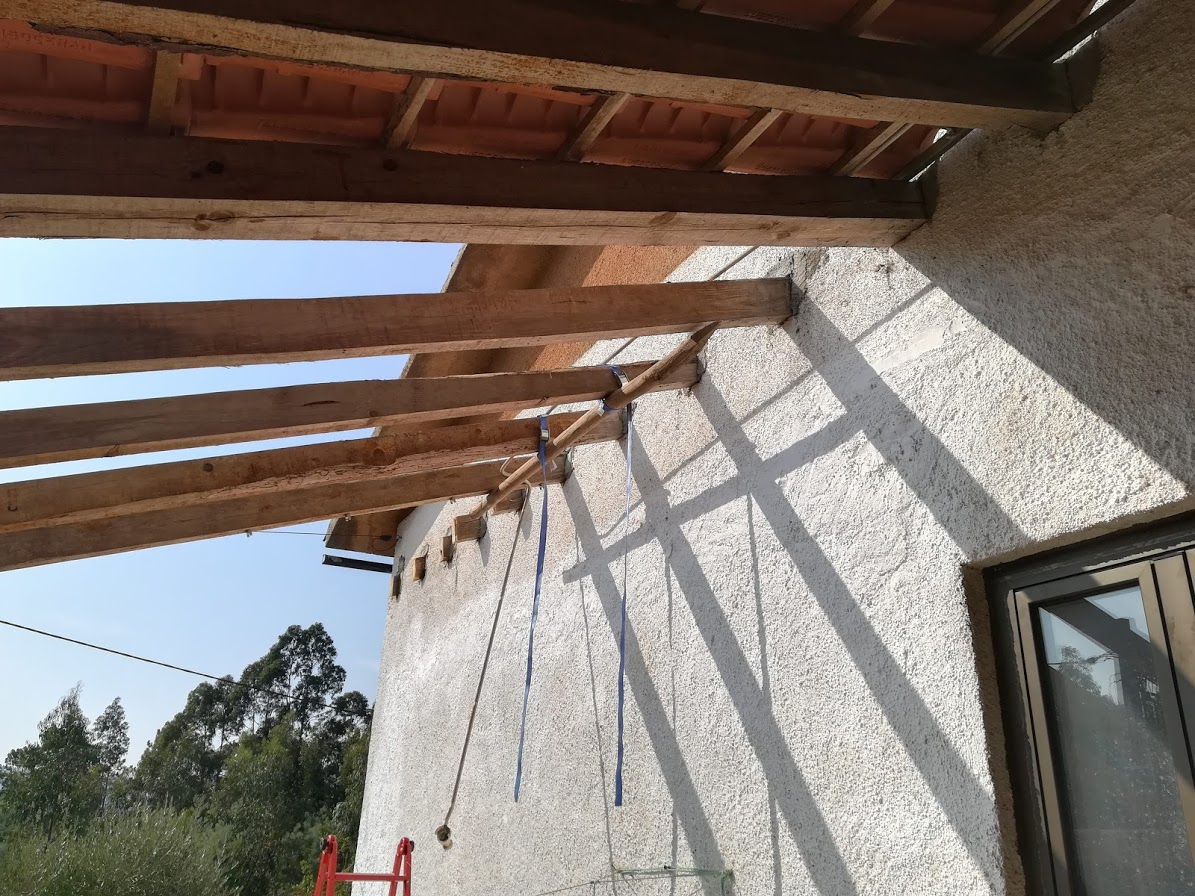
Job done, now to clean up
I took a few shots once the supports were taken down, I was just so relieved it went as smooth as it did.
If you take a look at the beam you will notice how much it had actually sagged, I still think it was close to breaking with the weight of the tiles and wood resting on it.
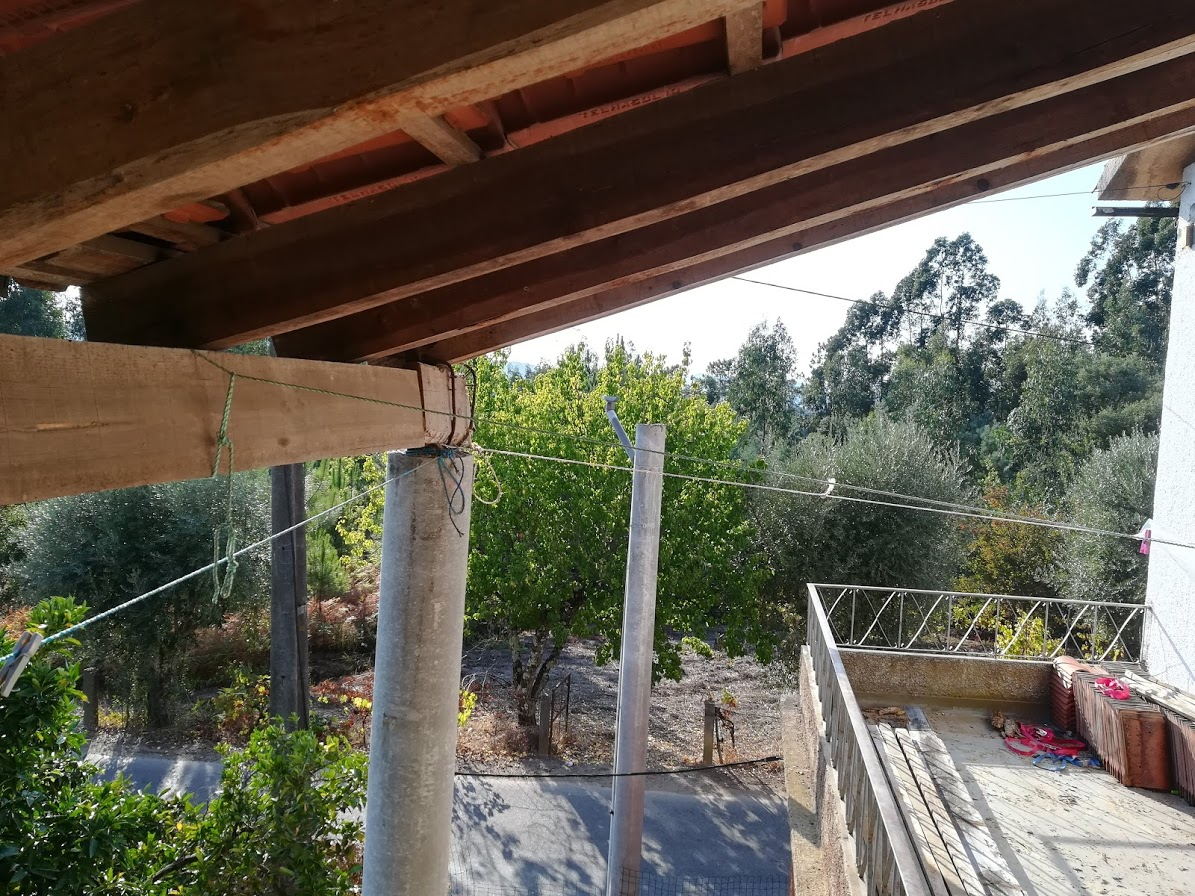
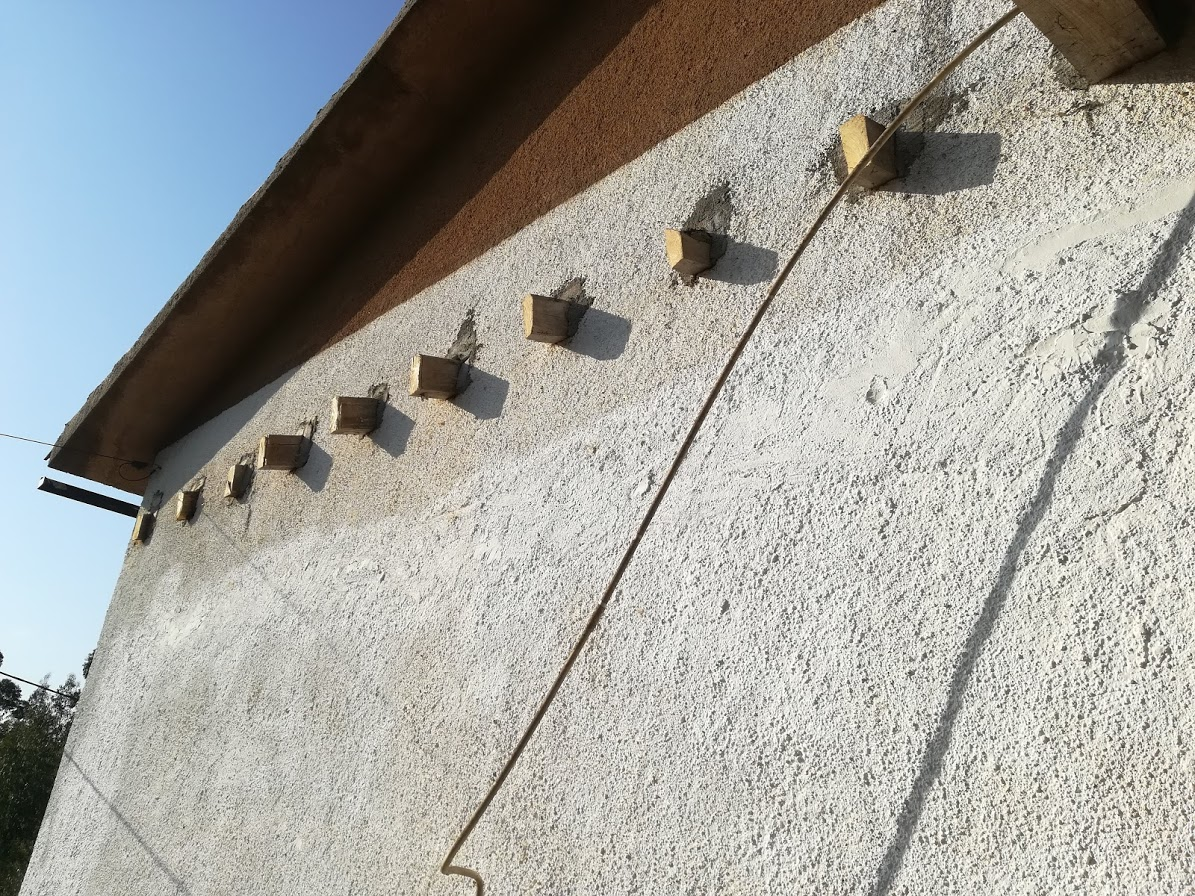
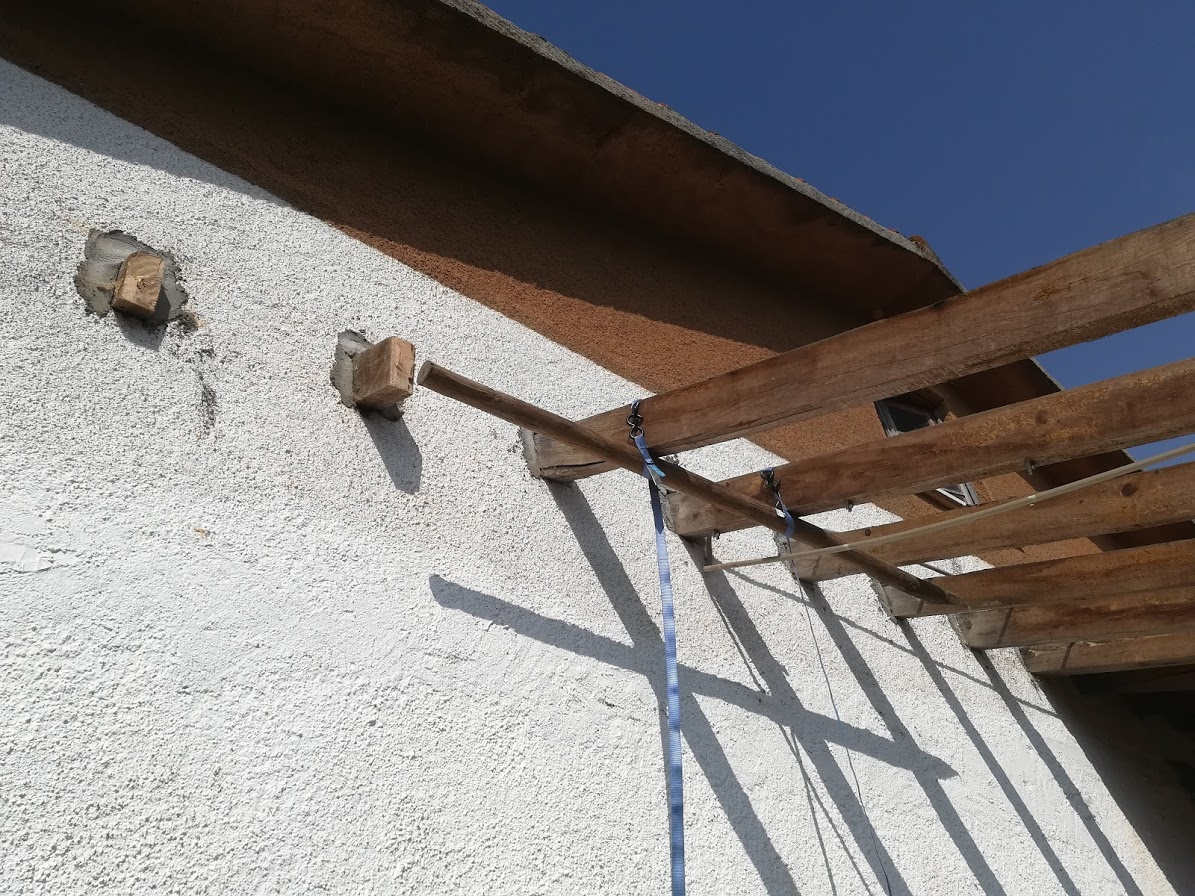
I have these bits of wood sticking out of my wall now, not sure how to handle them…
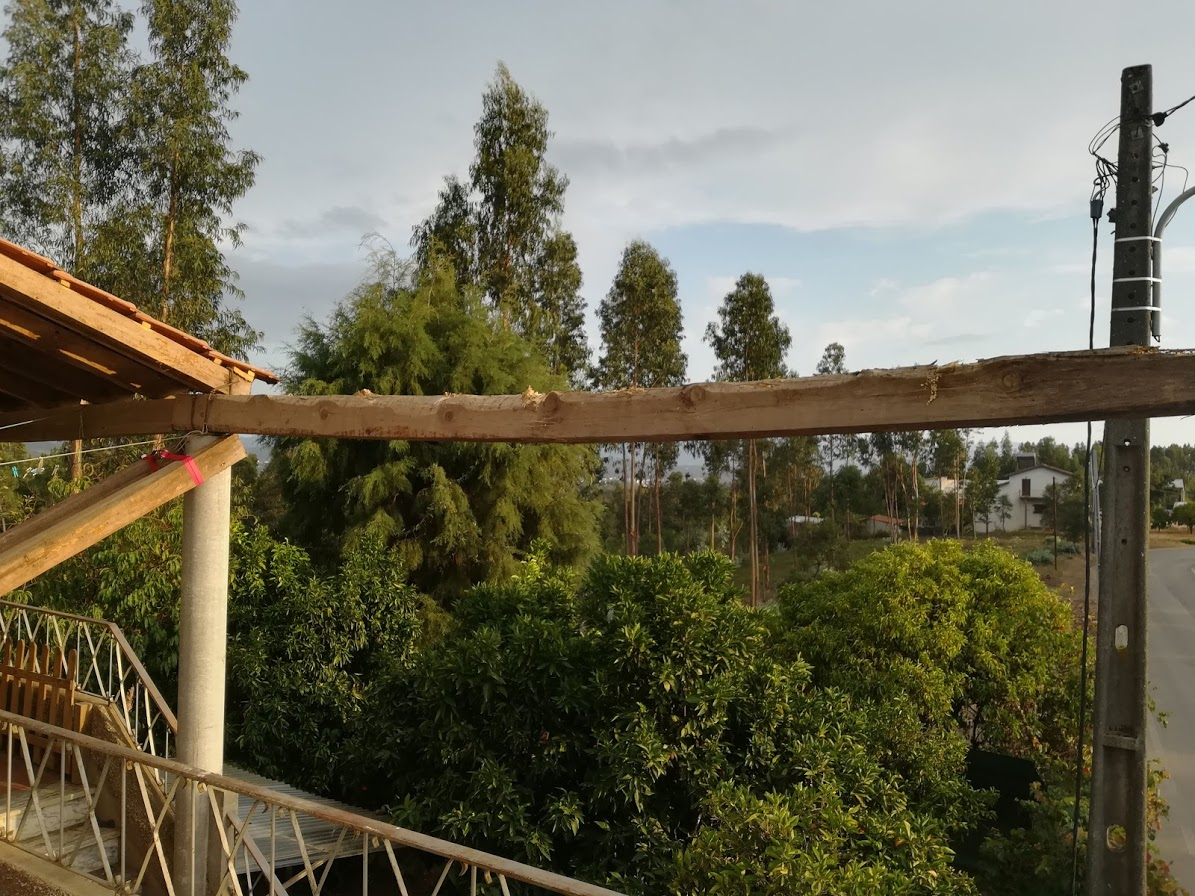
The terrace feels so much more open just with that beam missing. The downside is that we get beaten by the sun in the afternoon now, it makes it a bit uncomfortable to spend time on the terrace late afternoon.
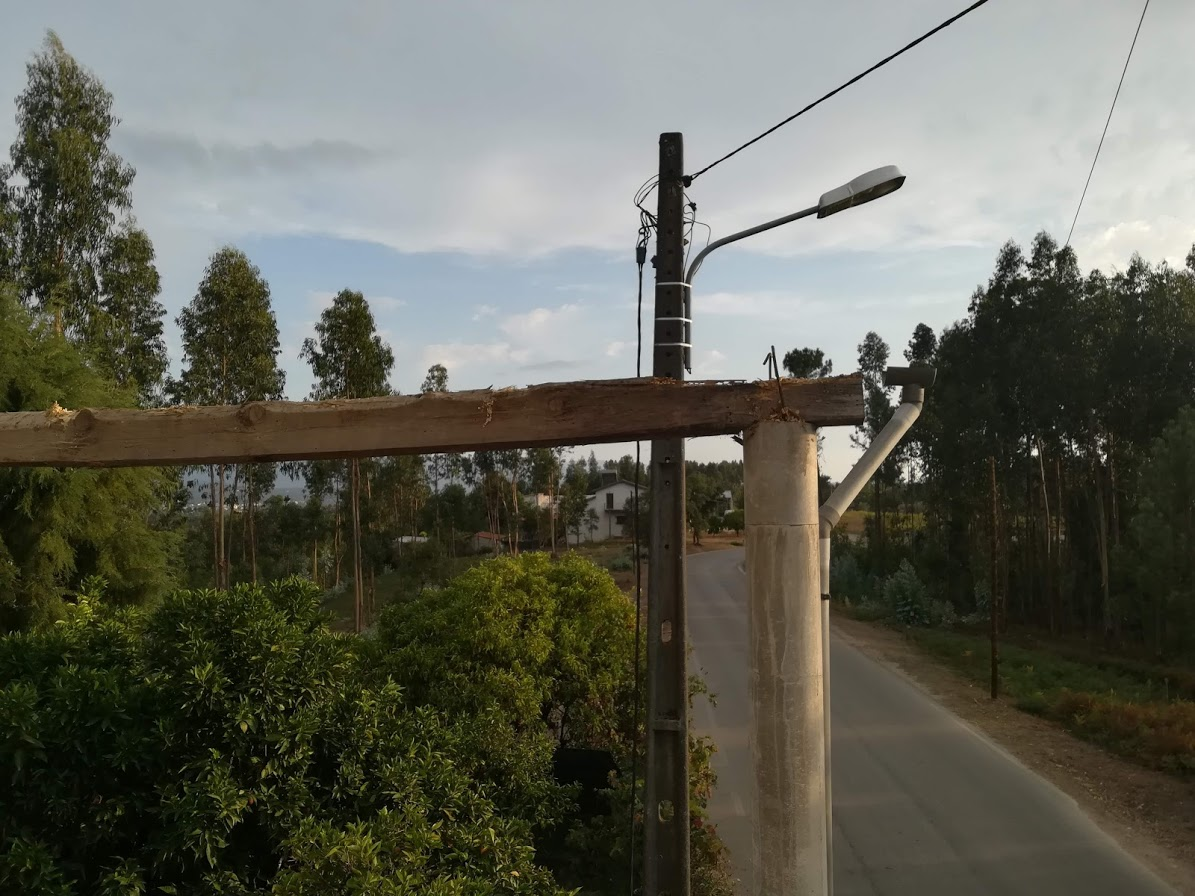
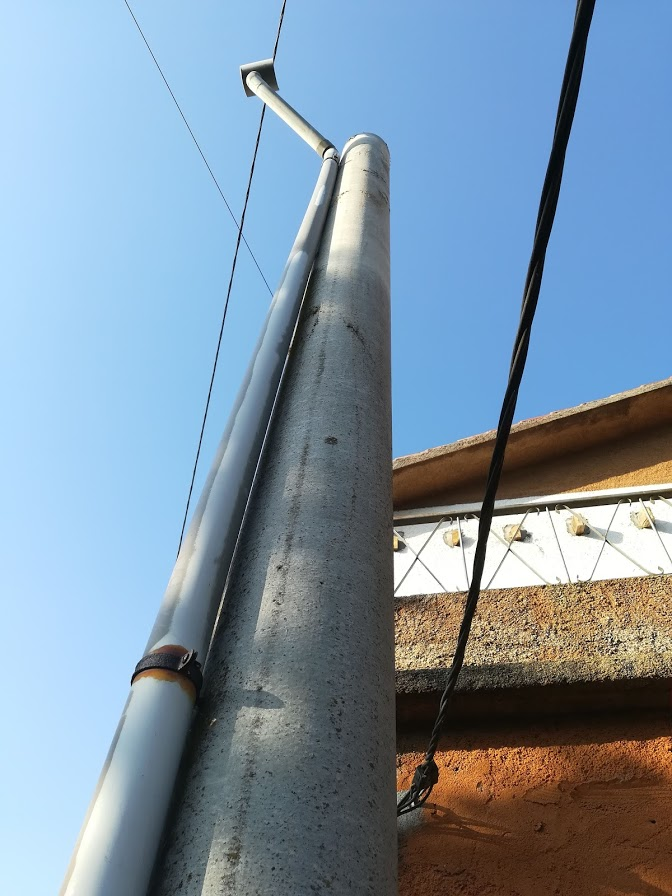
I tried to capture just how tall this is, I don’t think it comes through in the photo though. It’s amazing how strong concrete can be though!
I am finally done with this, so many other projects around the house though, I cannot wait to get started on them!
The following series of photo’s took place over the period of a few days. It took me a while to get into a rhythm, but once I found it I got work done quickly.
One down many to go
The first of the not so rotten beams was the hardest, again with it’s proximity to the road, standing at the top of a ladder on the edge of the terrace…
Nonetheless I got it down and did not fall off the ladder. I had an idea to get the beams off relatively safely, meaning they would not fall on top of me as I took them down. It did not work out exactly as I had planned, however I did learn I was overcomplicating things. My next attempt was much simplified.
Looking at the wood in the photo, it really does not look bad, on closer inspection you can notice how many holes it has in it caused by bugs boring into t and eating it up from the inside.
I have a camera!
I remembered and started photographing some of my progress again.
Here I had taken off all of the smaller supports that the tiles were packed onto, I was determined to get this down and soon!
I wanted it done before the rain started in earnest, which would make working on top of the terrace much too treacherous.
A few beams down, many to go. At this point I managed to get two down a day, after work. It’s some pretty heavy lifting and the afternoon sun had me perspiring profusely. Lifting those beams of while balancing on a ladder also did not help.
If you are going to do it alone…
You may as well be smart, or have a plan.
My plan was to have a treated pole tied to the beams adjacent to the one I was removing. This allowed me to cut it, once I had cut through it rested neatly on the pole. This gave me a chance to get off of the ladder, put down the tools, reposition the ladder to climb it and start moving the beam down.
Bit by bit, beam by bean I repeated the same process, getting 3 done in a day. Still not fast enough.
This long pole was starting to loosen up a bit though as the weight it had to carry got less and less. I would end up tying it to the railing so we would not bump it over accidentally.
Slower than going in circles
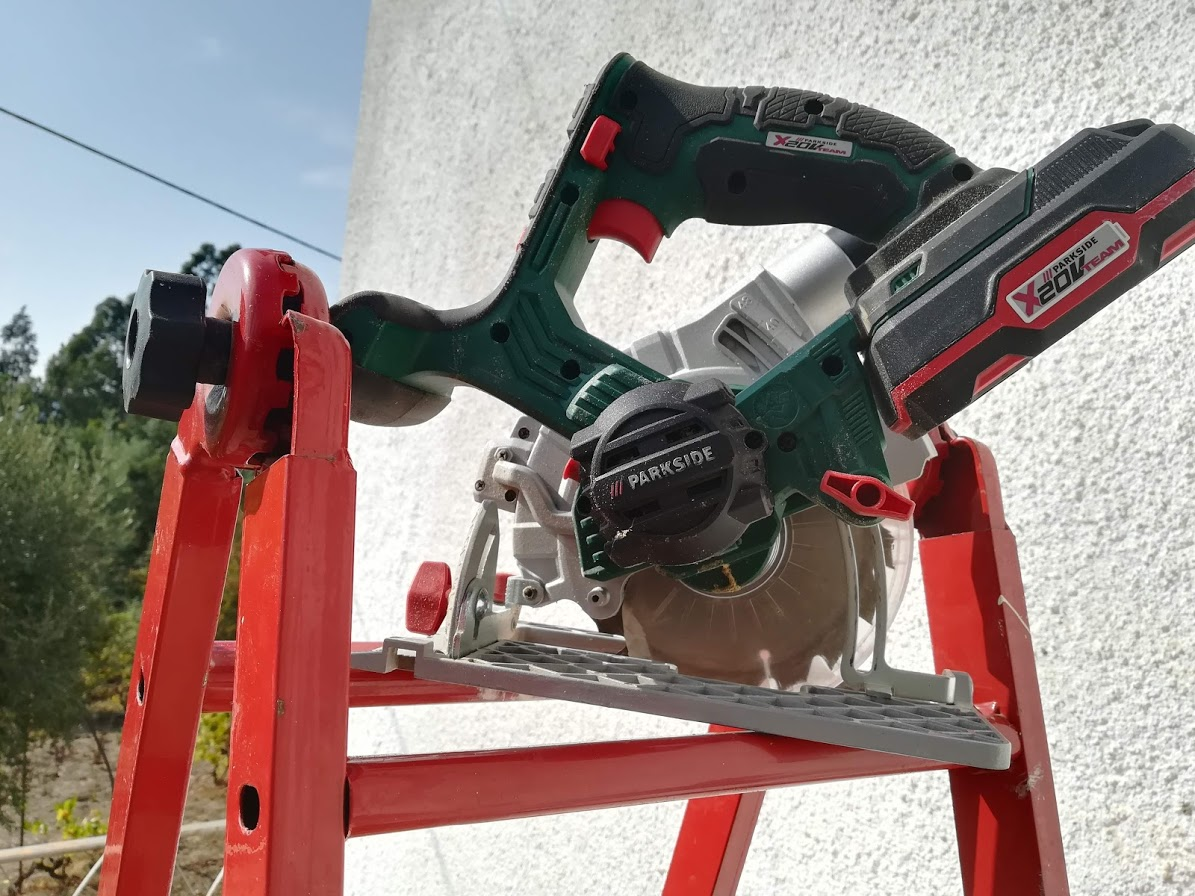
I have seen a few people on YouTube and the like using cordless tools that I would never have had thought would be worthwhile.
One such tool is a cordless circular saw. Such a tool needs speed and torque, right? Batteries simply cannot deliver the Volts and Amps needed for sustained high speed and torque.
I bought this tool a while back on a whim and thought this would be a good test of its usefulness.
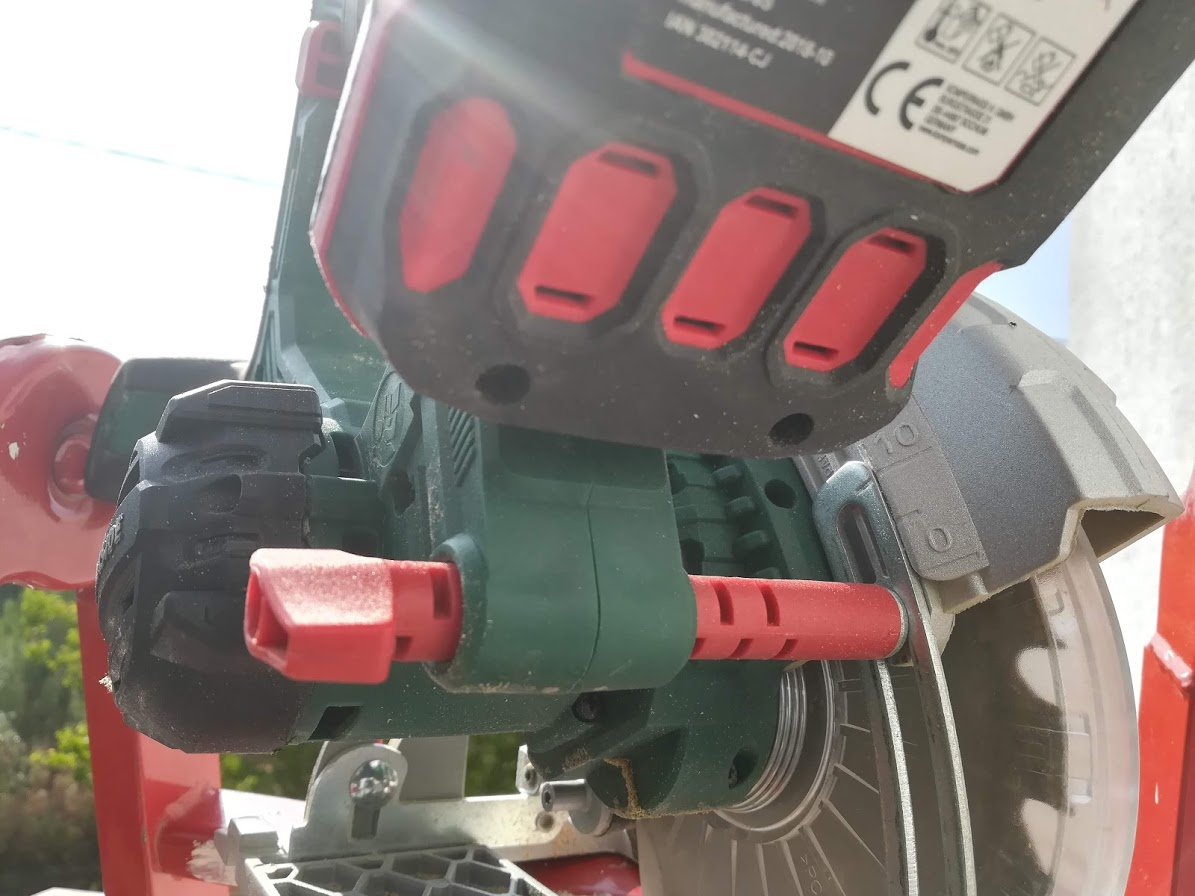
At first I tried to cut the full depth in one cut, but it jammed quite often and started smoking pretty quickly.
I let it cool down, thinking I had just let all the magic smoke out, whe it cooled I tried again, this time cutting no deeper than 10mm a time.
Unfortunately it is quite unwieldy standing on top of a ladder and still trying to make a straight cut with this tool where the battery is hanging off like a tumour.
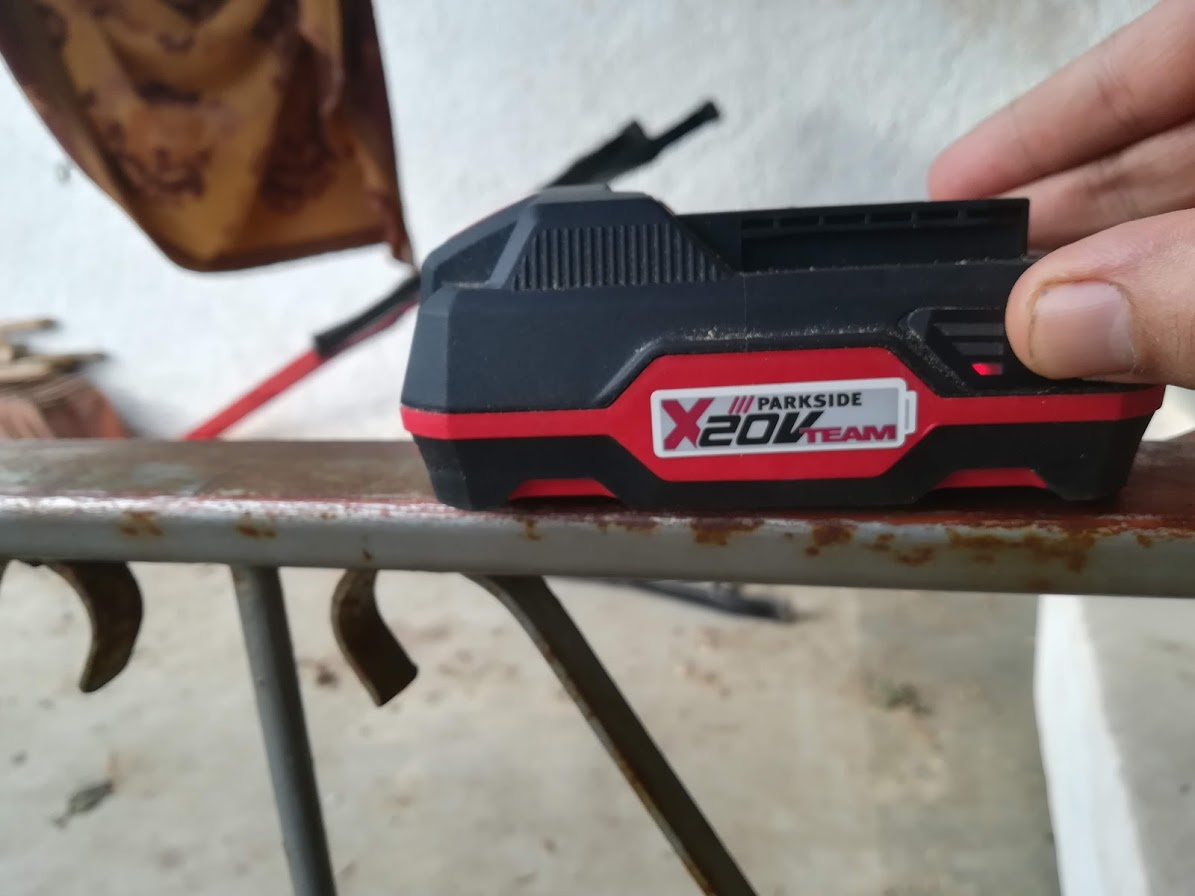
I could get through at most two beams before the battery was completely drained. I always leave the battery to cool down and rest for a while before charging it up again. Eventually I tried to just use a handsaw.
And whammo, in one afternoon I took down the remaining four beams, much easier. My arm was jelly at the end of it, but one big part was done.
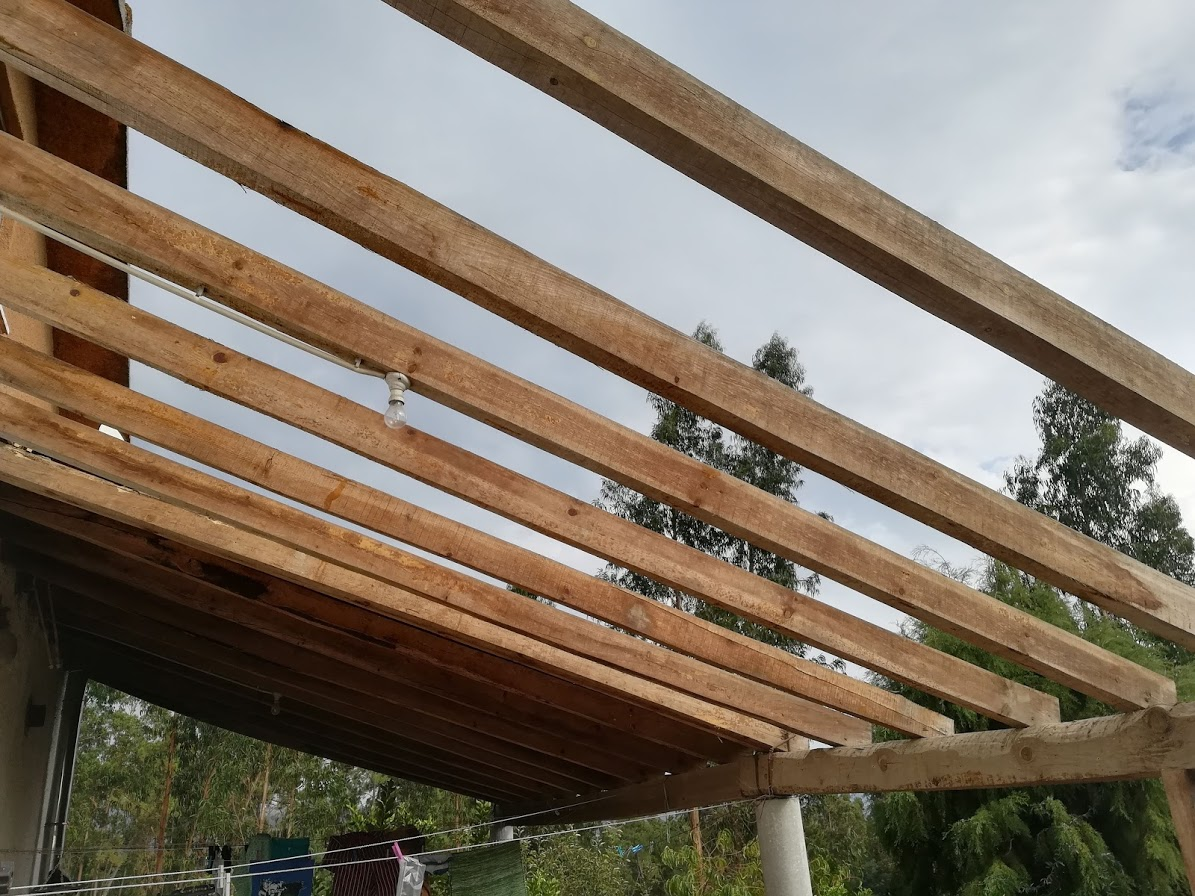
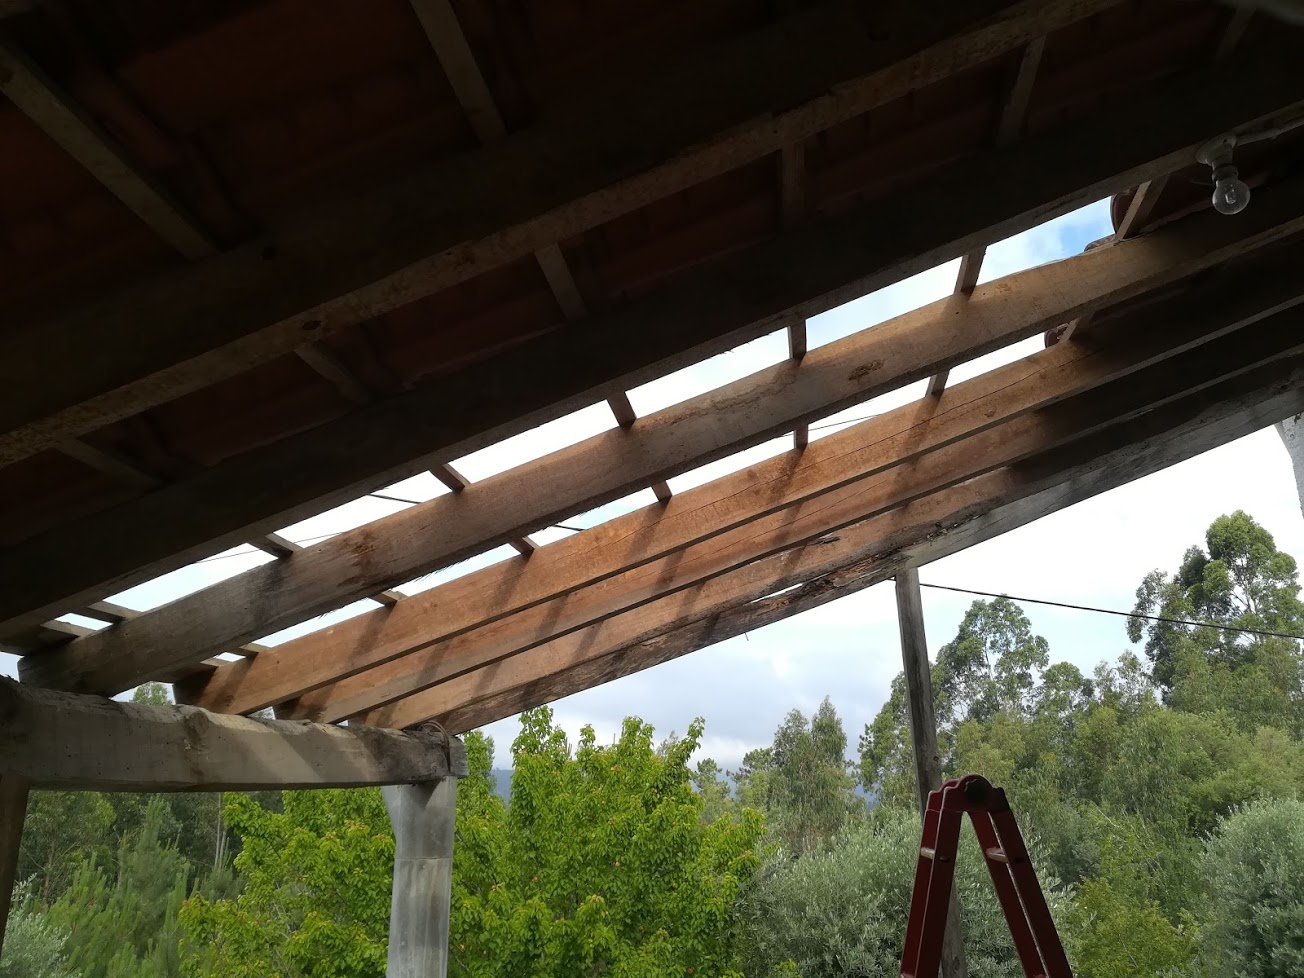
Now I had to figure out how to bring down a huge rotted beam hanging a meter plus away from a floor!
A few months ago I started tearing down a portion of the roof that covers our terrace. The wood used in its construction was untreated and this meant that all manner of creatures had started making it their home.
The main beam holding up half of the roof had started sagging to the point that the houses previous owner propped it up with another wooden pole, which was jammed between the beam and a stair. This made me feel incredibly uneasy.
A rotting mess
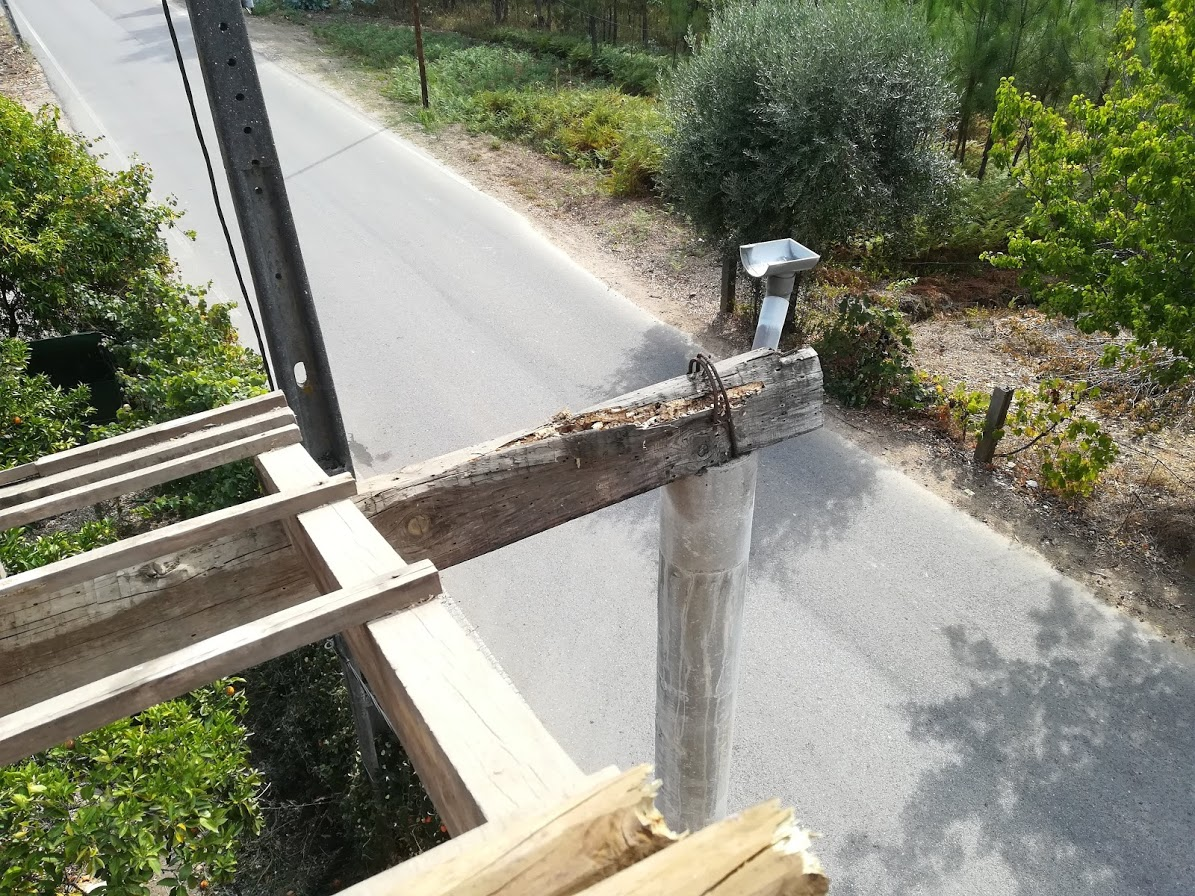
As the wood was untreated the beam near the end, which got wet any time it rained, was completely rotten. It was right near the road and I was very worried that the tiles on it would fall off and into the road, leading to an accident.
This too had a pole propping it up. Here you can see the sad state it was in.
This was how far I got for a while, with the tiles off, the immediate danger was out of the way. Much of the weight had been removed from the main beam so I had bought some time, as you may know I focussed on redoing the kitchen and bathroom downstairs to prepare it for when my mother-in-law moved in.
Some progress, rotten to the core
Fast forward two months and I started taking some of the wooden beams down, not an easy task when you are so high and working on top of a ladder on the terrace.
I took the above photo to show my wife just exactly how rotten and weakened the main beam was. I got quite a surprise when looking at it from this angle.
I had managed to take the end bean off and it practically crumbled in my hands as I took it down. If not for the pole holding it up it would have fallen down a long time ago.
I managed to get two beams down in a day, but working so near the edge of the terrace meant my nerves were shot. I was very glad to be down from the ladder for a while.
A little while later ( a few days) I put a different light up outside so that I could disconnect the ones fixed to the beams. With the tiles off I did not want water to go into them and cause a short. Better safe than sorry.
As life has it I got not one but two freelance deals so I had to take a break from the DIY stuff for a while and sort out the two clients.
She ain’t purdy but she works. Another image heavy post, this after I culled a few!
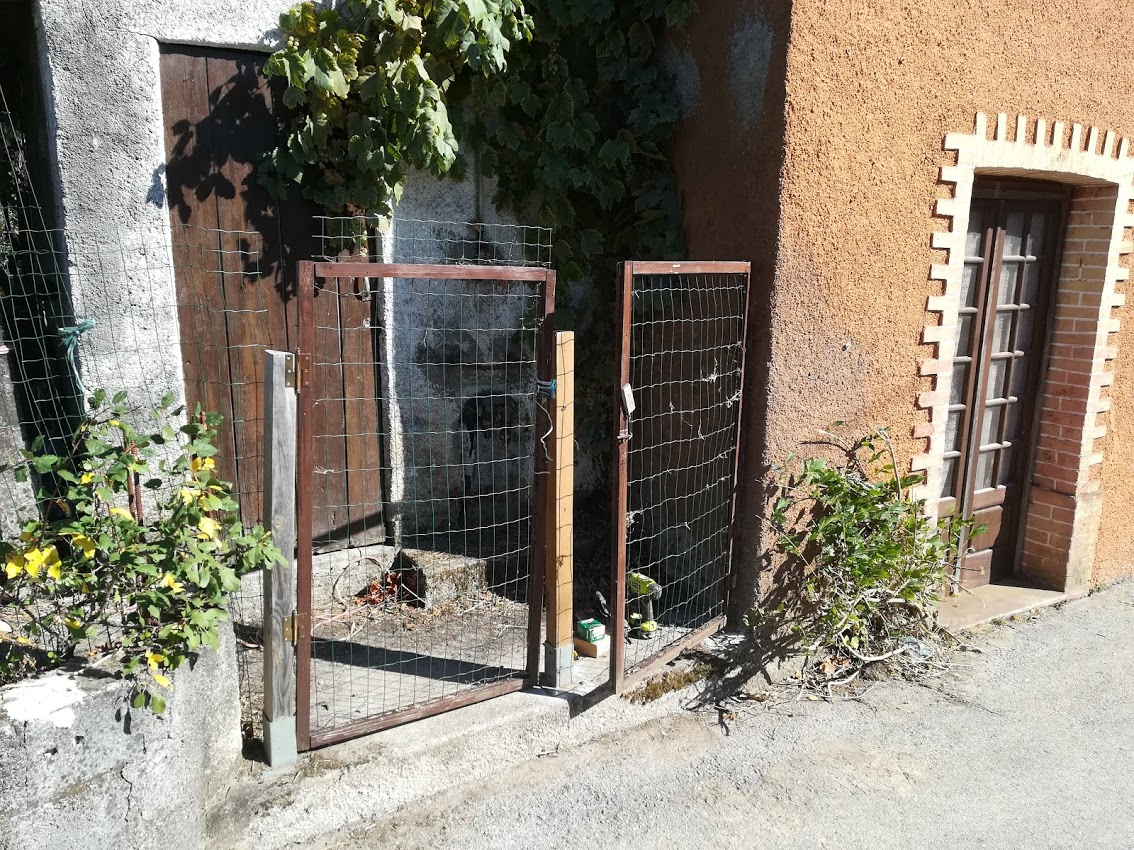
Let’s jump right into it, gates are up and dogs can now be let loose in the back yard without going into the street, WINNING!
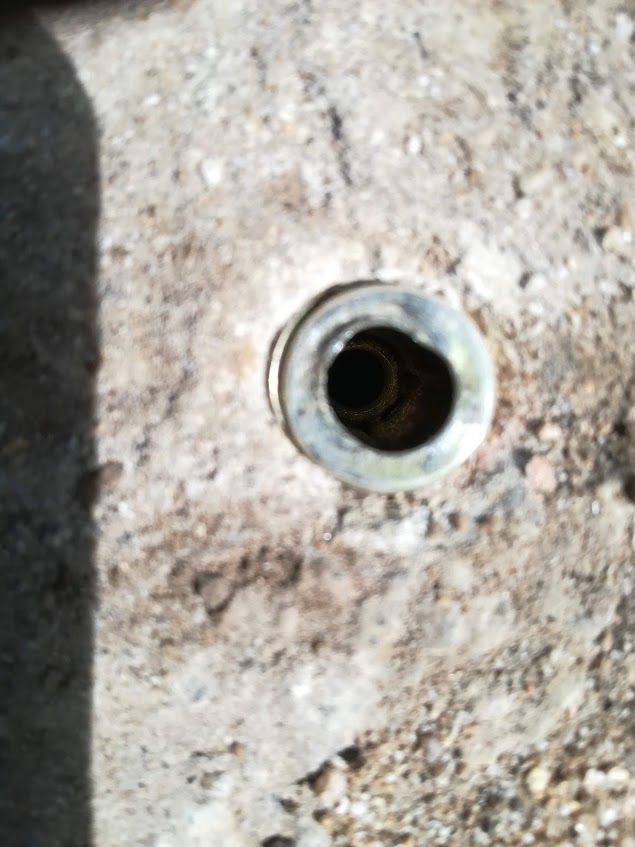
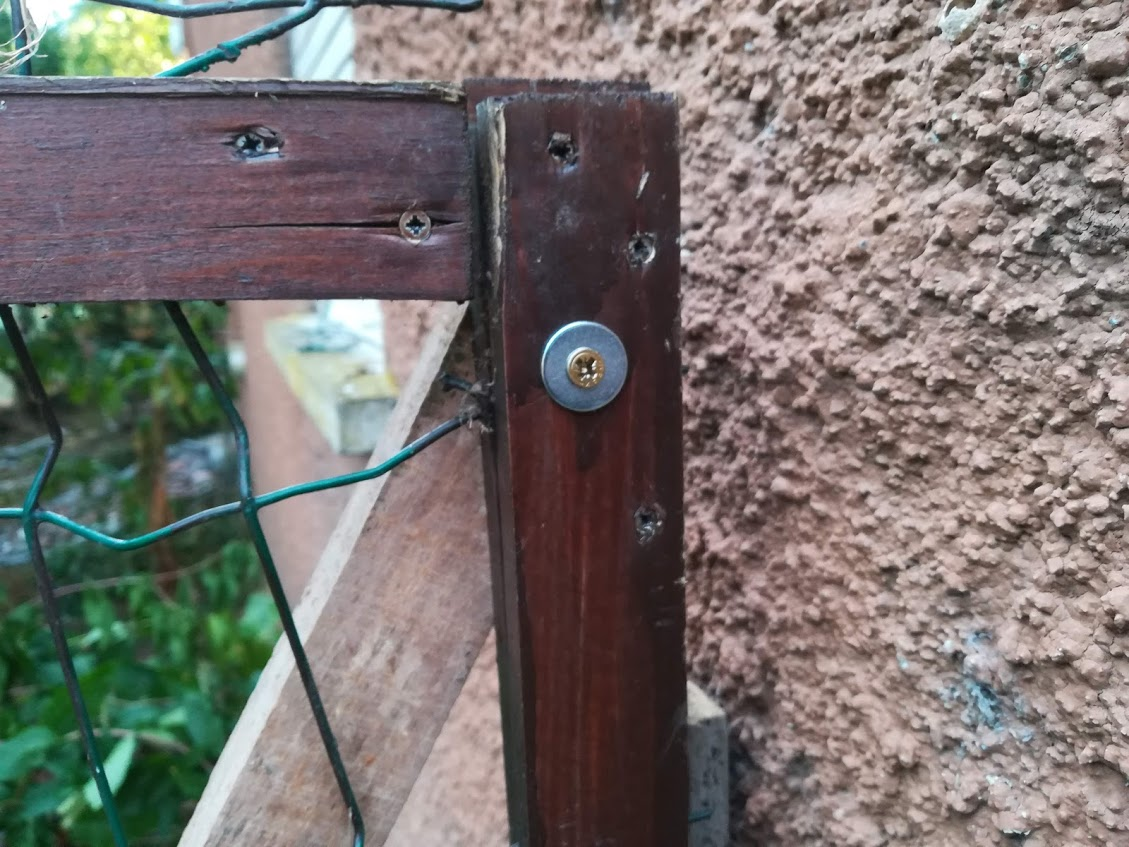
A note on rawl bolts and quality
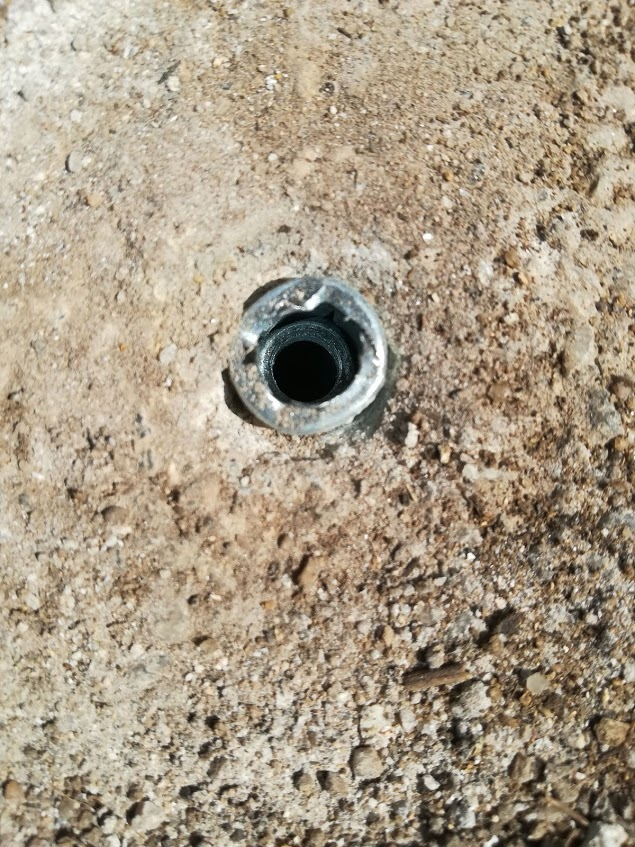
Also known as sleeve anchor bolts it seems. I bought a box of 10 at the hardware store, on the box it showed you should use a 14mm drill bit when installing them, I did not have one so picked one of those up too.
When installing I noticed they were awful loose in the holes, as if the drill bit was oversized. I managed to mess a few of them up as I tried drilling a smaller hole, eventually I ran short on this fence post, so bought a few loose sleeves from another hardware store. I only needed the sleeves as I still had the bolts that were left over from the ones I destroyed.
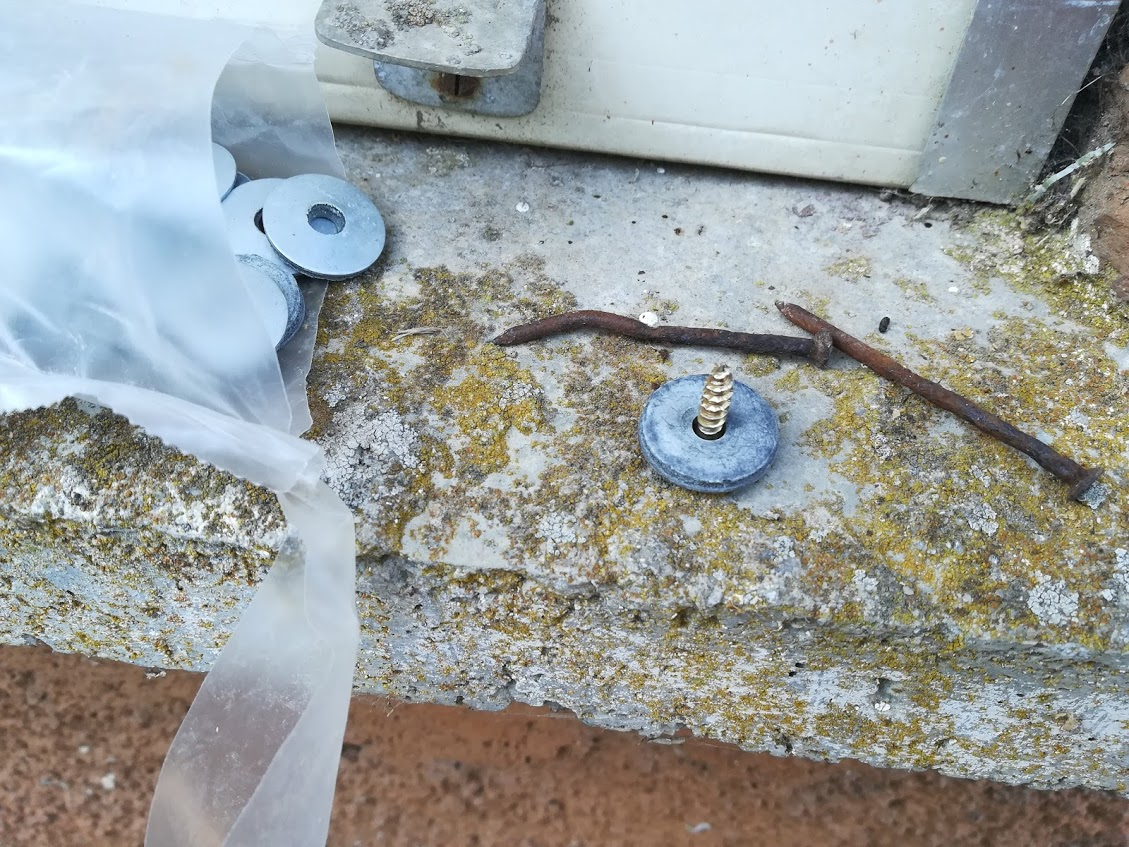
Lets take a look at some pictures, first picture you will notice the nut that’s inside the sleeve is almost at the top.
The following hazy photo id of the sleeve I bought loose. See how far down the sleeve it is?
The only deduction I can make is that the box of bolts I bought were really cheap and nasty and undersized. The loose sleeves I bought went in snug with the 14mm hole and I could feel they were tightening up much sooner and had more bite.
OK, boring I know…
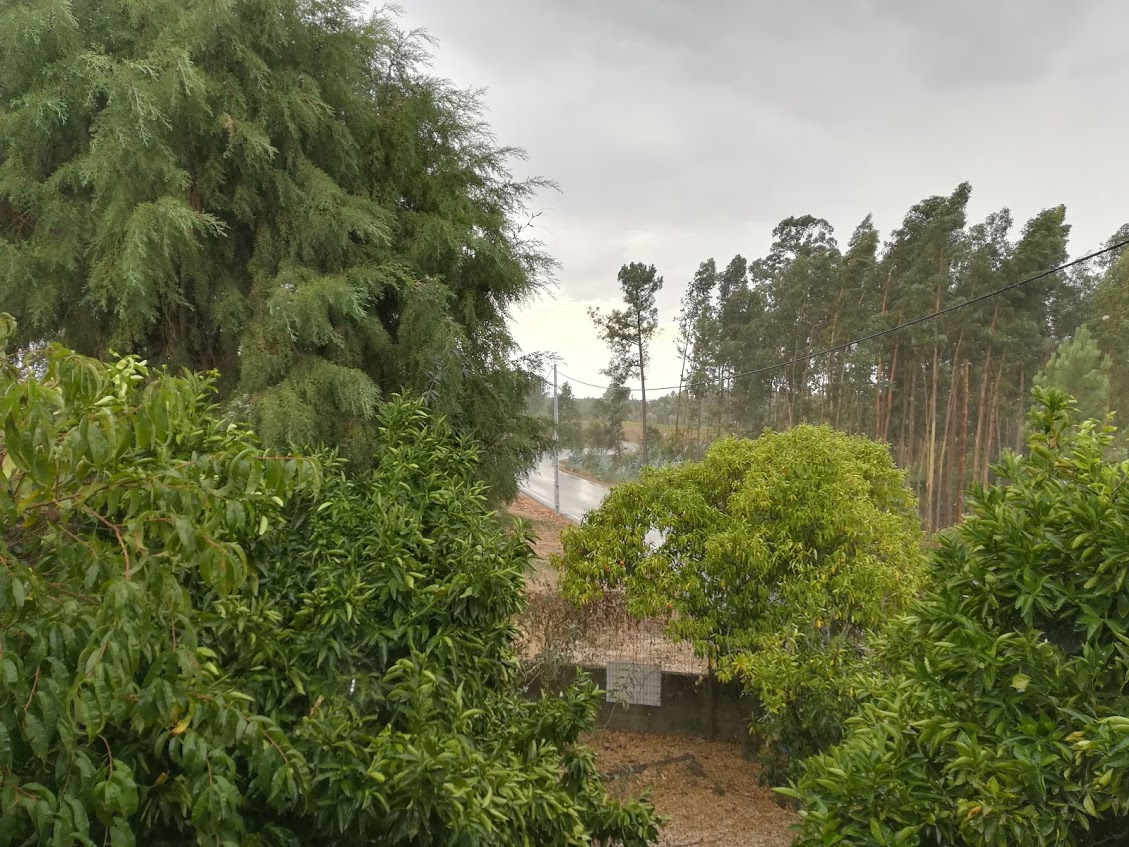
Miranda do Corvo on fire
There was a fire near us and for some time there were a fleet of firefighting planes going overhead. Every so often the five (yes 5!!) planes would fly overhead as they picked up more water to dump on the fires.
I only managed to get two in one shot though.
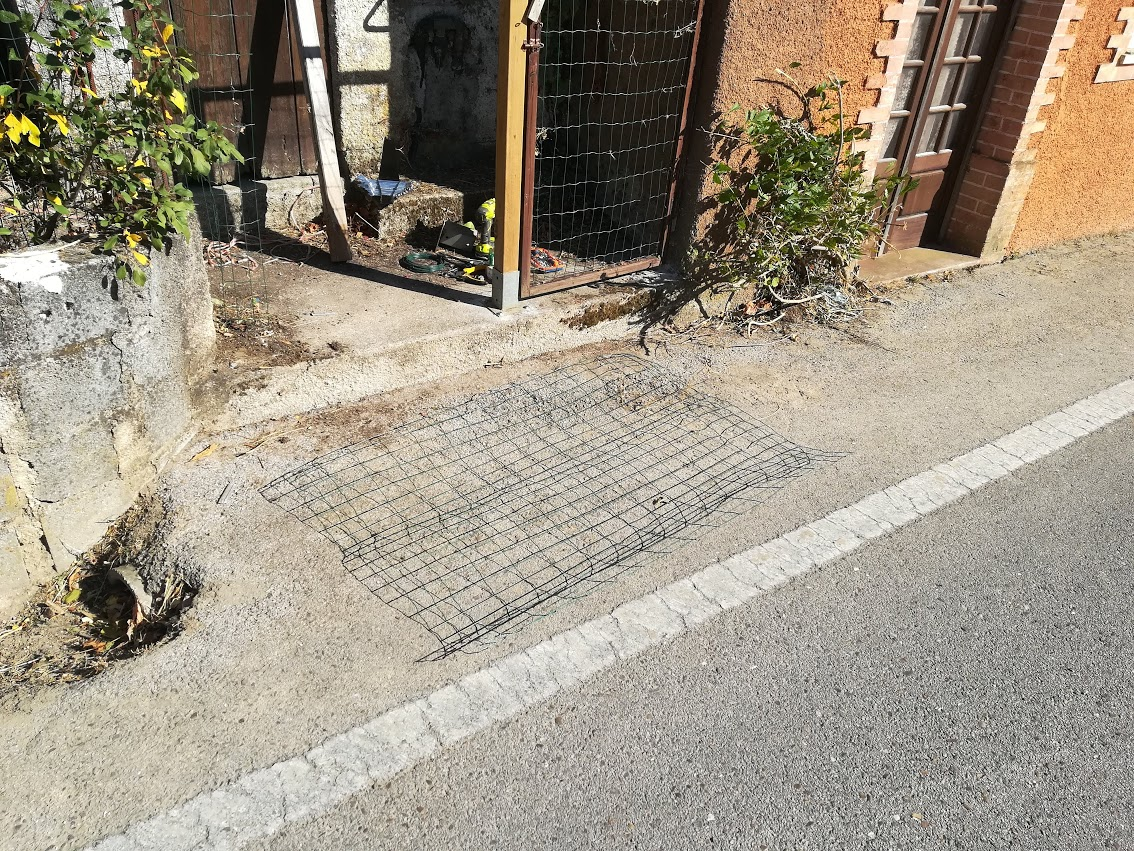
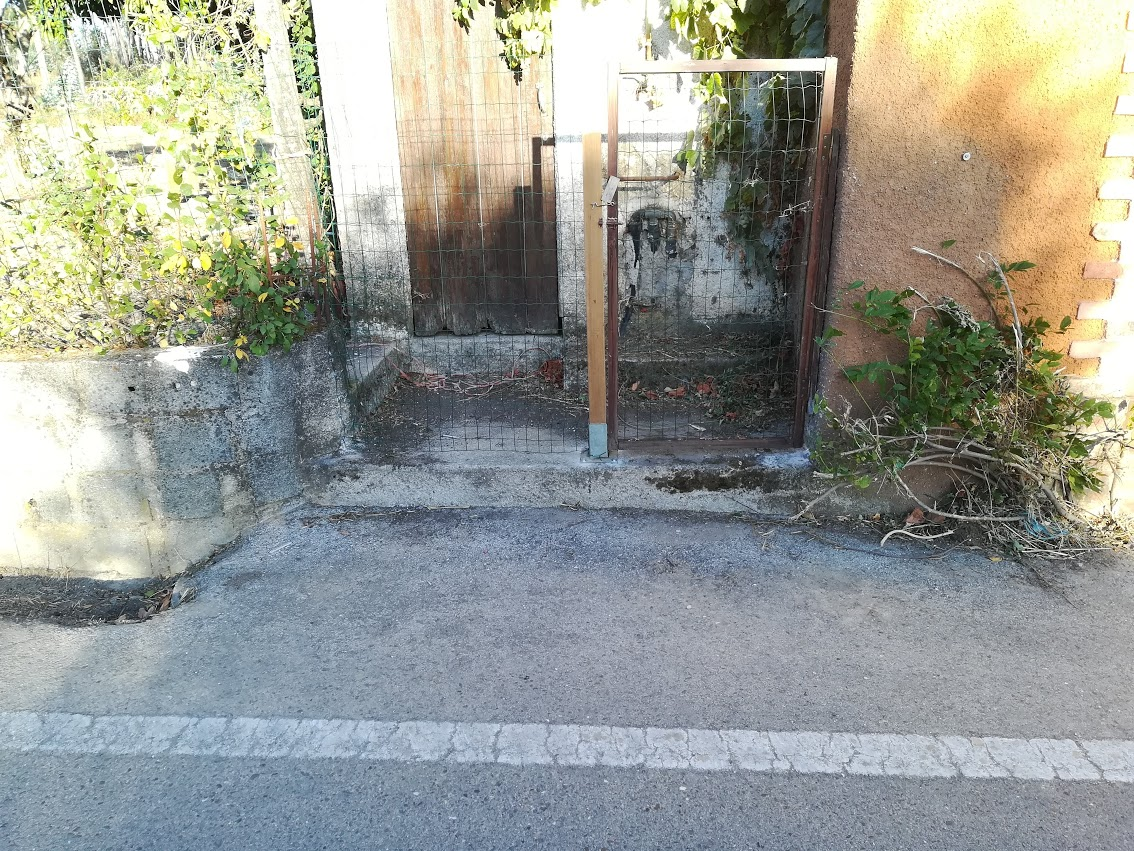
Moving the fence
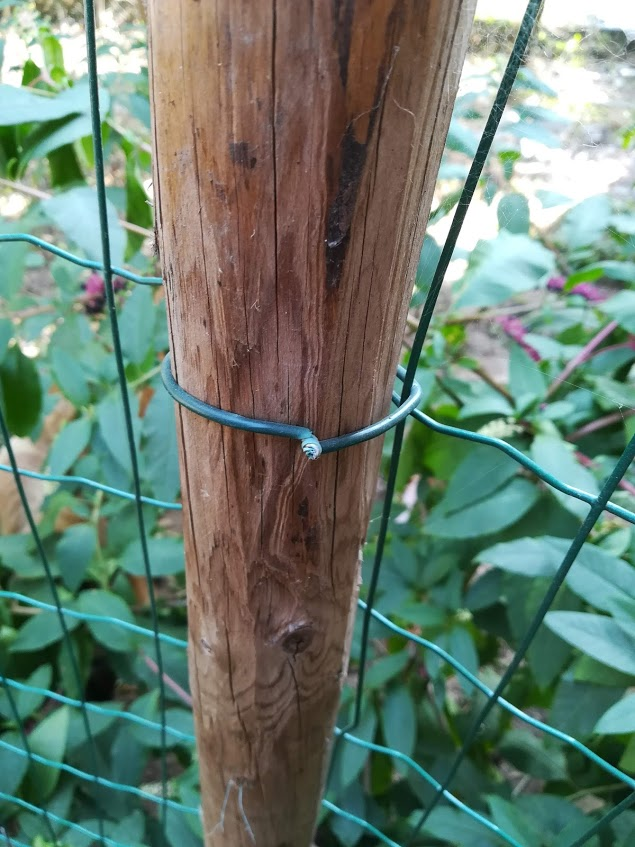
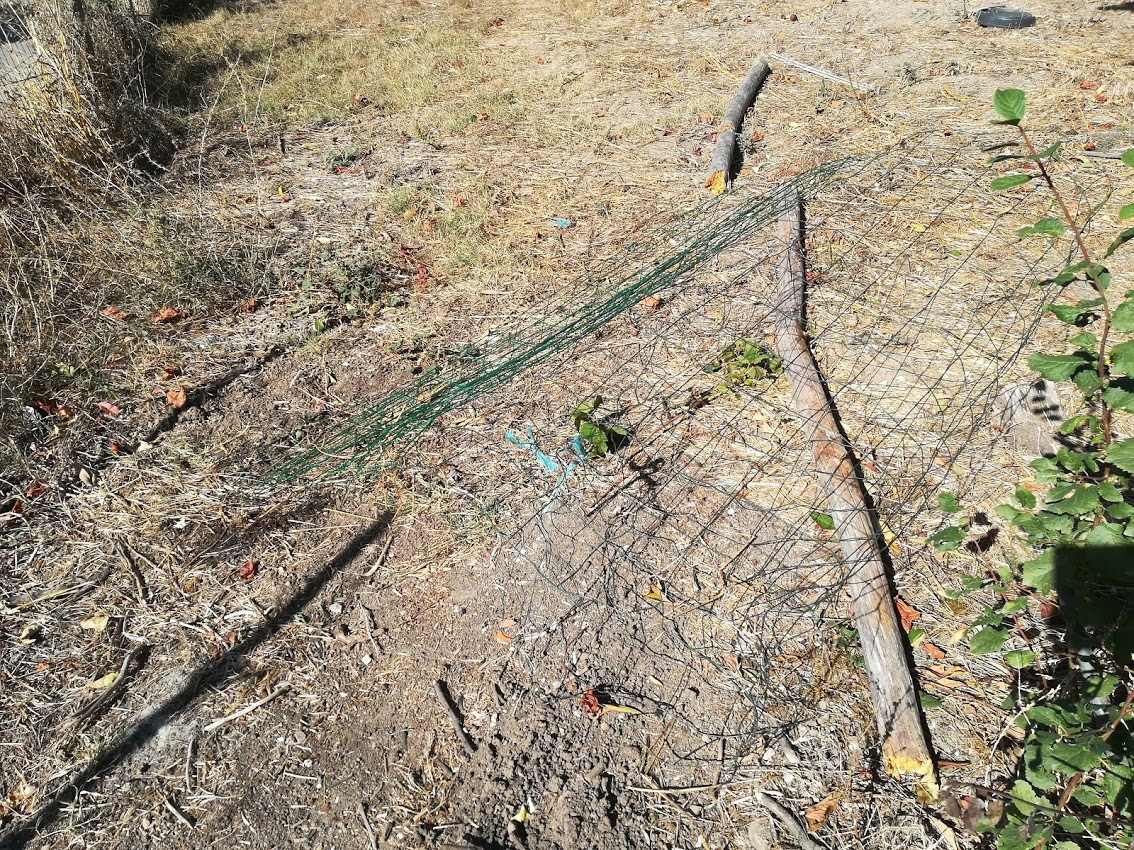
The length of fence was attached to a pole, which by this point was hanging on for dear life as Roxy, the bigger dog had been digging a hole right by it.
I had attached it with some simple binding wire a while back.
The bush had managed to go through the fence, so getting it loose ended up being more of a struggle than I expected.
Eventually I got it loose and boy was I relieved that it was long enough to make it to the post I had installed. After much pulling and dragging and stretching I had figured out where I wanted to anchor it.
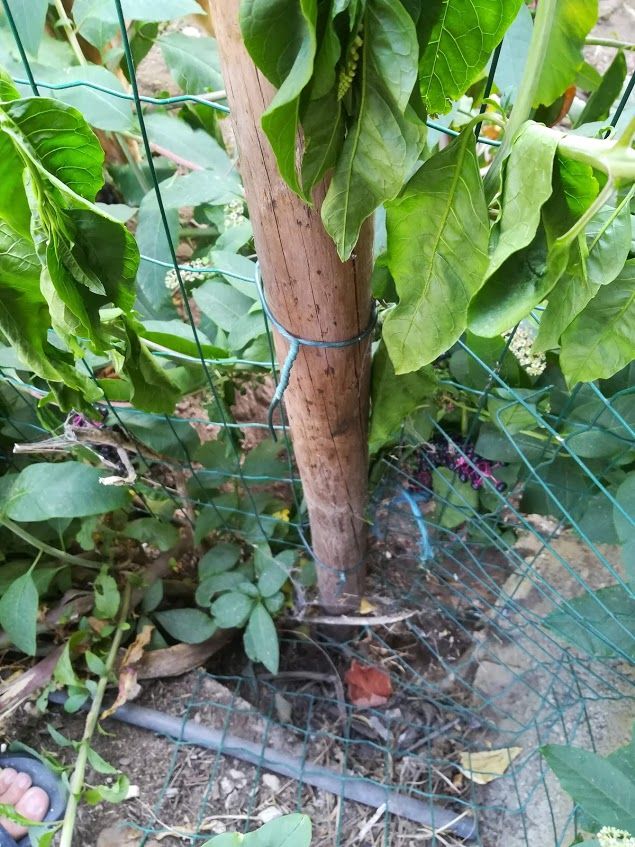
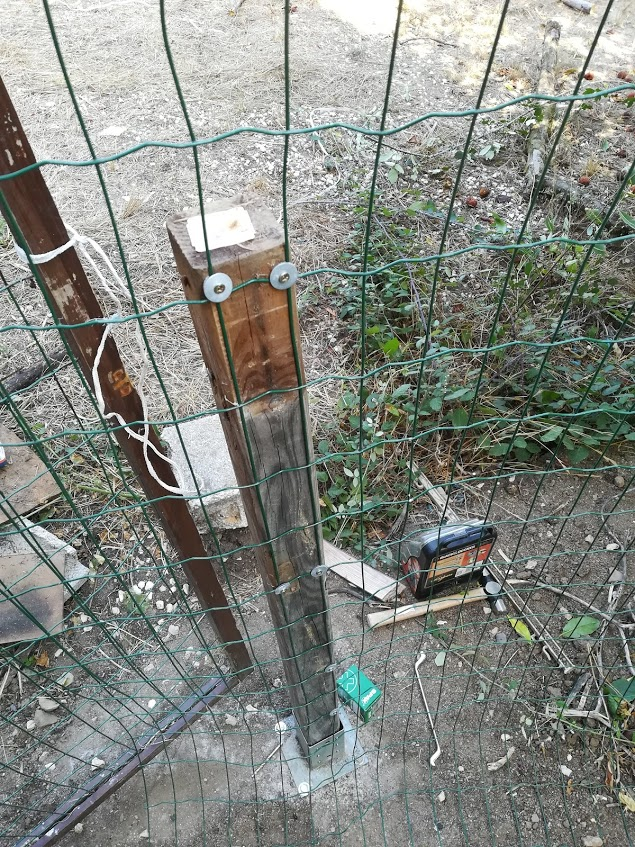
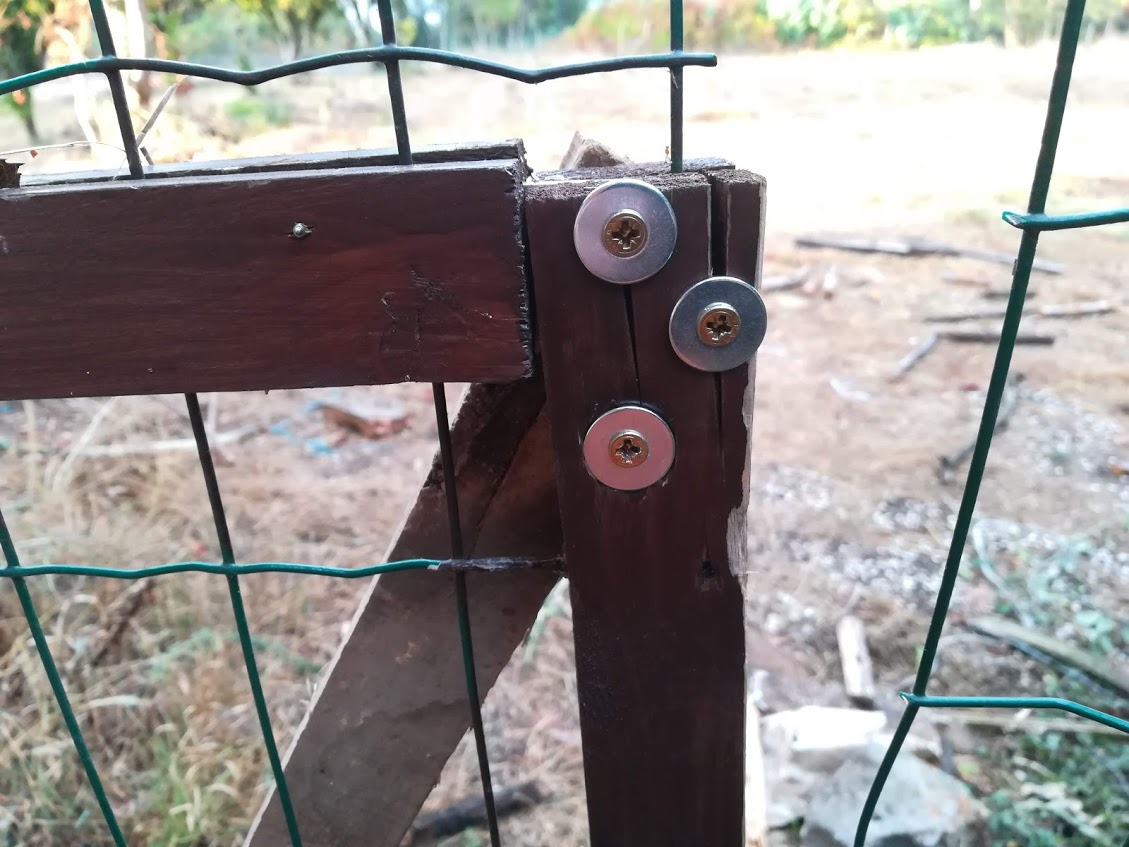
I had explained in my last post, but heres a picture, showing how I clamp the fence to the wood using screws and the roofing washers.
Close up view shows a bit more, I install the screws in such a way that the trap the fence, so pulling it up, or down, left or right won’t free it up.
Because I want to be absolutely sure you get it, here a photo of the screw in the washer pre-installation 😉
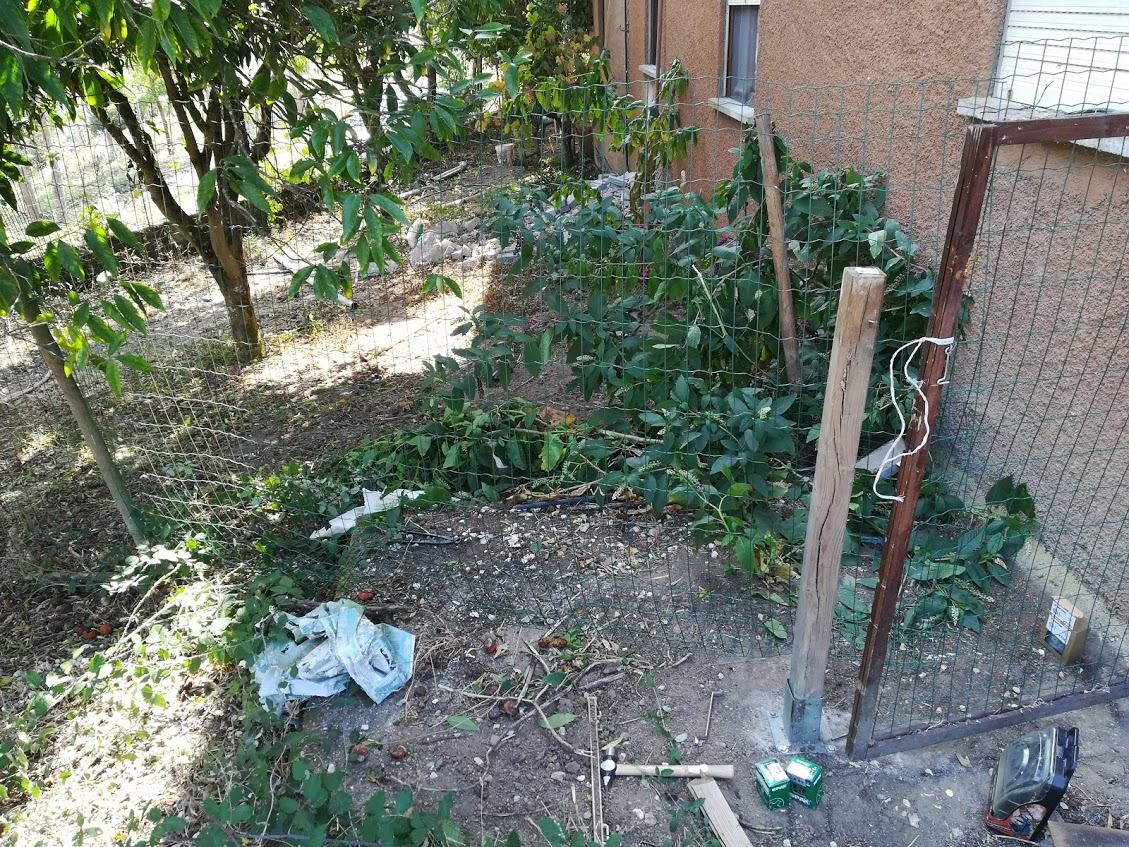
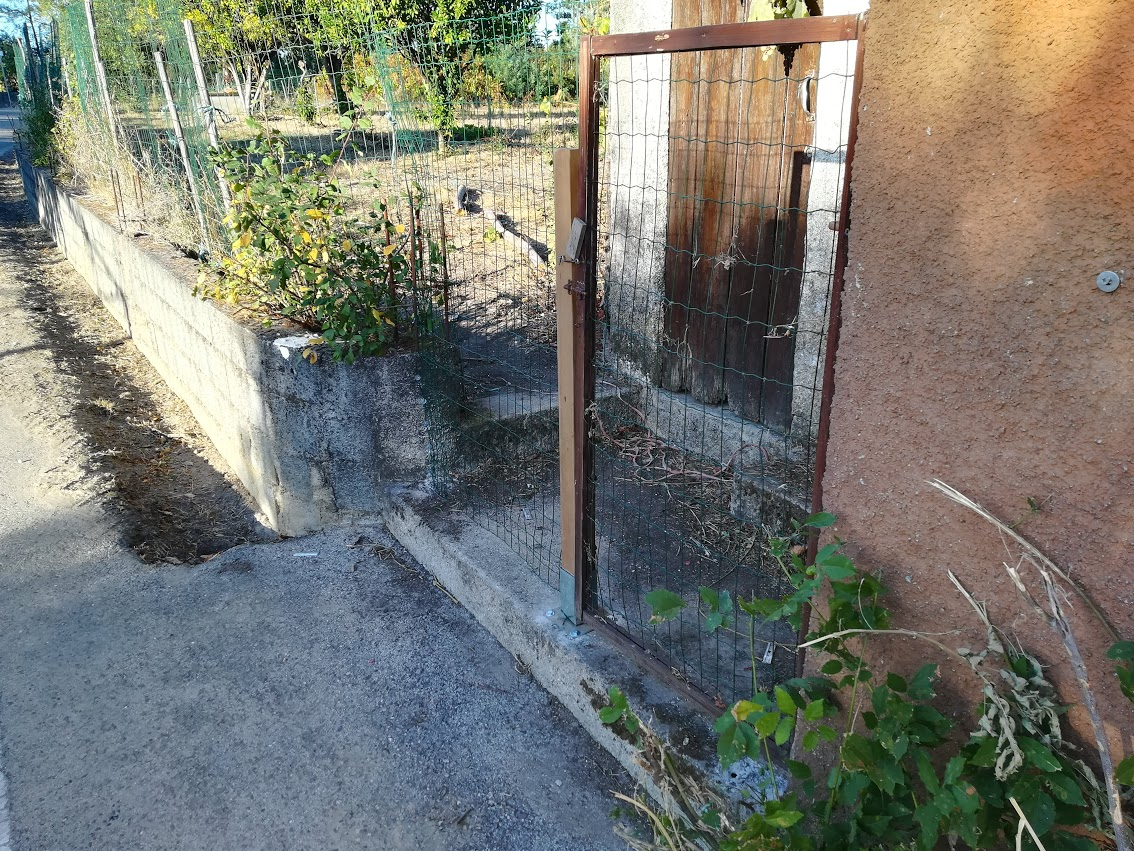
French drain access hole
After getting the fence connected to the post, I cleaned off some of the sand and muck from the cement, should have done that first!
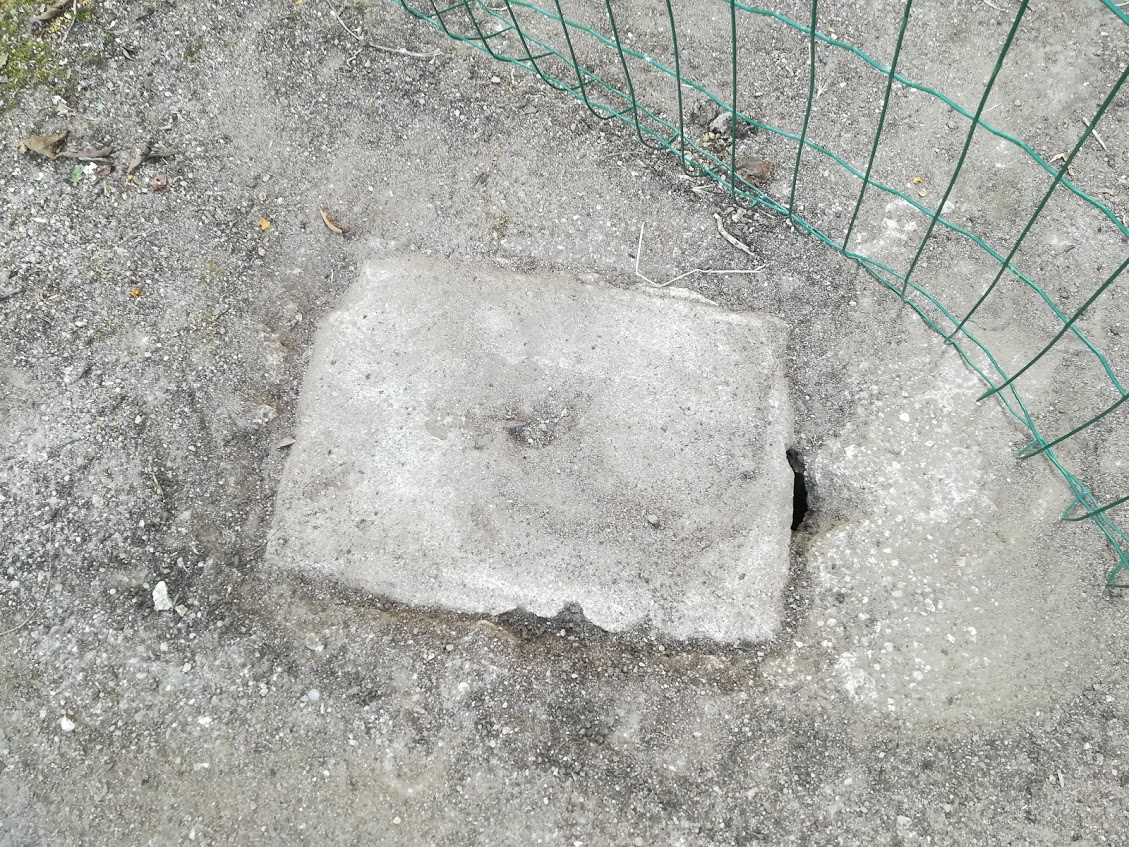
I actually found the cover that would be used to pump out the ‘stuff’ from the drain if it gets full. I had been wondering where it was and found it quite by chance.
I pulled the fence to once side to clear it, so that if we needed to get it emptied, the fence would not be in the way.
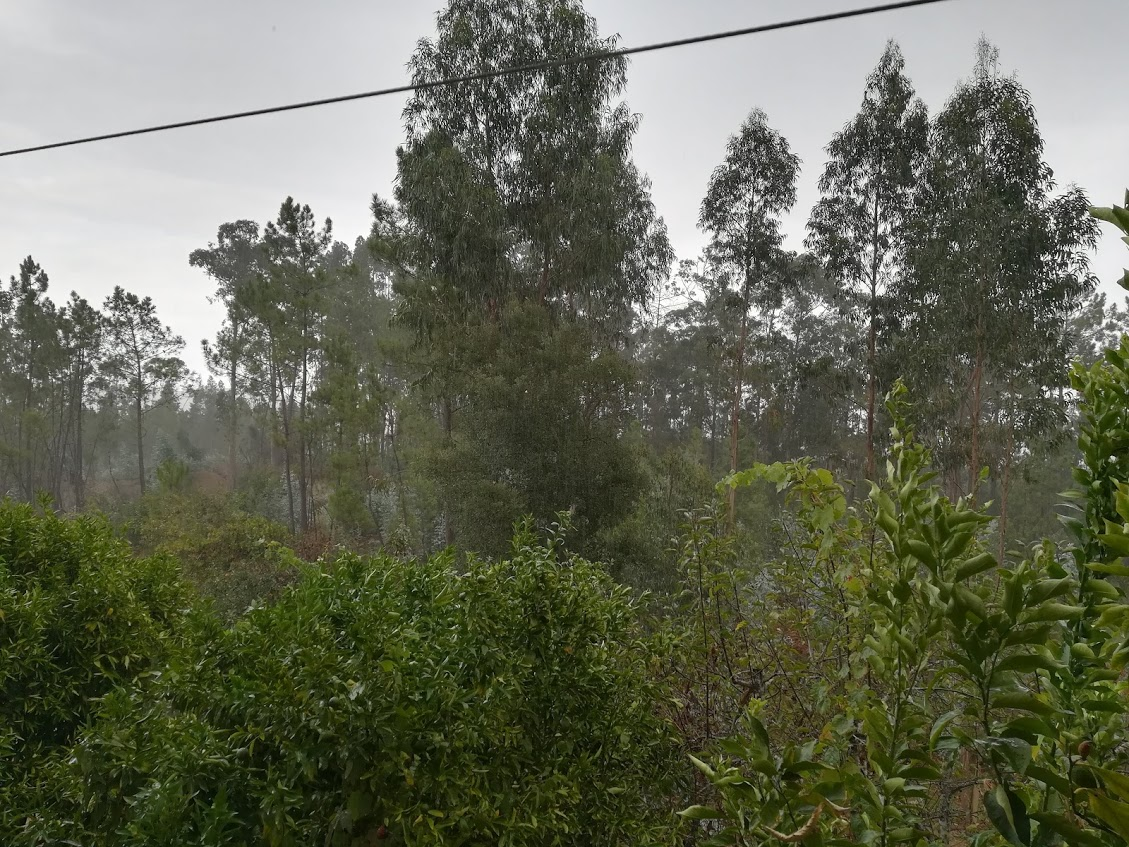
Day over, it rained
It had been threatening for a while, so I decided to pack up before my tools got rained on and got soaked.
As I took this photo, after having just finished packing everything away it started to drizzle. I had made it just in time!
I took a break on the terrace and tried to get a photo of the rain, but it’s lost in this photo. Whilst I was a bit disappointed that I had not finished I was thankful that the rain would at least be helping the firefighters a bit in their task.
I heard from my wife the next day that it seemed the rain was what helped the firefighters get the blaze under control, so all good in the end.
I was sitting outside and was about to start writing this when the rain subsided, I decided to take my chance as I could get away with fewer tools in case it rained again.
Support needed
I anchored the fence into the cement slab, so that it would stay out of the way.
I used a simple plastic wall plug here as it is not under much strain.
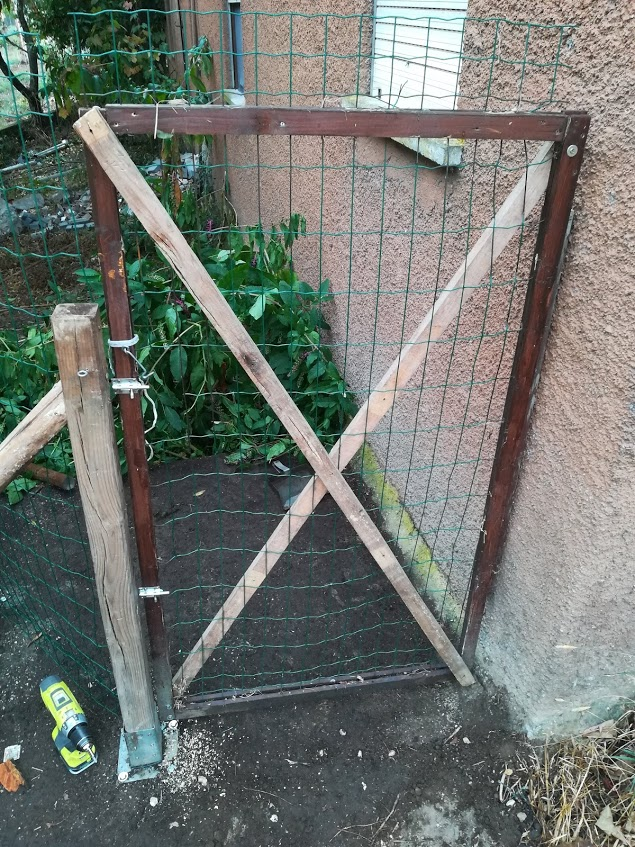
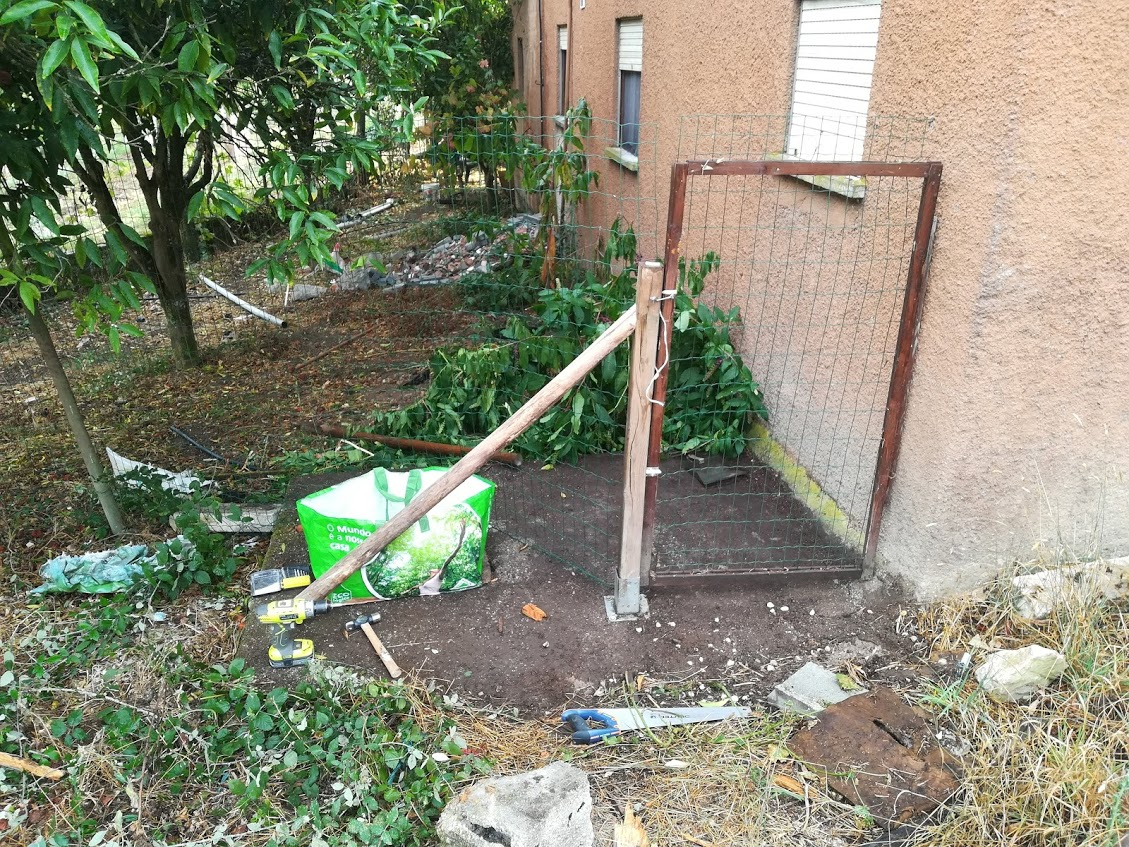
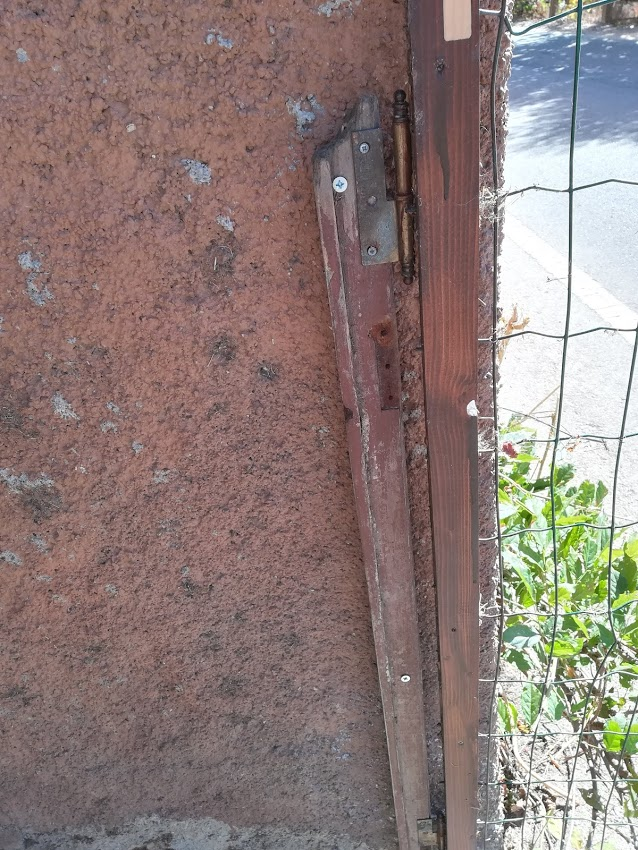
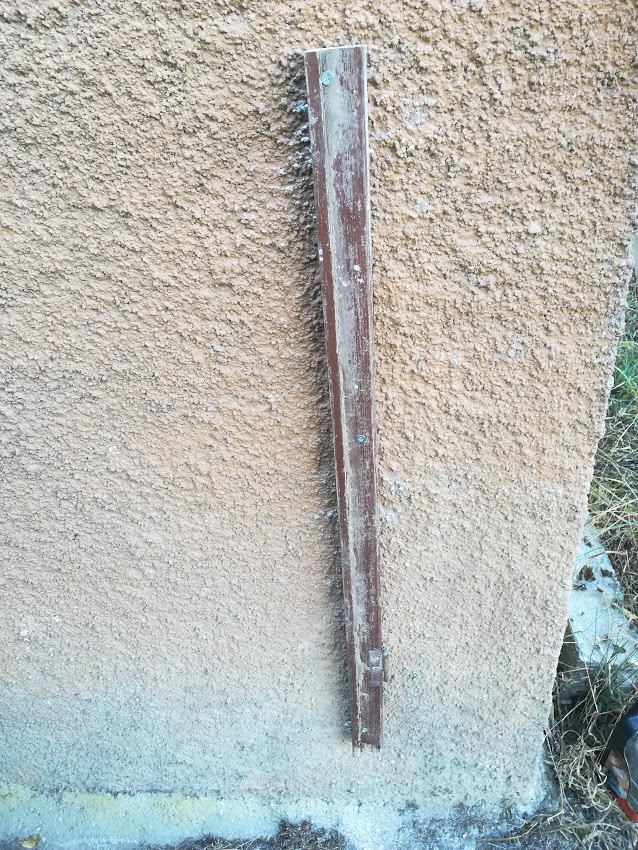
The fence had enough tension on it to pull the post away from the gate, so much so that there was a very noticeable gap. I did not like the look of that so grabbed a length of wood we had dragged in from the forest next door and made it work as lateral support for the fence post.
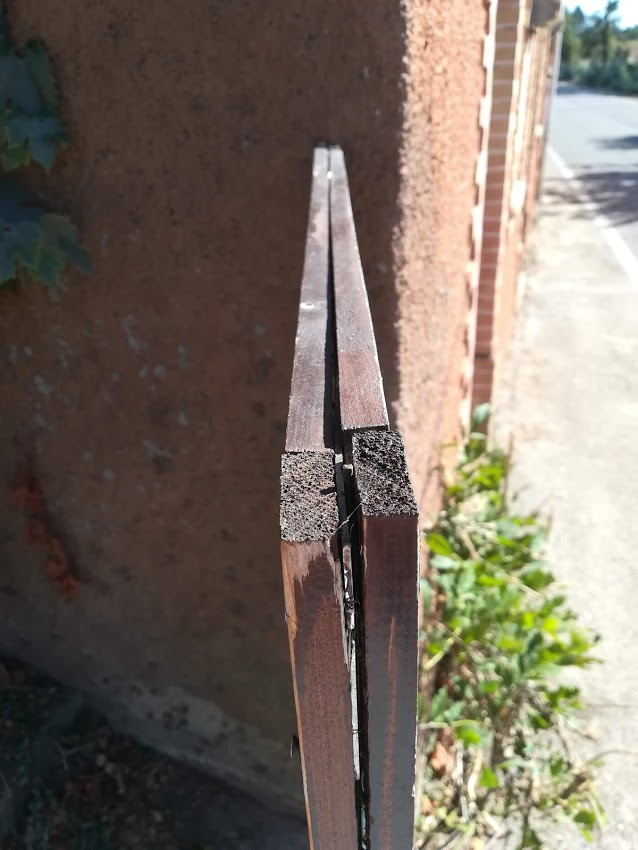
Final bits to do were to add some cross bracing on the gate, it was still quite flimsy. I too two lengths of brandering that I had taken off of the terrace roof and put one on each side of the gate, so that they crossed over in the middle. The wood that the gate is made up of is quite soft, so I added metal washers to the screw head, so that it would tighten up against the wood and not get pulled all the way through.
An example of how the wood had already split, the washers worked well enough even on such a damaged piece.
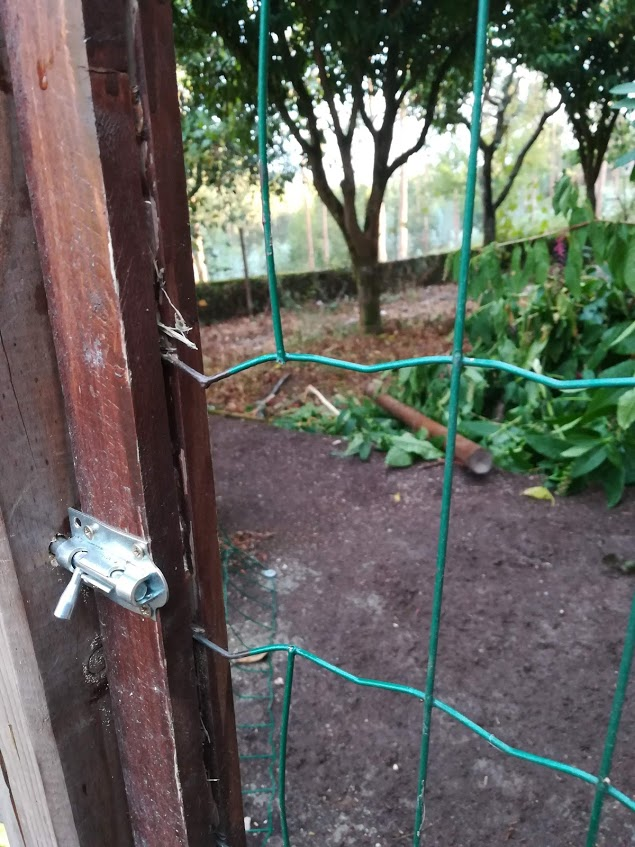
Finally I cut a hole in the fence by each of the latches, so that you can open it easily no matter which side of the gate you are. This gate was done.
As I was packing up I thought I should add a lateral brace on the front gate too, so did that as quick as I could as it was about to rain again. It does not look too bad from far.
So my gates are up, I bought a few rawl bolts, screws and additional latches. Pretty much everything else was re-used from the original gates or from other stuff I had salvaged.
Not pretty but definitely functional, have you managed to reuse something lately?
Here are the two mutts, in front the attention hogging Roxy and hiding almost out of view Chilli. Both are rescue dogs and complete characters in their own right.
Free as in more space
We are fortunate enough to have a sizeable back yard with tons of space for the dogs to run around, unfortunately the fence needs repairs and whole gaps filled in some places. Because of this we cannot let the dogs roam free there without supervision as they would both get out eventually.
We live right next to a road, where people do unfortunately not obey the speed limits meaning we could have a tragedy on our hands if the dogs got into the road.
I have run through a multitude of possibilities for making the back yard more accessible. Right now we walk out the gate by our houses entrance, then walk on the road next to the house, gaining access to the back yard by going through another set of gates on the left side of the house. This means when our kids want to go play they also have to walk next to the road, it’s really not ideal.
My wife and I agreed it would be better to have a gate at the back, so that for now we could keep the dogs out, until we fix the fencing, while giving us all easier and safer access to the yard.
Two becomes one
I am a big fan of using what you have, we did price up ready made gates and the cost of buying new posts etc. but baulked at the prices. We need to make sure we can put the gates up without having the dogs run loose.
I managed to figure a way to move the gates around in such a way that we could keep the dogs in place and have the minimal time frame where they could make a break for it.
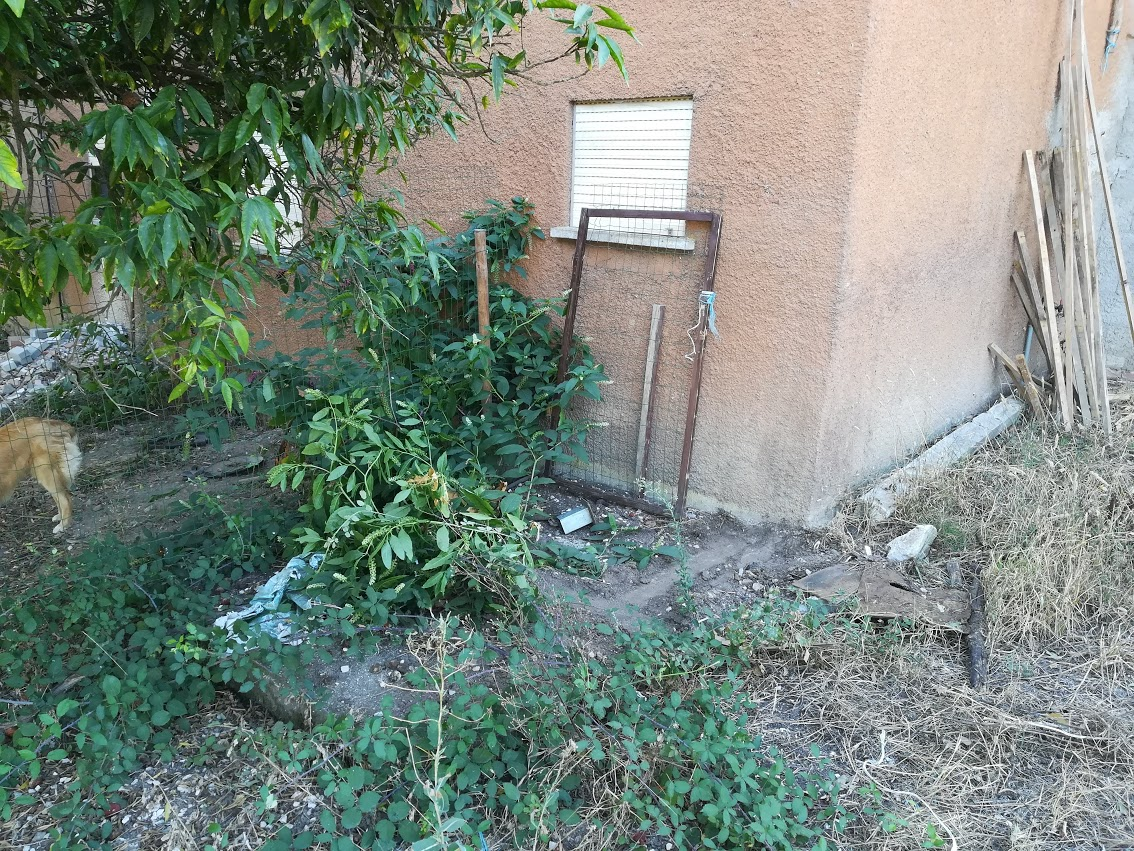
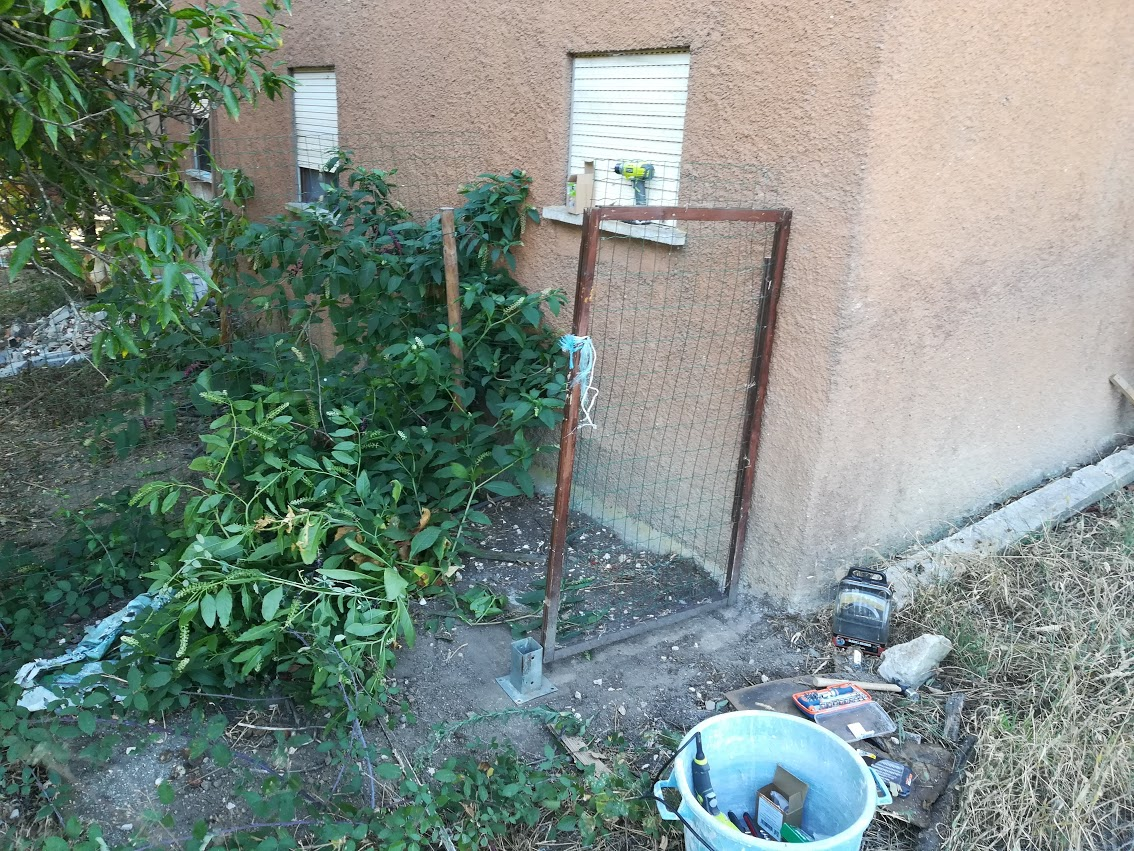
On the side of our house we have these two gates, my plan was to remove one, then move it around to the back of the house.
By the time I took this photo I was already part way into the process, the right hand gate was mounted on the post you see between the gates. I took the gate off, mounted a strip of woo against the wall and then screwed the gates hinges to that.
The post was moved to the middle, you will see why soon.
These gates are home made and quite loose and weak. A section of fencing is sandwiched between strips of wood, quite a neat idea actually, I will be using some left over wood from another part of the house to give these a bit of rigidity. Fortunately we live in an area where the crime rate is low, so these gates are meant to keep out wild pigs, foxes and keep our dogs in.
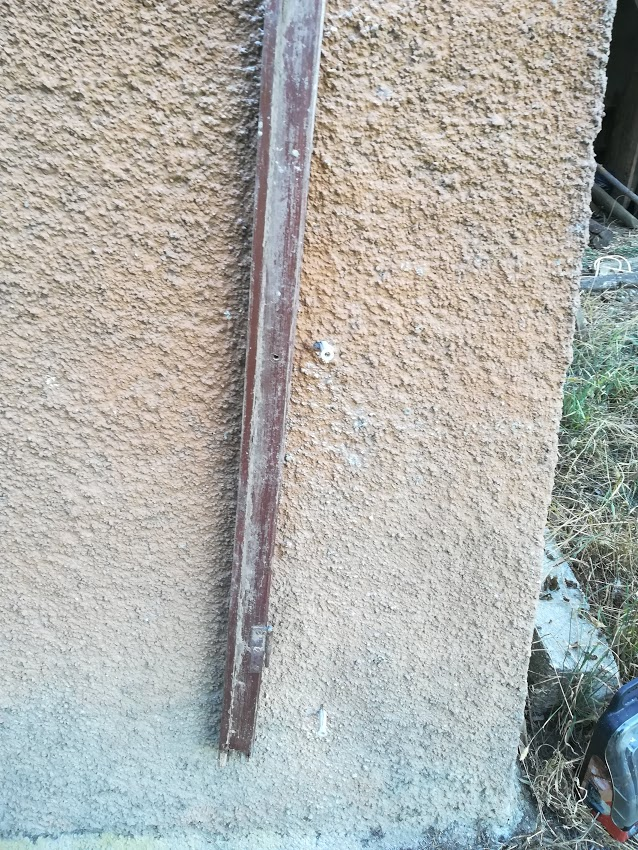
Re-use, recycle! Even the strip of wood against the wall is repurposed junk. This happens to be part of a door frame that had been left outside to rot. I cut it in half and use one piece here, the other would be for the back.
More trash being repurposed. This time a bit of fence will be used as a …
fence!
I lay it down in the road and stood on it a few times to get it straighter. I did not take photo’s but one side was attached to the wall on the left of the photo, using wall plugs and screws with the washers used on roofing, these have a metal washer and a rubber washer in one. They seem to keep a good hold on the wire of the fence.
The other side of fixed to the wooden post, using screws with the same roofing washers.
Meanwhile ’round back
Please excuse the state of the back yard, between the internal renovations and taking on 2 extra projects after hours I have managed to completely neglect my yard 🙁
Here you can see the second gate as I was planning where to put it. The bits of wood on the right are what I have managed to pull off of out terrace roof so far. The thin strips will be used to strengthen these gates up a bit.
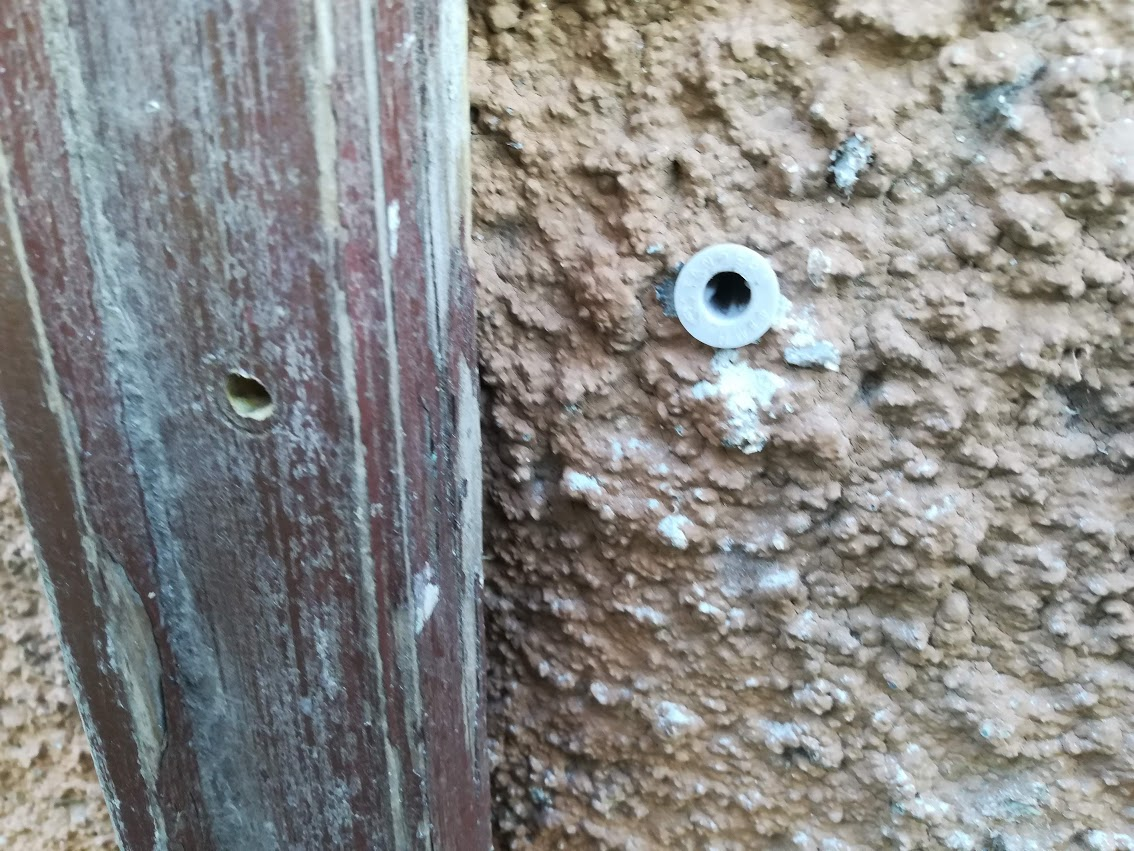
I mounted the length of wood on the wall by drilling holes through the wood, the drilled the top most hole in the wall.
After inserting the wall plug and turning a screw into it, I used the handle of my hammer to try and get the bottom of the wood at an equal distance from the edge of the wall to the top. I used a small diameter drill bit in the drilling maching to mark on the wall the position of the other two holes.
Then I move the wood out of the way and drilled the other two holes.
Heres one of the wall plus and its corresponding hole in the wood.
All the screws are in, oddly it looks very skew in this photo. Maybe it’s the angle it’s taken at?
Keep me posted…
You may have noticed from an earlier photo that this gate was also mounted to a post. Well same as the front, I decided to reuse that post so that I can latch the gate onto something, and to attach the fence to.
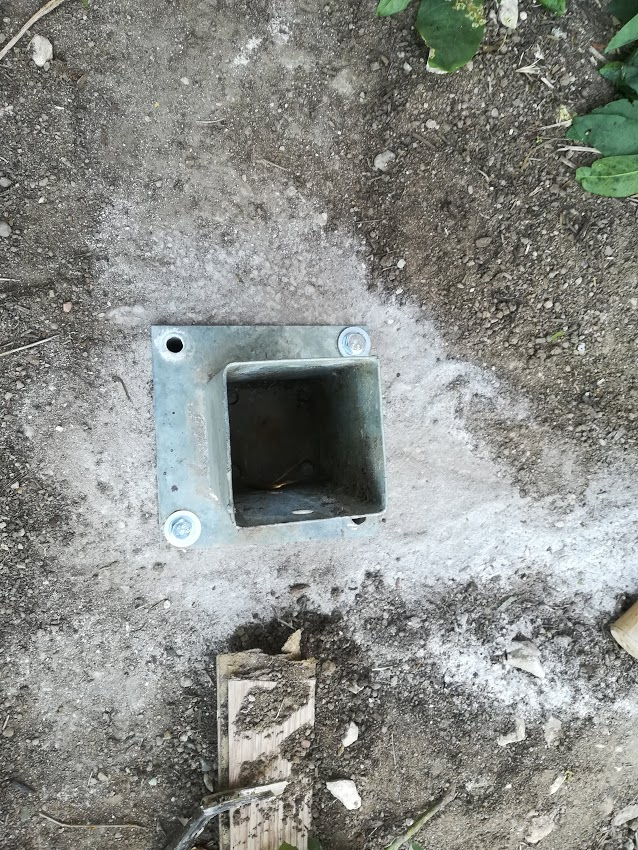
Fortunately (unfortunately?!?) , we have a french drain right next to the house so I was able to reuse the base that the wooden post goes into as well. I simple cleaned up a spot (it really needs some cleaning…) and drilled small holes in each of the corners where the holes in the base are.
I then proceeded to drill those holes out to the correct size and installed rawl bolts. I need 4, but only have 2. It seems even when I buy a box of screws / bolts I run out some how 🙁
I mounted the base nonetheless, as it will be easy to remove to install the missing two.
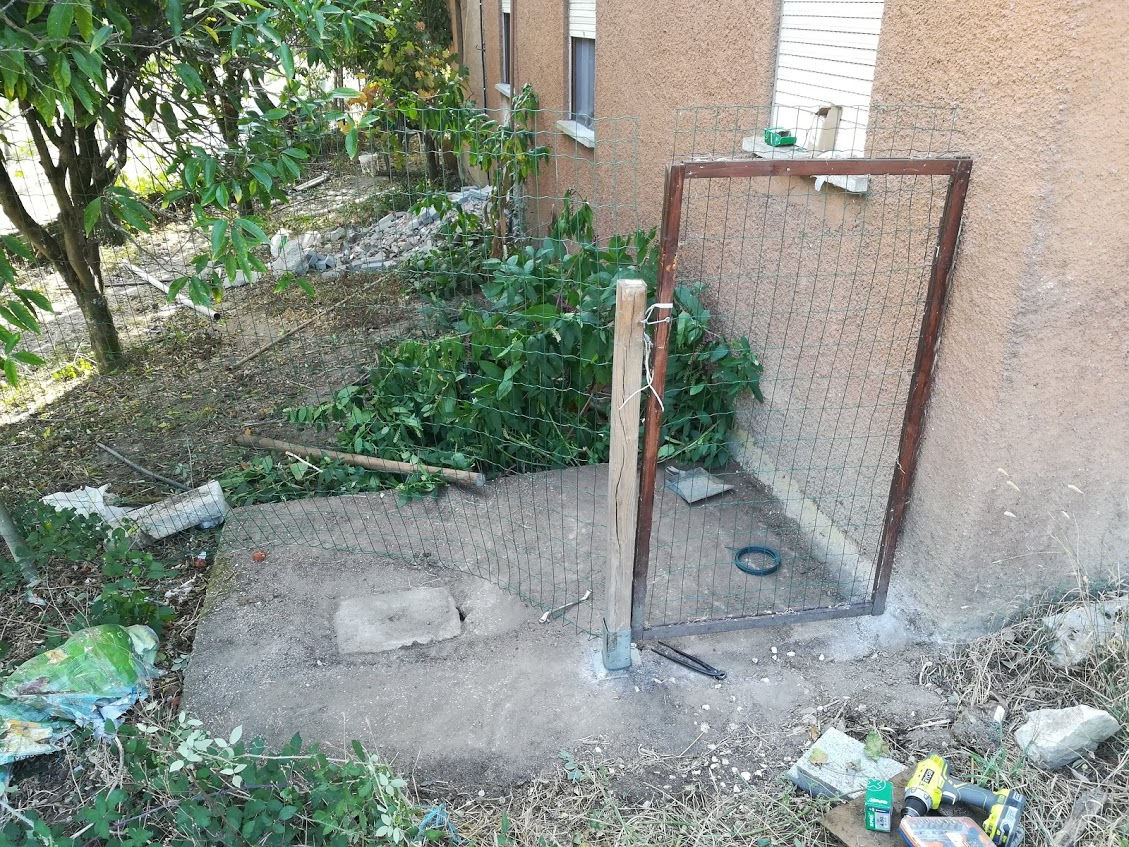
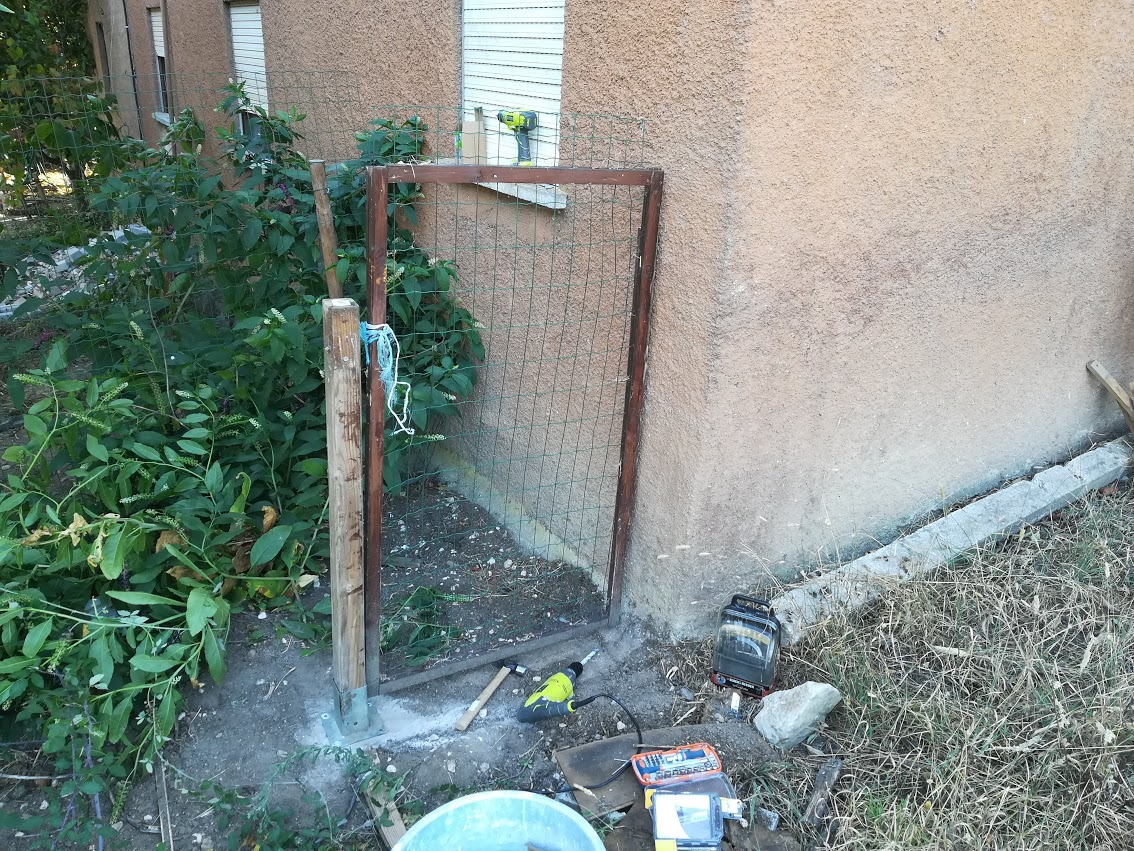
Above is a photo with the wooden pole dropped in loosely. I will fix this in place when the base is secured.
At that point I will be able to remove the fence from the pole in the background and bring it around to meet this post. Then we will super easy (and safe) access to out back yard! But first I need to go to town to buy supplies.
And so out day ends
It was time to head inside and have dinner, so my son and I packed up, but I could not resist taking a shot of the gate. The work is not all done yet, but we need to stand back and appreciate not wasting money sometimes.
All I have purchased for this so far were a few screws, washers and rawl bolts. Everything else was repurposed.
Yes new gates would have looked nicer, but at what cost? Sometimes having something look nice is about more than just the financial side. I deplore buying stuff to replace other stuff, so am happy with the compromises I made here.
I felt under a lot of pressure to get the shower done, so much of the progress is missing. At least I stopped to take photos periodically!
Dusty haze and clean beginnings
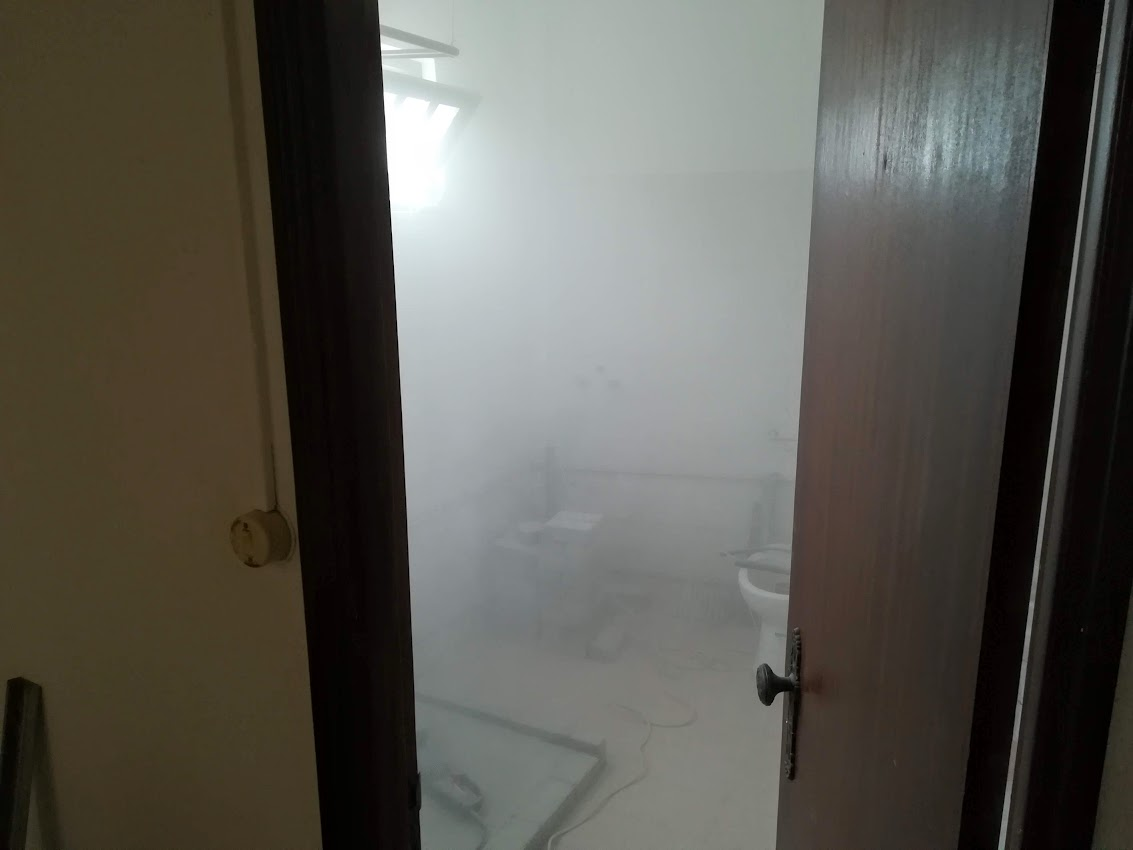
I wanted to remove the tiling cement from the section where I had chopped tiles off of the wall. Unfortunately chipping it away led to me breaking holes in the wall, no matter how slow I went. I thought it might work better if I were to cut grooves into the tiling cement to make it weaker and easier to chip pieces off.
Using my large angle grinder and the same disc I used in the kitchen to cut the bricks, I proceeded to cut a number of grooves in the tiling cement. Here you can get an idea of the dust that is kicked up whilst cutting with that disc. Before I opened the door and took the photo I could hardly see past my hand, it’s insane!
The floor was swept clean before I started, but now you can get an idea of the amount of dust, just look for my footprints. I did not even cut that much!
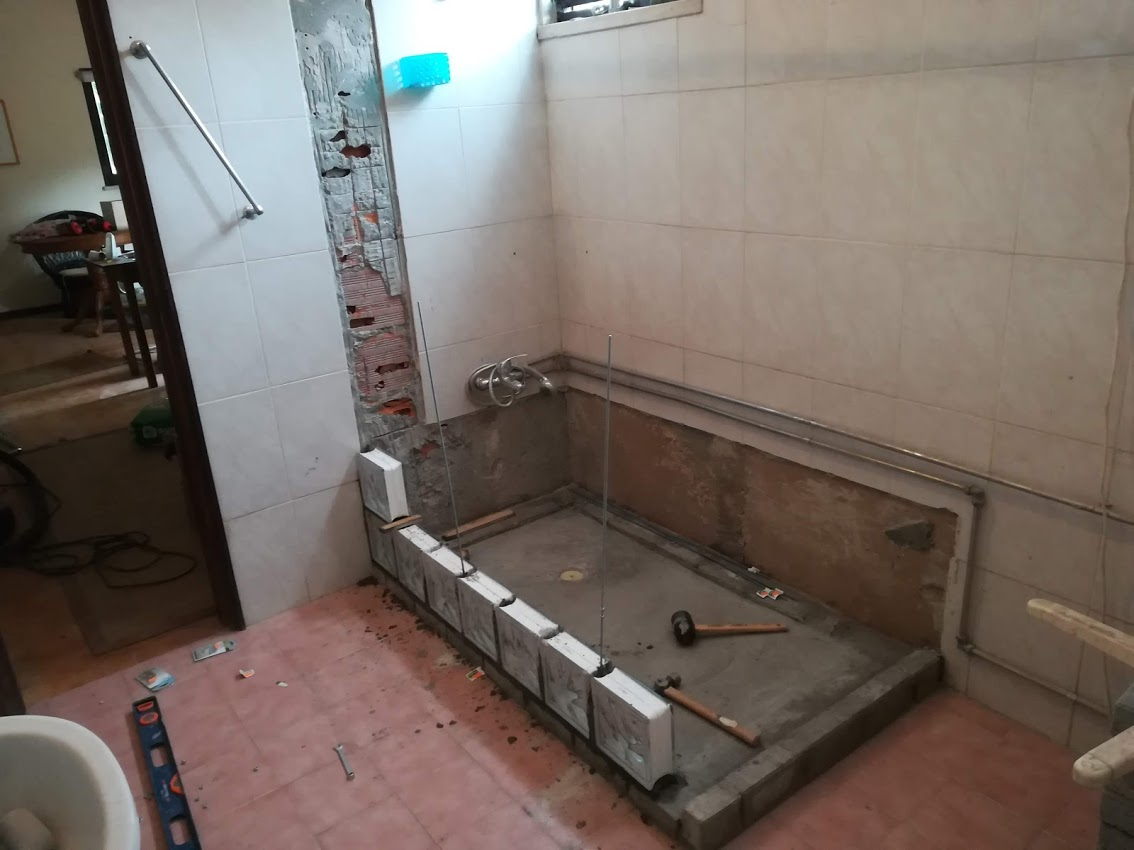
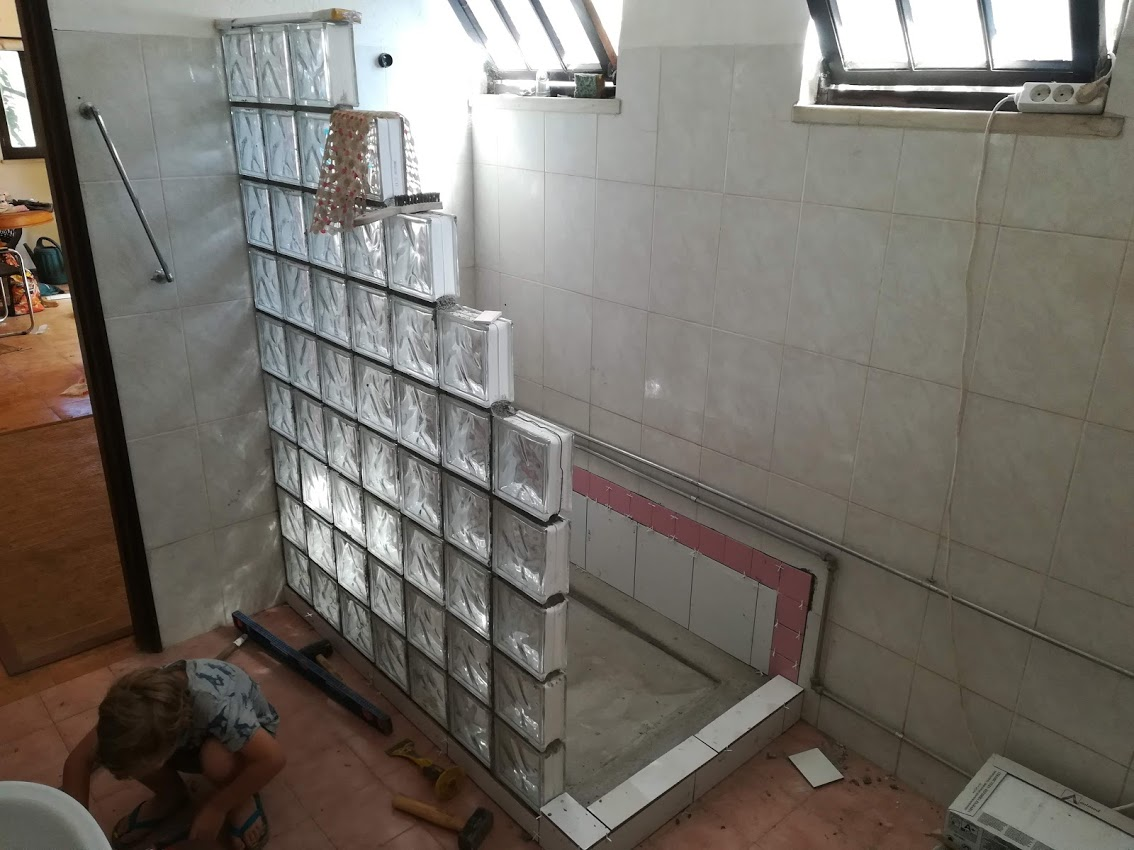
Even with the grooves I was breaking through the bricks, so I stopped and checked that I would at least be able to match the tiles I had with the existing tiles. It looked like I would so I decided to start on the wall of glass bricks.
Look closely at the photo and you will see two metal rods poking up between the glass blocks. I drilled holes into the layer of bricks and fixed those rods in there to provide a bit of extra strength for the wall. Would it help? I don’t know, but it’s my wall so I will do as I please 😉
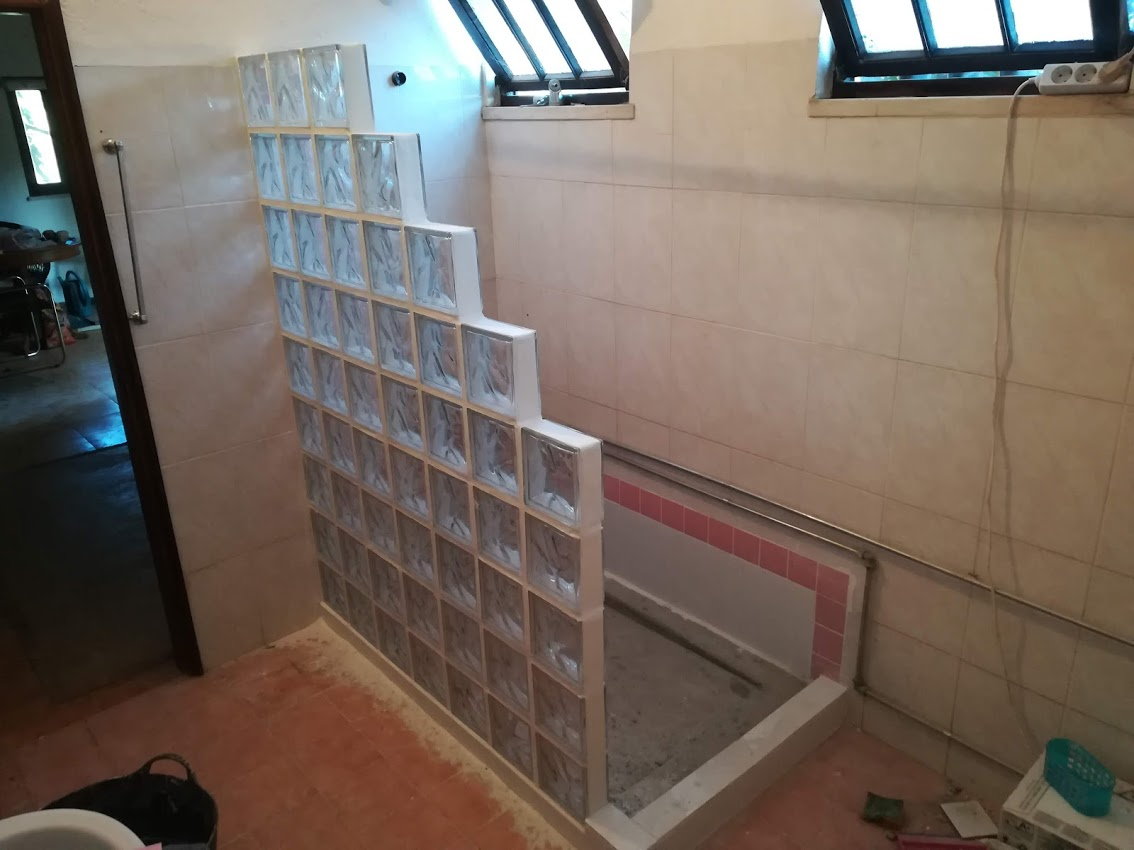
Walls up!
I do wish I had taken more photo’s, but was running between the kitchen and bathroom at this point trying to get more than one room done concurrently.
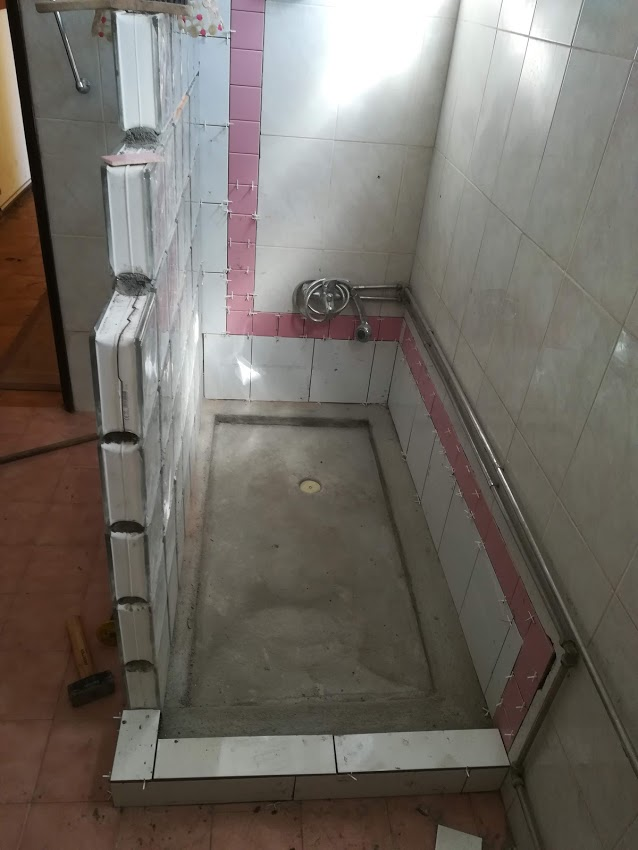
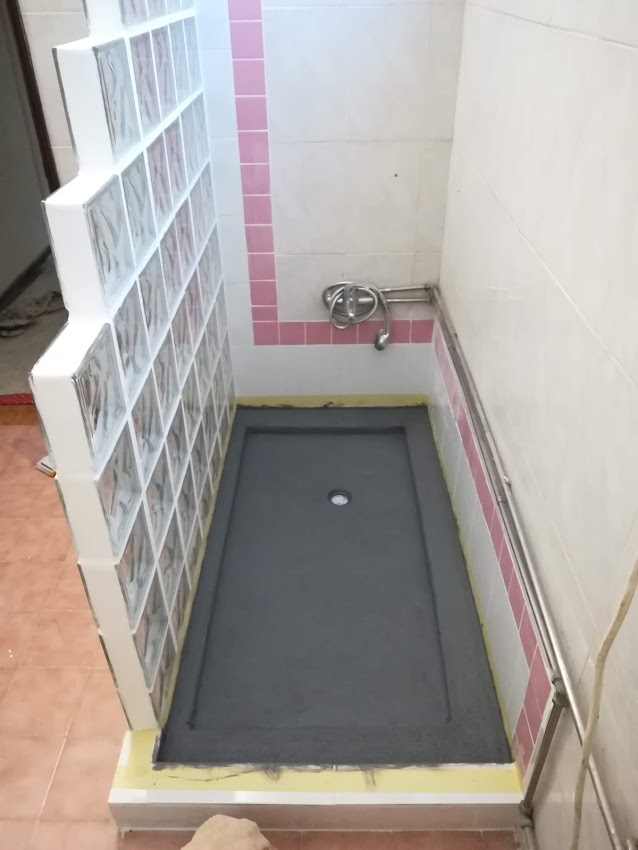
As you can see above, I started and almost completed the tiling at this point.We decided to highlight the difference in tiles rather than trying to hide it. It would have been impossible to match the tiles on the wall anyway, so we added a border of pink tiles. Not my first choice but it matches, kind of, the rest of the bathroom floor.
So you should tile bottom up, for the vertical tile I started at the top, meaning the tiles wanted to slide down pulled down by their weight and gravity. I had expected this and did it like that anyway, so that I could be absolutely sure that the top tile matched perfectly.
I could cut a slim piece off of the tile near the bottom and it would not look out of place, but it would look terrible if I did it near the top.
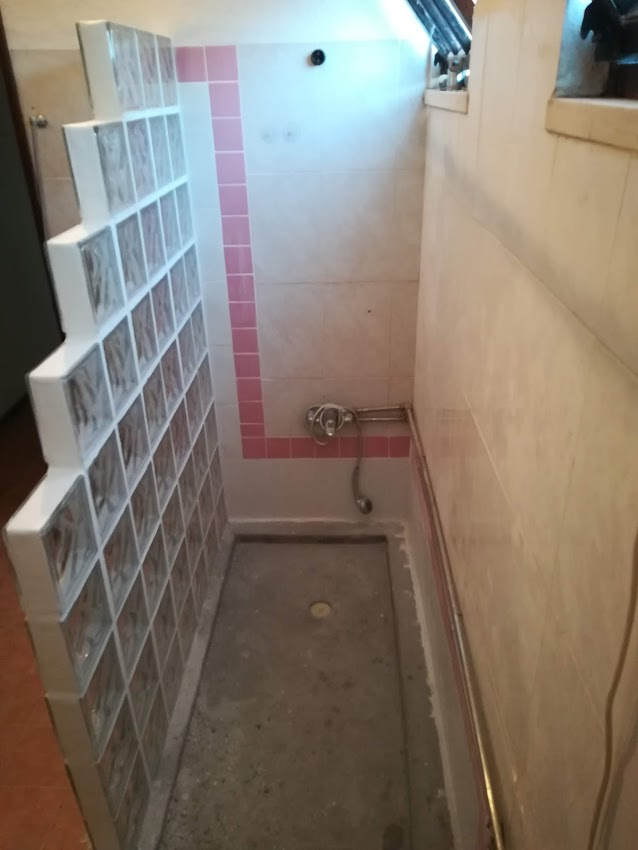
It’s a wide shower but holy cow it felt tight working in there!
Tiling done…
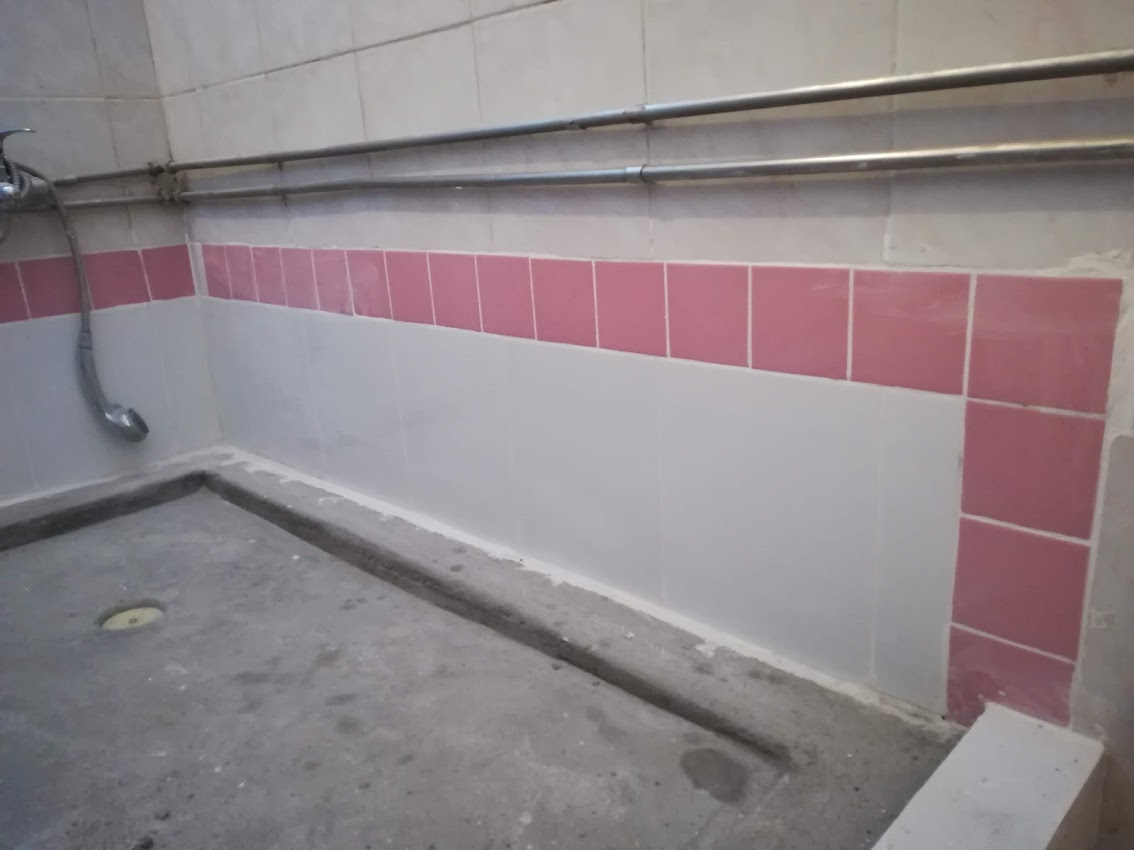
With all of the tiles on the wall I could turn my attention to getting it all grouted up.
I could have sworn I held the phone straight for this shot, anyway, look at the top of the vertical line of pink tiles and you will see why I started at the top. It would be hard to hide any smaller tiles there.
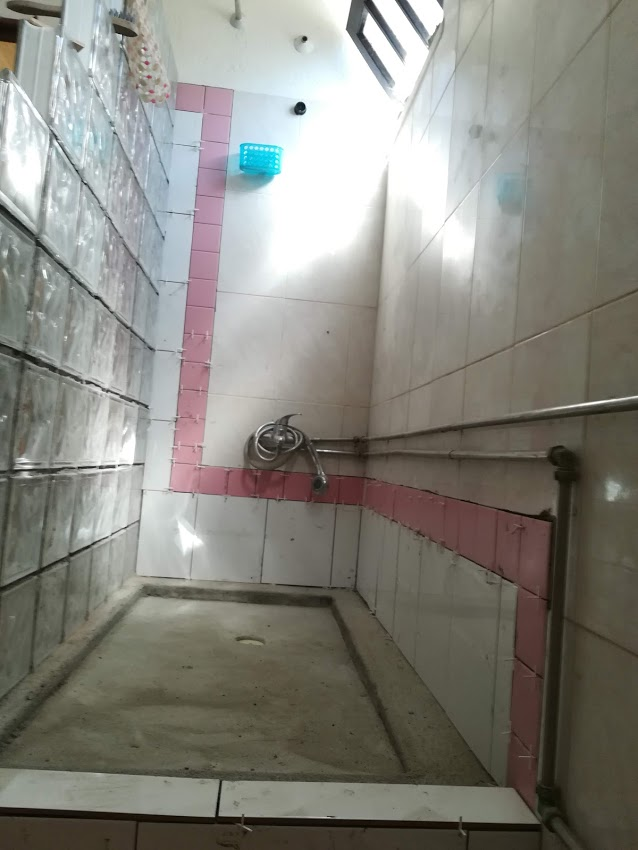
Just another view showing the entrance too, I tiled the step into the shower as well, it looks more finished like that.
Not the best lit shot, but I like that some light makes it through the blocks, with a solid wall it would have made the bathroom too dark I think.
… let’s get grouty!
No photo’s taken unfortunately, here is the almost finished product.
Eeeeek I can see how poorly I matched those glass blocks, the grout really highlights it :(. This is just post cleaning the extra grout off, I realised a wire brush was super effective at removing the excess grout from the glass block and did no damage to them at all. That’s all the dust lying on the floor there.
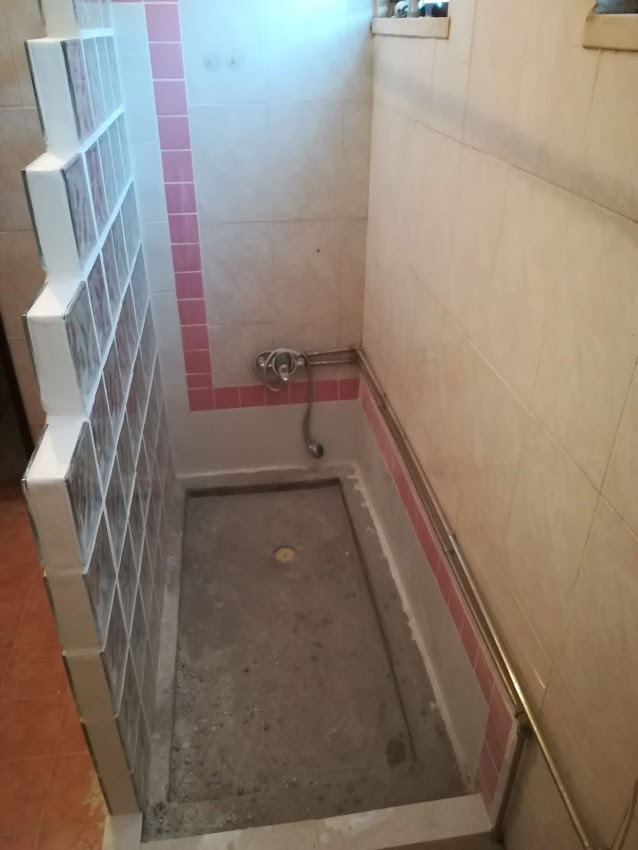
The walls still need a wash but looking tons better! Only the floor lets it down now.
More of the same, slightly different angle. It’s been a hectic journey so I am but chuffed it’s almost done.
Not too shabby considering my day job involves sitting behind a screen all day?
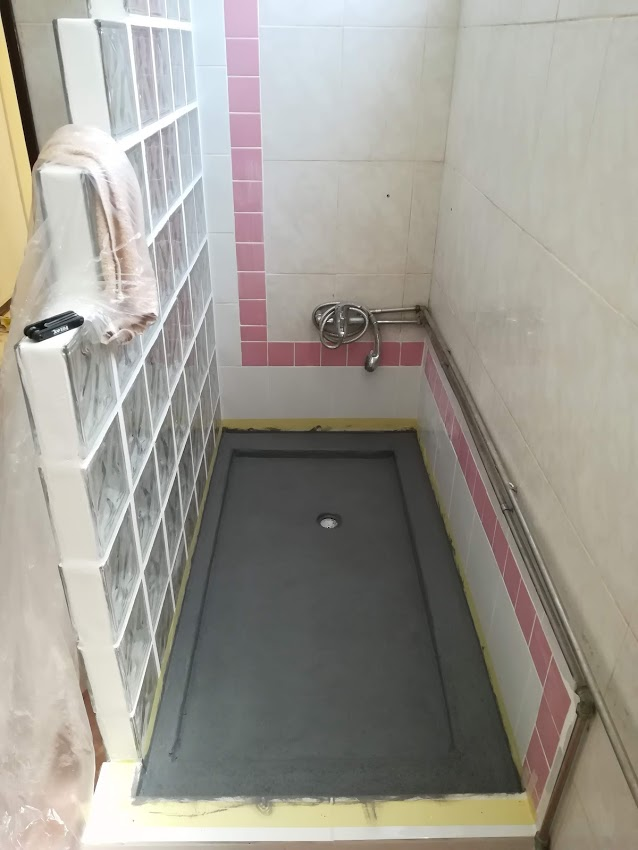
Paint, the, floor?!?
Yes, It would have been nicer tiled, but we thought that using the kind of paint you use to seal cement water tanks etc. would work well and not be slippery when wet.
It also does not look too bad, it’s hardly even noticeable when you are in the bathroom. It did cover well, though I gave a few coats. I tried to apply more thin coats so that it would cover the cement, but not become too smooth.
Same photo, sans all the stuff. I only pulled the masking tape off a few days later as we were preparing other stuff too.
And so this journey comes to an end, I still have a ton of stuff to do around the house (thats a good thing, I enjoy these projects!).
I hope, if you read this far, that you actually enjoyed it.
After a long time and copious amounts of work and time I managed to get the kitchen finished. I would not say that I am super happy with the result, but much of the worst parts are hidden by a cupboard so it’s not noticeable how bad a job I did with the plastering…
When my wife explained to my mother-in-law I was taking a photo for a blog, she insisted that she had to be in the photo, so there she is, posing in her kitchen!
With all the soot that was on the wall, every coat of paint I put on would end up with the outline of the inside of the fireplace bleeding through. I had no choice but to keep applying layer after layer of undercoat, so that when I painted with the final paint it would not be so obvious.
Here you can see it extended all the way up to the roof and was obvious from any angle. After the above photo was taken I turned my attention to the bathroom (as can be seen in my other posts) so neglected to take more photo’s of my progress in the kitchen.
I tried to optimise my time by running between the two, applying a coat of paint in the kitchen, then going back to do work in the bathroom, whilst the paint dried. I would then take lunch at some point, then paint another coat in the kitchen and go carry on with the work in the bathroom.
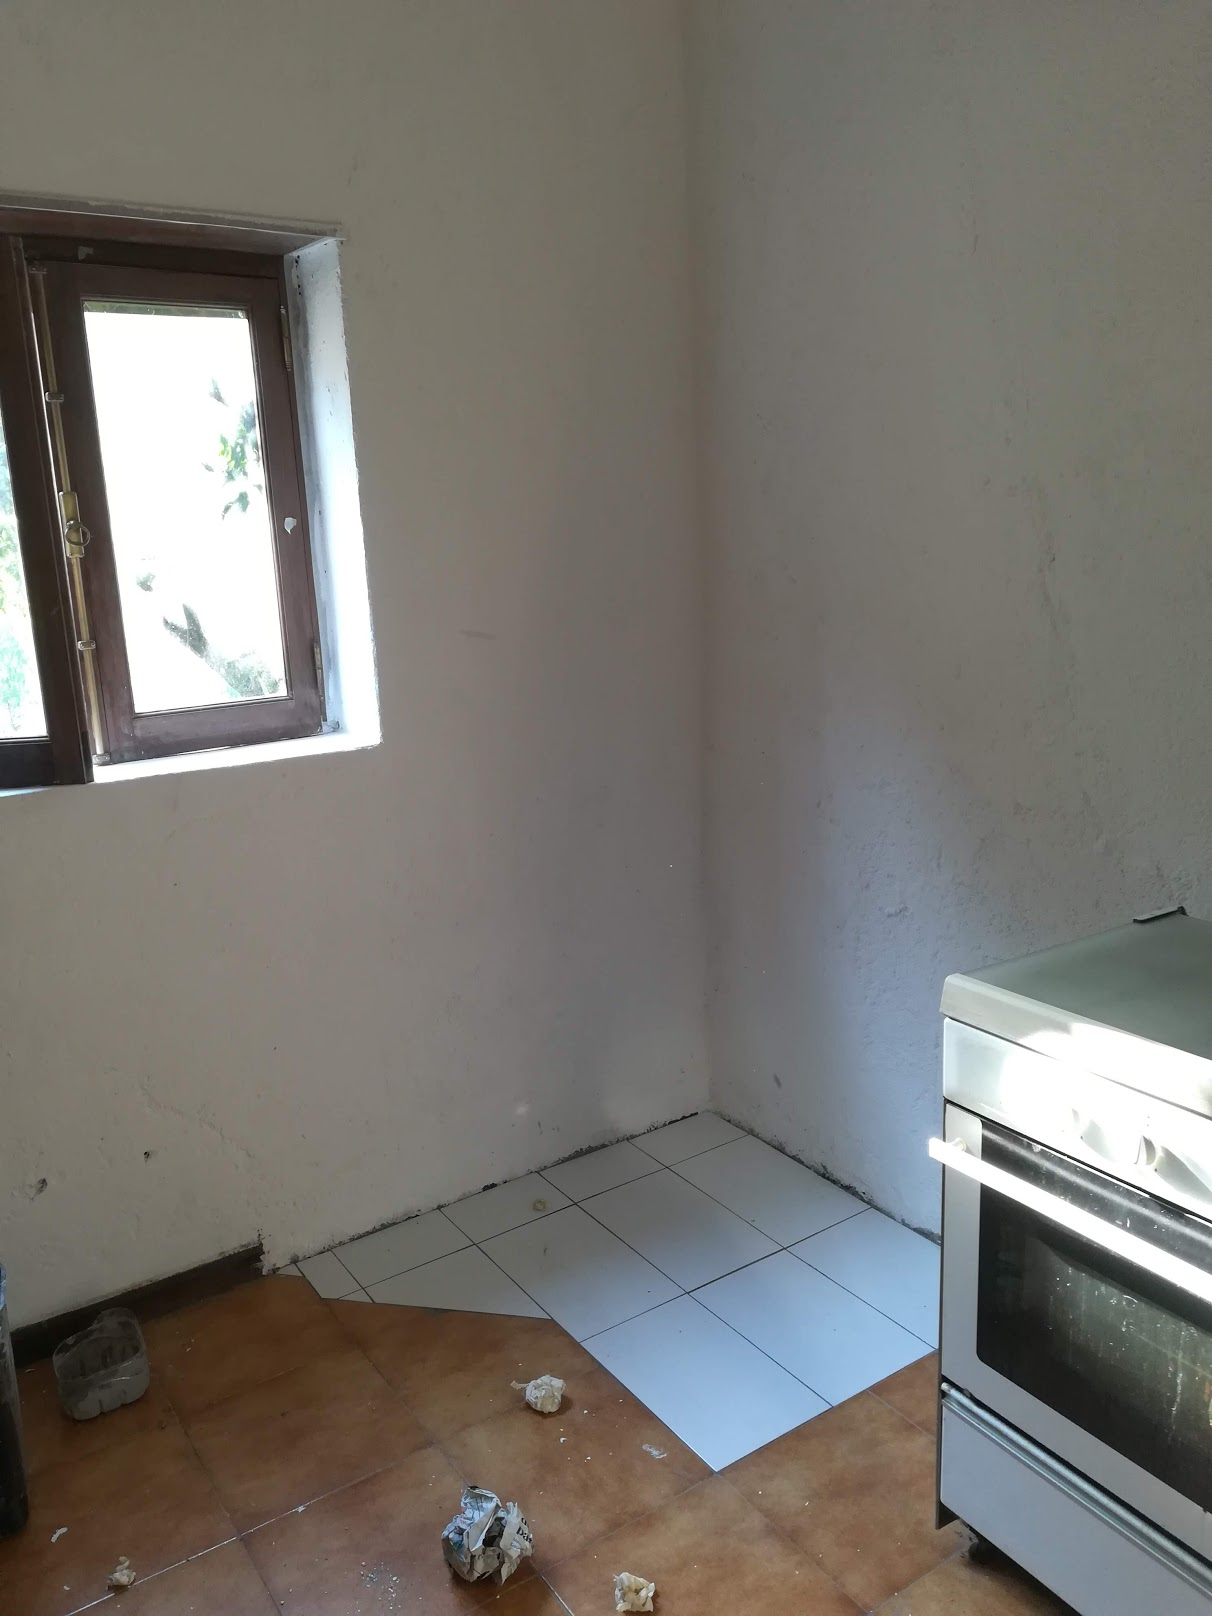
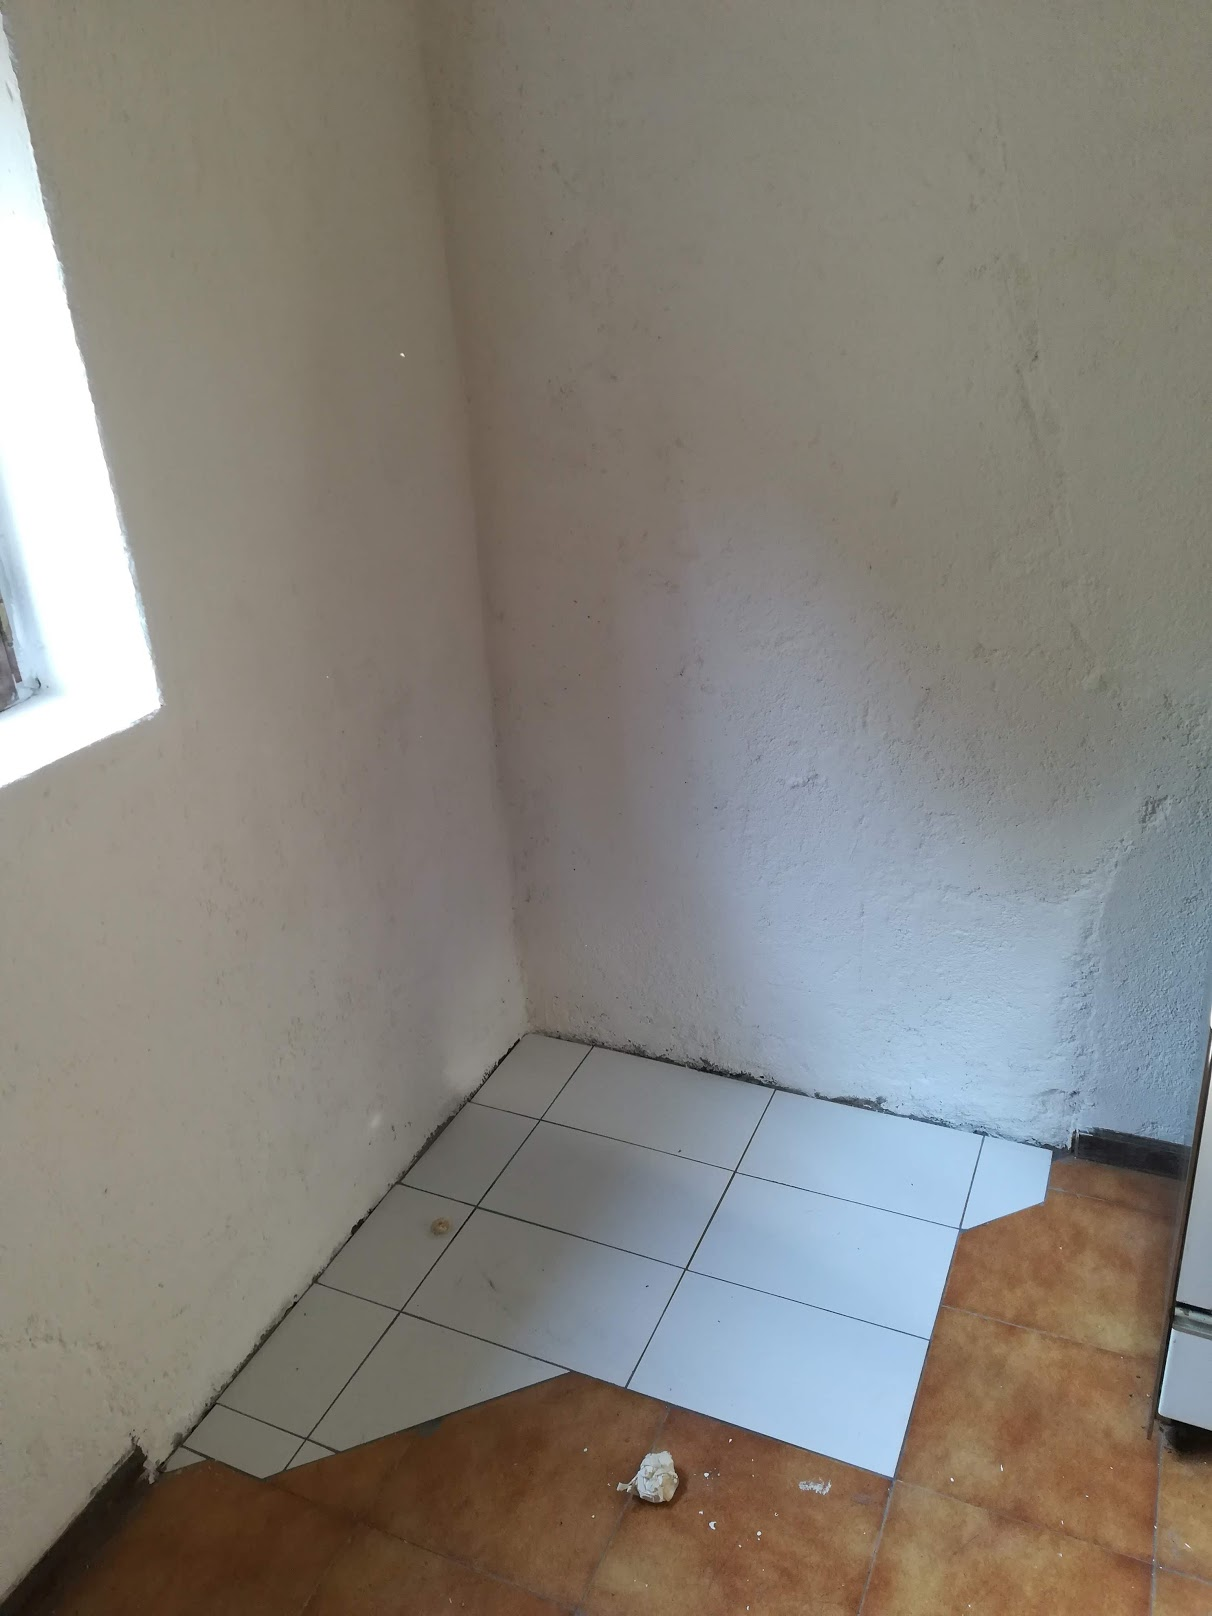
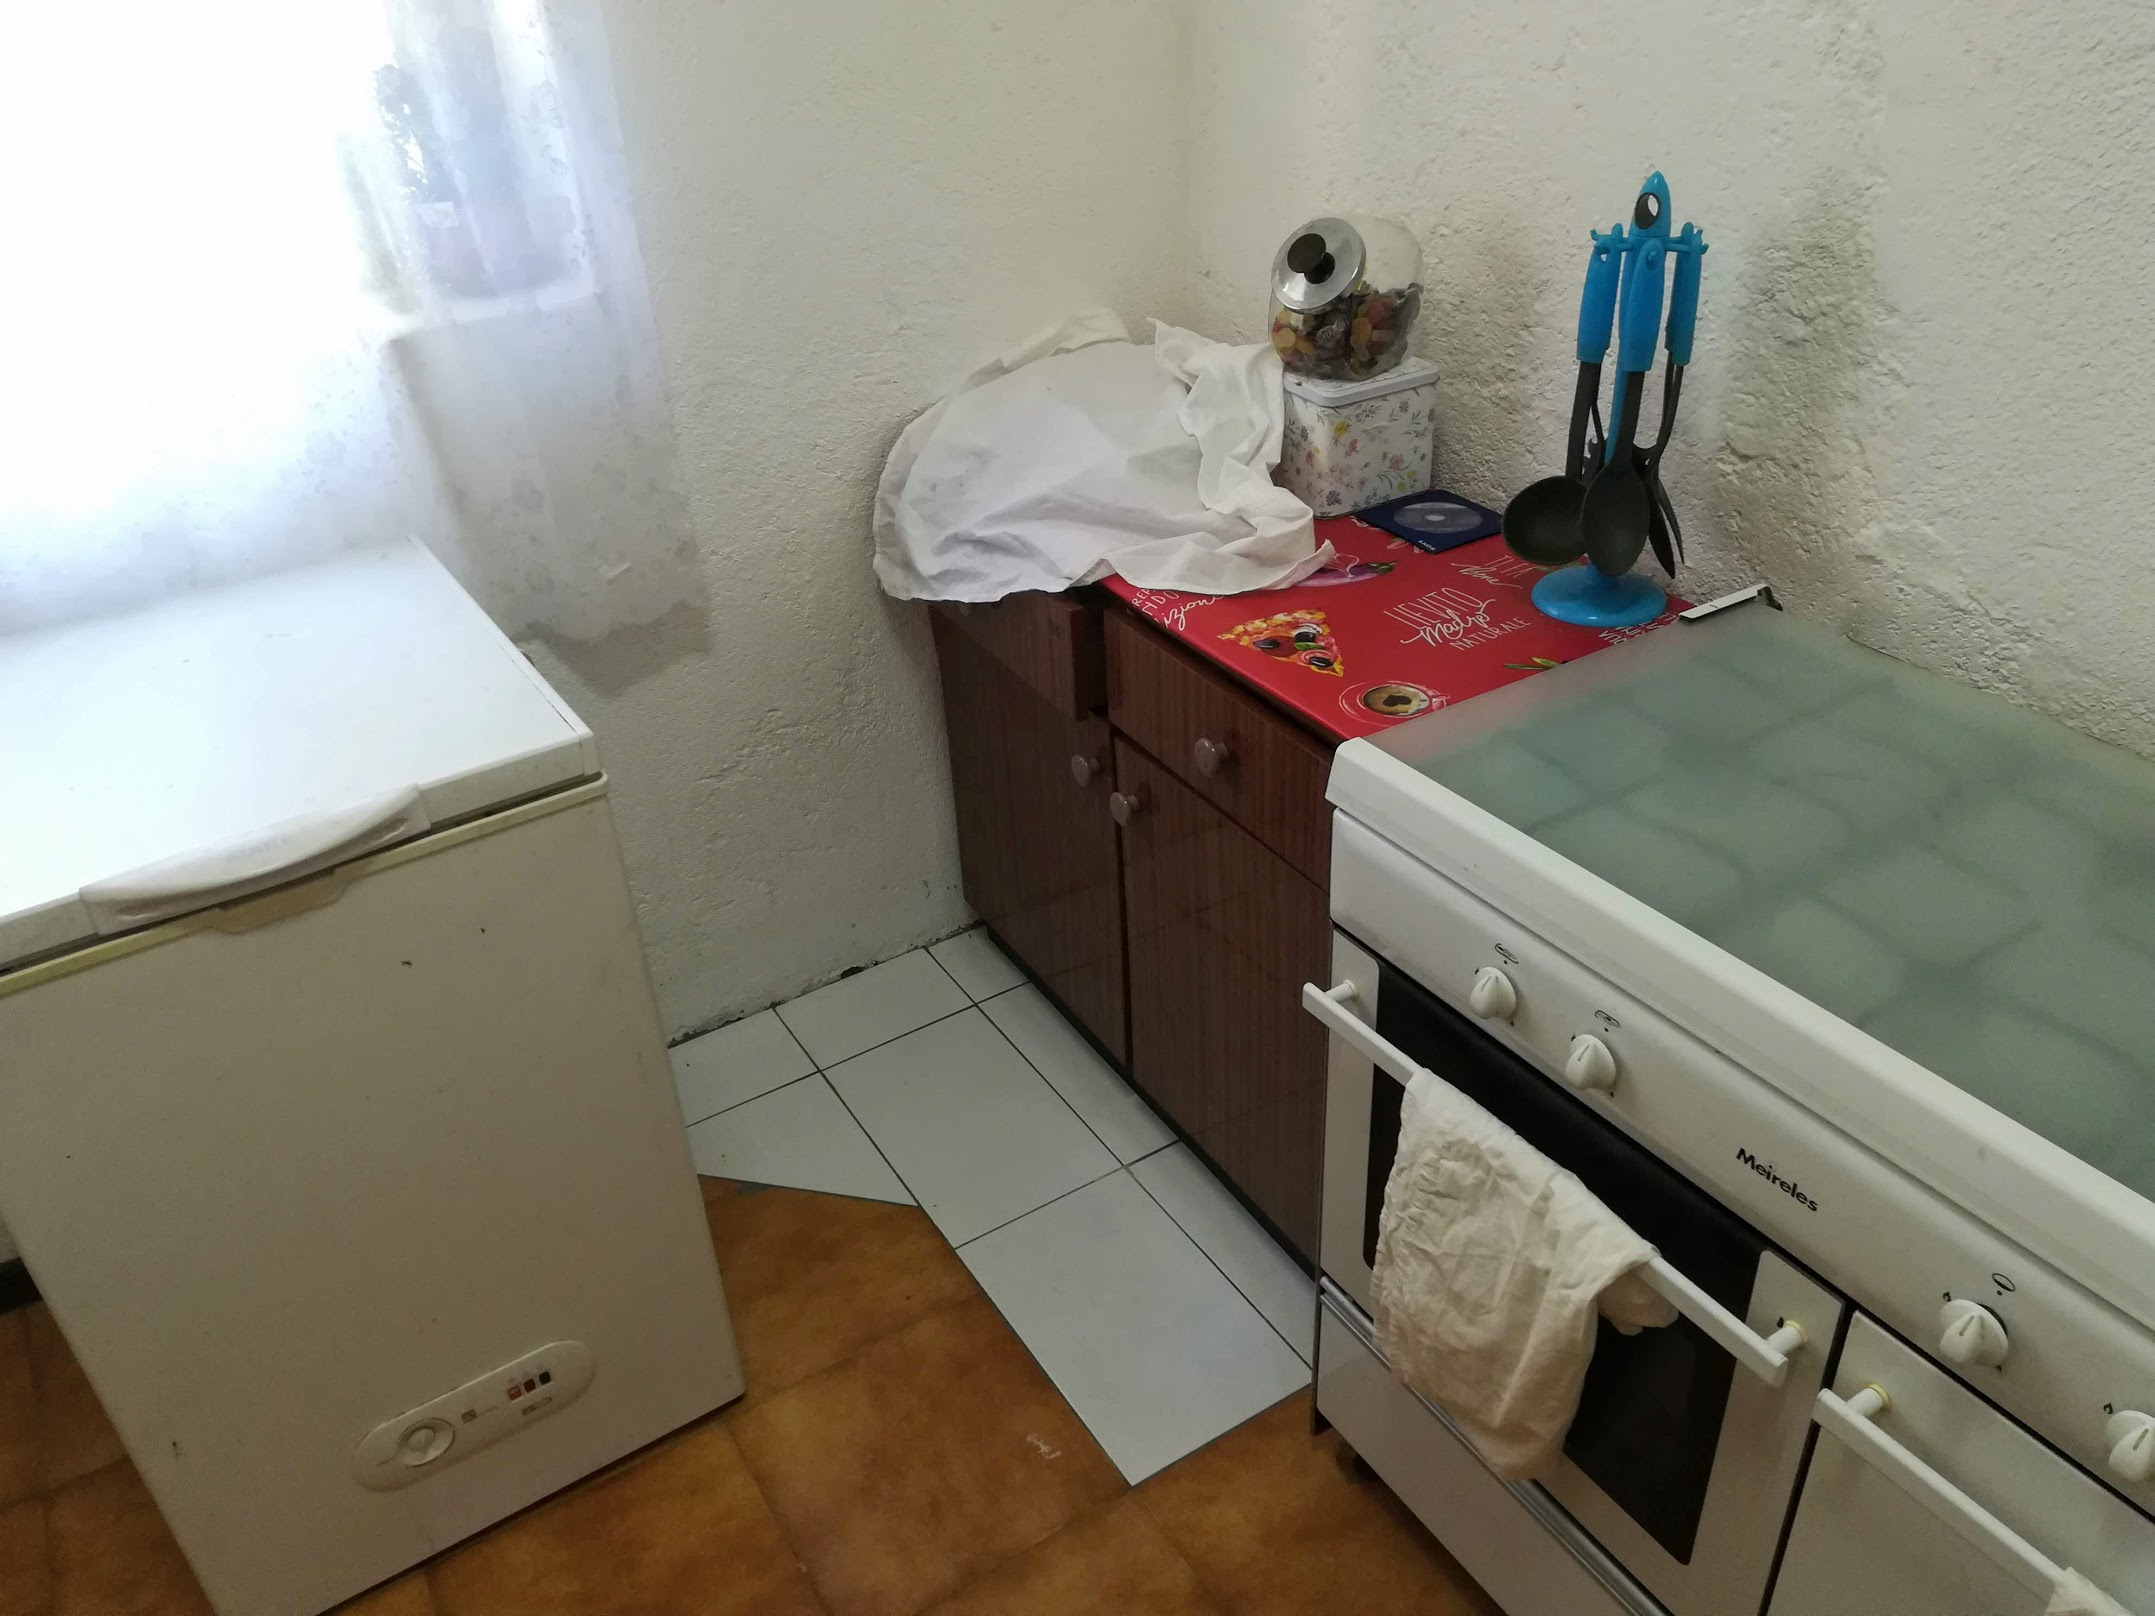
Skip forward to after having painted and tiled. Yes, those are a different colour, These are leftovers from the bathroom. I did try find similar tiles at the hardware store, but it’s nigh on impossible to match tiles that are years old with something in the store now.Most of the tiles would be covered by the cupboard and my mother-in-law is not a person who will blow up because tiles don’t match, thankfully.
I tried to match the space as well as possible, given that the tiles were different sizes I tried to find the best compromise. It turned out ok I think.
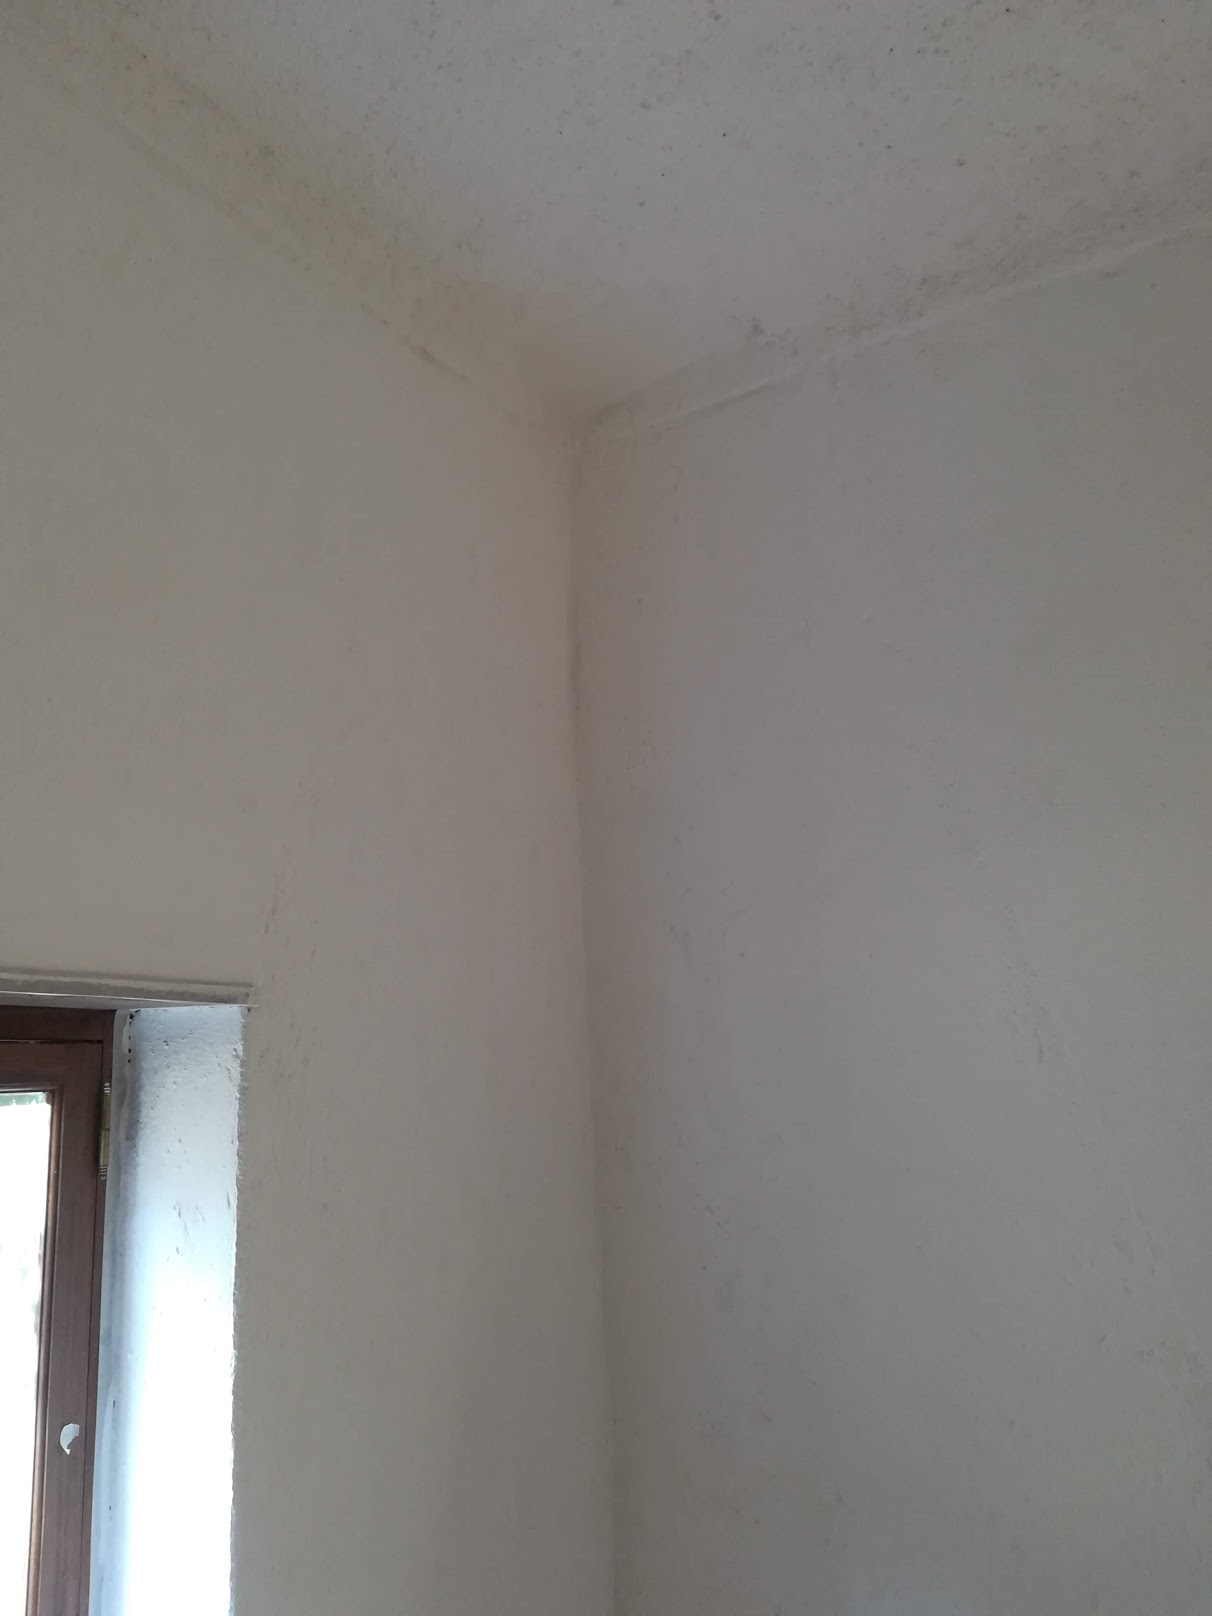
If you look hard enough you can still see parts where it is off-white. Thankfully standing in the kitchen it’s not nearly as obvious as in the pictures.
With some furniture in, its still noticeable, but not nearly as glaring as without.
Most important of all, my mother-in-law is happy with the result, this in turn makes my wife happy and you know what they say;